
>>

A quick, crowd-pleasing dessert pizza topped with apple pie filling, buttery crumble, and a sweet glaze—ready in under 40 minutes and perfect for sharing.
This Apple Dessert Pizza has become my go-to weeknight dessert whenever I want something warm, comforting, and impossibly easy. I first made it one chilly October after finding a can of apple pie filling at the back of my pantry and a premade thin crust in the freezer. The combination of tender baked apples, a buttery crumble, and a bright powdered sugar glaze tasted so much like apple pie that my family immediately declared it a keeper. It’s the sort of recipe that makes the kitchen smell like fall and invites everyone to linger at the table.
What I love most is how quickly it comes together without sacrificing any of that homemade feel. The apples get gently chopped in the can for an even spread, the crumble brings a golden texture, and the drizzle of icing adds just the right level of sweetness. It’s excellent for last-minute company, school functions, or a cozy dessert for two. I keep the ingredients on hand and can assemble it in under ten minutes, then pop it into the oven while I set the table and brew coffee. This version is approachable, forgiving, and endlessly adaptable.
My family’s reaction the first time I served this was immediate praise and surprise at how much it tasted like a classic pie despite being so simple. Neighbors asked for the recipe, and it has become my fallback for potlucks because it travels well and slices neatly. The balance of textures is what keeps everyone coming back for a second slice.
What I enjoy most about this dessert is how it evokes apple pie memories with half the effort. Family members frequently tell me they love the contrast between the crisp crumble and the tender, saucy apples. At potlucks it disappears faster than I expect, which is always a good sign. I also appreciate how forgiving this method is; small variations in butter temperature or exact bake time still yield a delightful outcome.
Store the cooled pizza in an airtight container in the refrigerator for up to three days. For best texture, separate slices with parchment paper to avoid sticking. To freeze, flash-freeze slices on a tray until firm, then transfer to a labeled freezer bag for up to three months. Reheat frozen slices in a 350 F oven for 10 to 12 minutes from thawed or 12 to 15 minutes from frozen, covering with foil for the first half to prevent excessive browning.
If you prefer less sugar, use light brown sugar or reduce the crumble sugar by two tablespoons without dramatically changing texture. For a dairy-free version, substitute salted butter with a vegan buttery spread, and expect a slightly different crumb color and flavor. Swap the premade crust for a gluten-free crust if necessary, though baking times may vary. You can also mix pear or peach pie filling in place of apple for an interesting flavor twist.
Serve warm with a scoop of vanilla ice cream or a dollop of whipped cream for contrast. Garnish with a light dusting of cinnamon or a few toasted pecans for crunch. This dessert pairs nicely with coffee, chai, or a light dessert wine. For an afternoon treat, cut into small squares and serve alongside tea for a casual gathering.
Flat, open-faced desserts have long been part of American home cooking, borrowing the idea of pie and tart while simplifying assembly and bake time. This approach echoes rustic fruit tarts and skillet cobblers, delivering the same comforting flavors with minimal technique. Using a premade crust brings this tradition into a modern, busy-kitchen context where convenience and flavor go hand in hand.
In autumn, enhance the crumble with a pinch of ground nutmeg and swap dark brown sugar for more molasses-rich versions. For winter holidays, add chopped crystallized ginger or a splash of bourbon to the apple filling before baking. In summer, try a peach or mixed berry filling with the same crumble for a lighter, seasonal variation.
Assemble the apple layer and crumble topping separately in advance: store the chopped filling in a sealed container and the crumble in the fridge. When ready, spread and bake for a fresh dessert with minimal same-day work. This is an excellent make-and-bake option for parties—assemble in the morning and bake just before serving to retain the crisp topping.
This simple, satisfying dessert brings people together and is a reliable way to end a meal on a sweet, nostalgic note. Make it your own with favorite toppings and enjoy sharing it with friends and family.
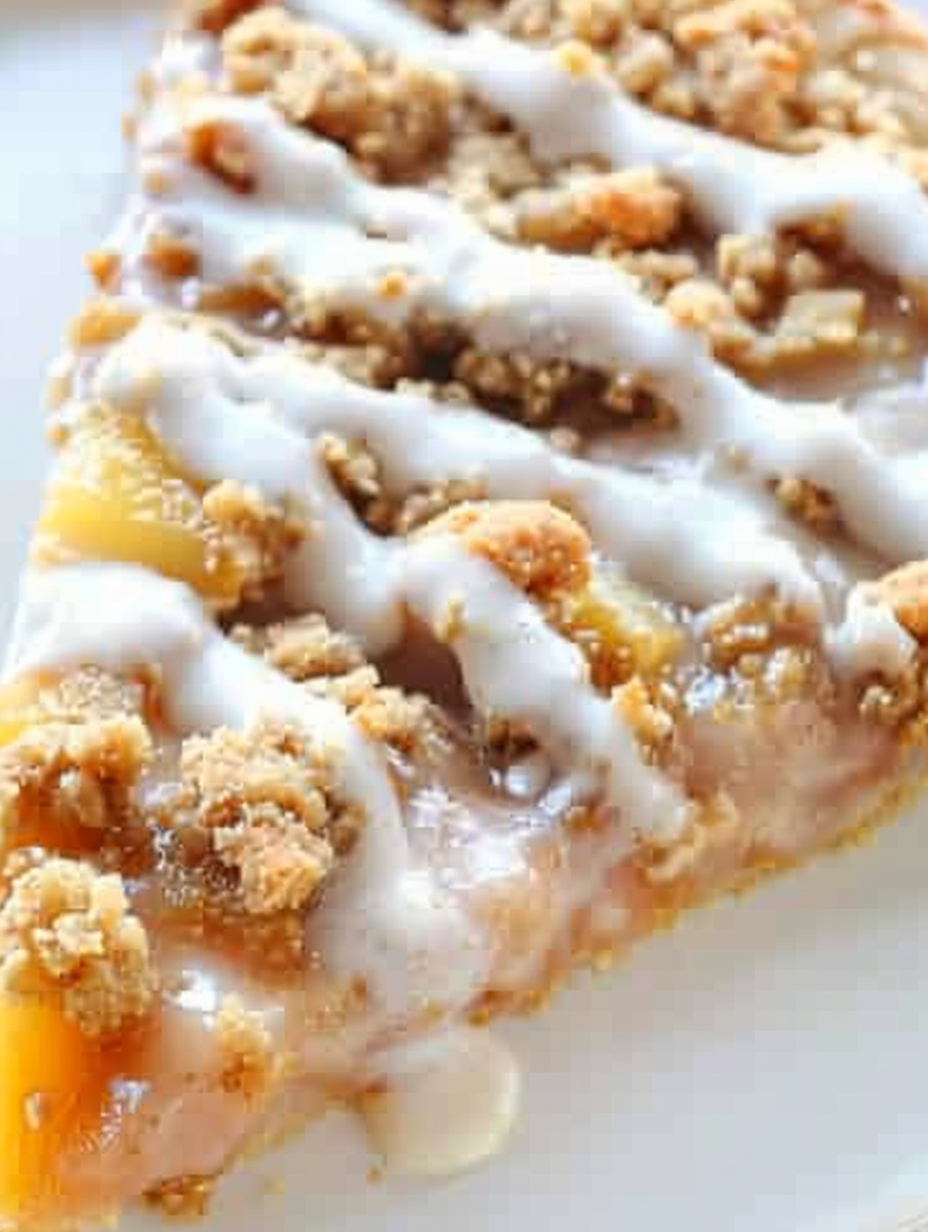
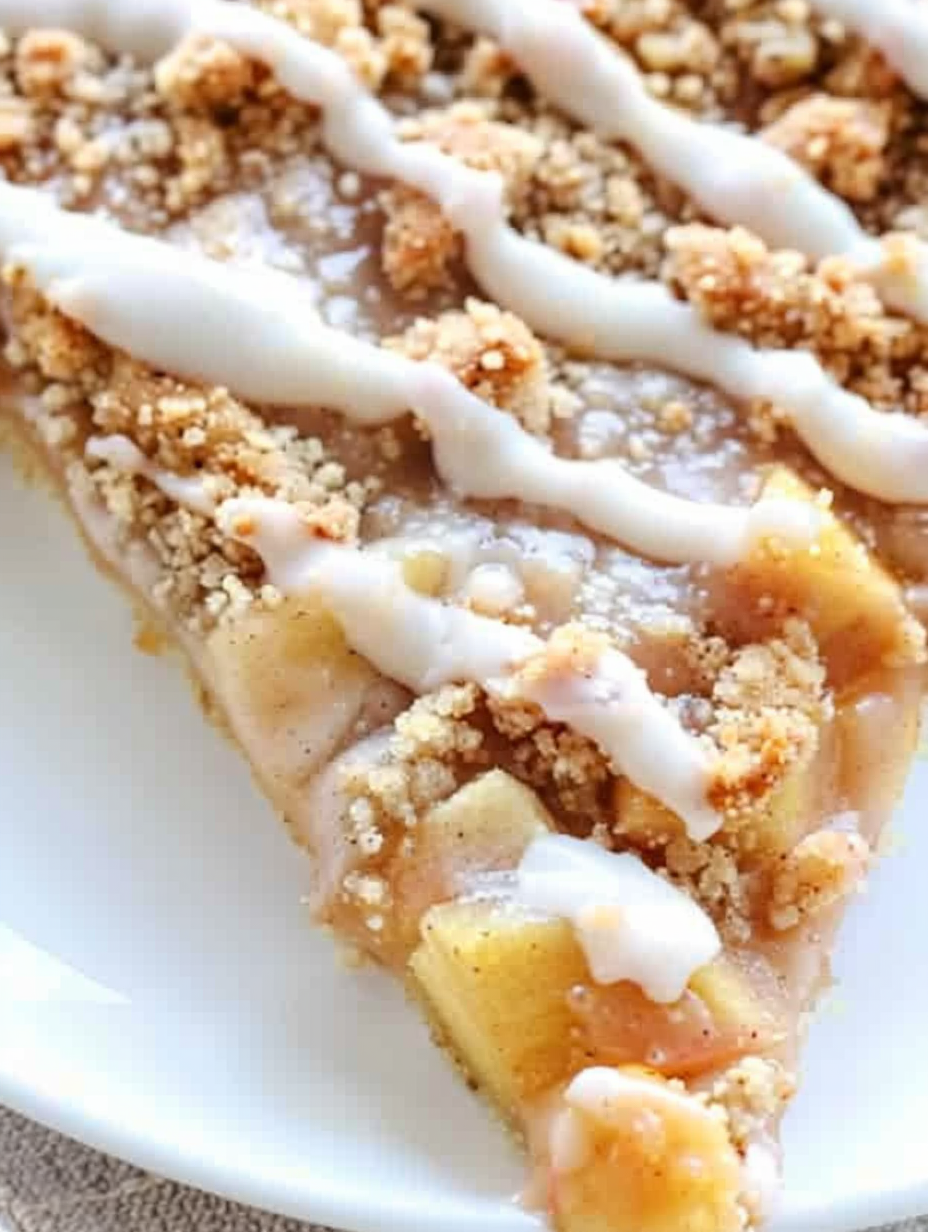
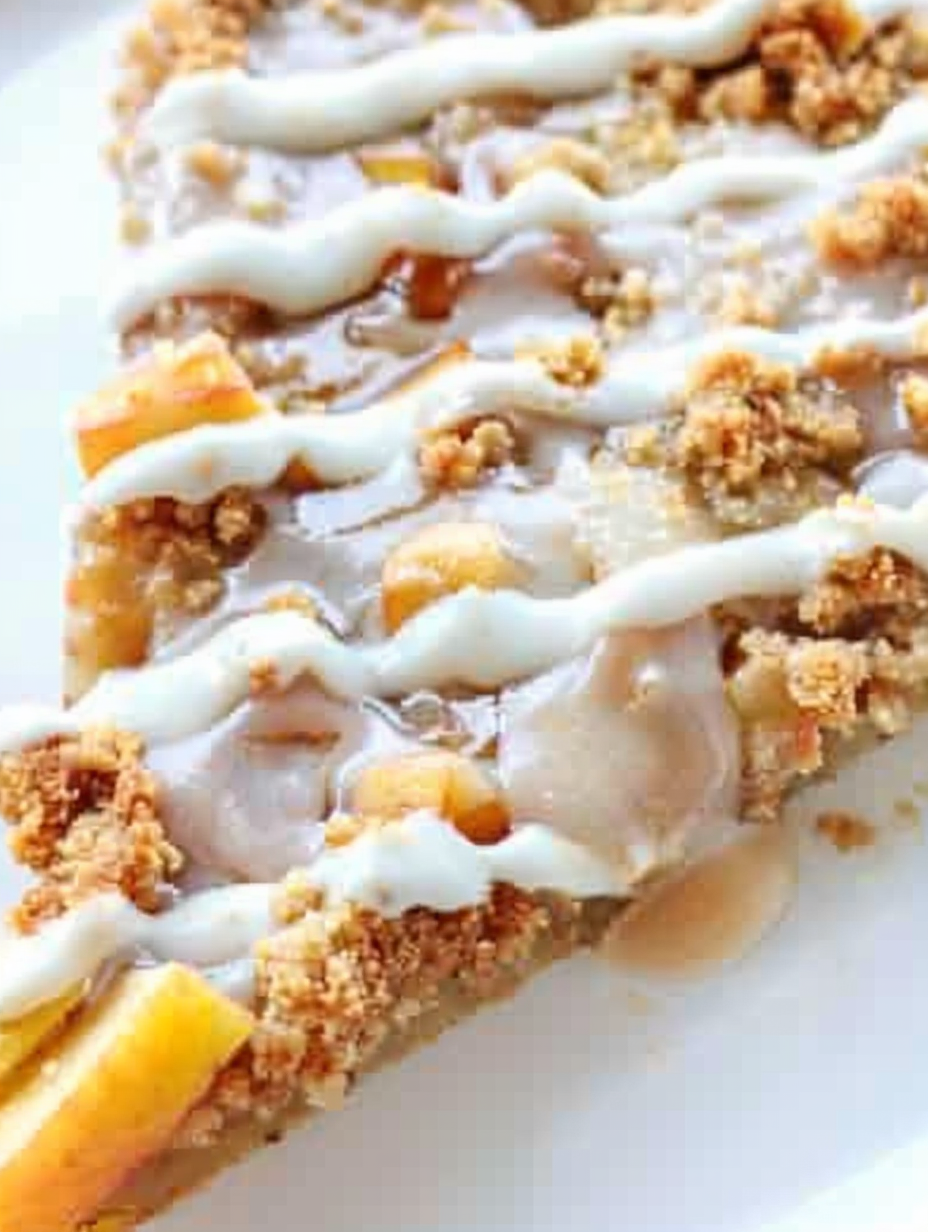
Chop the apples inside the can with a sharp knife so the filling spreads evenly across the crust.
Use room-temperature butter for a tender crumble; if butter is too soft, chill the mixture briefly before baking.
Watch the last five minutes of baking—crumb topping browns quickly and can go from perfect to too dark.
For cleaner slices, let the pizza cool 8 to 10 minutes before cutting and use a very sharp pizza cutter.
This nourishing apple dessert pizza recipe is sure to be a staple in your kitchen. Enjoy every moist, high protein slice — it is perfect for breakfast or as a wholesome snack any time.
Yes. Store cooled slices in an airtight container in the refrigerator for up to three days.
Freeze slices for up to three months; thaw overnight in the refrigerator and reheat in a 350 F oven.
This Apple Dessert Pizza recipe makes perfectly juicy, tender, and flavorful steak every time! Serve with potatoes and a side salad for an unforgettable dinner in under 30 minutes.
Preheat oven to 350 F. Remove crust from package and place on a round baking sheet. Allow crust to come to room temperature briefly while you prepare toppings.
Open the can of apple pie filling and run a sharp knife back and forth through the apples to break up large pieces. Spread the chopped filling evenly across the pizza crust, leaving a small edge.
In a bowl combine softened butter, brown sugar, all-purpose flour and ground cinnamon. Use a fork or pastry cutter to create coarse crumbs that hold together when pressed.
Sprinkle the crumb topping over the apple layer and bake on the middle rack for 25 to 30 minutes until the topping is lightly browned and filling is heated through. Rotate halfway if your oven has hot spots.
Whisk powdered sugar with 1 tablespoon milk, adding more milk slowly until you reach a pourable consistency. Drizzle over the cooled pizza, slice with a sharp pizza cutter, and serve.
Last Step: Please leave a rating and comment letting us know how you liked this recipe! This helps our business to thrive and continue providing free, high-quality recipes for you.
Leave a comment & rating below or tag
@velvetyum on social media!

Tender grilled zucchini rolled with a basil-kissed ricotta filling, nestled in marinara, and baked until the mozzarella bubbles and turns golden.

Golden, garlicky rounds with a deep-fried crunch made lighter in the air fryer. A fast, vitamin-packed side everyone devours.

Tender chicken meatballs simmered in marinara, finished with melted mozzarella and basil for cozy, weeknight Italian comfort in every bite.
Leave a comment & rating below or tag @velvetyum on social media!
Enjoyed this recipe? Share it with friends and family, and don't forget to leave a review!
This recipe looks amazing! Can't wait to try it.
Comments are stored locally in your browser. Server comments are displayed alongside your local comments.

Join to receive our email series which contains a round-up of some of our quick and easy family favorite recipes.
