
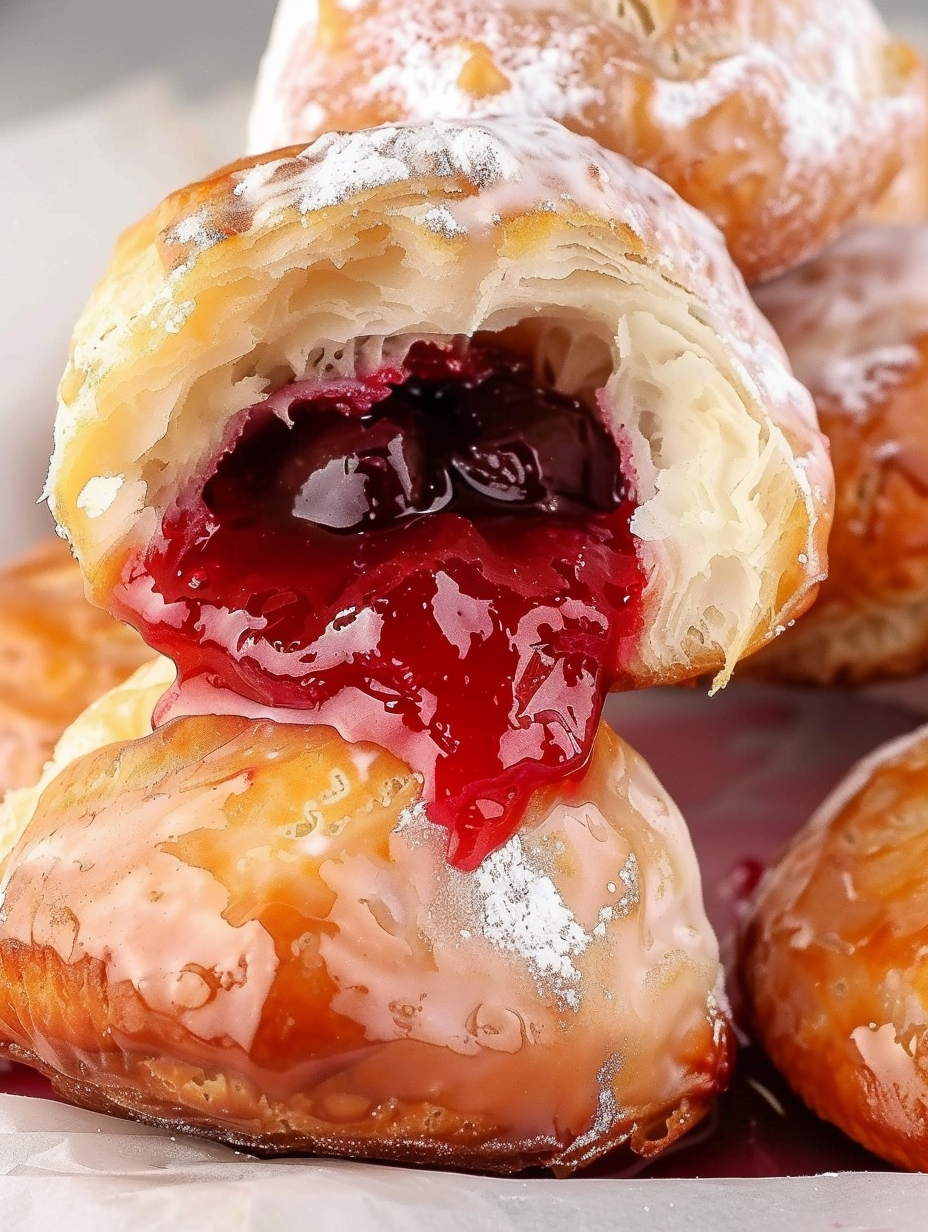
Cherry Pie Bombs

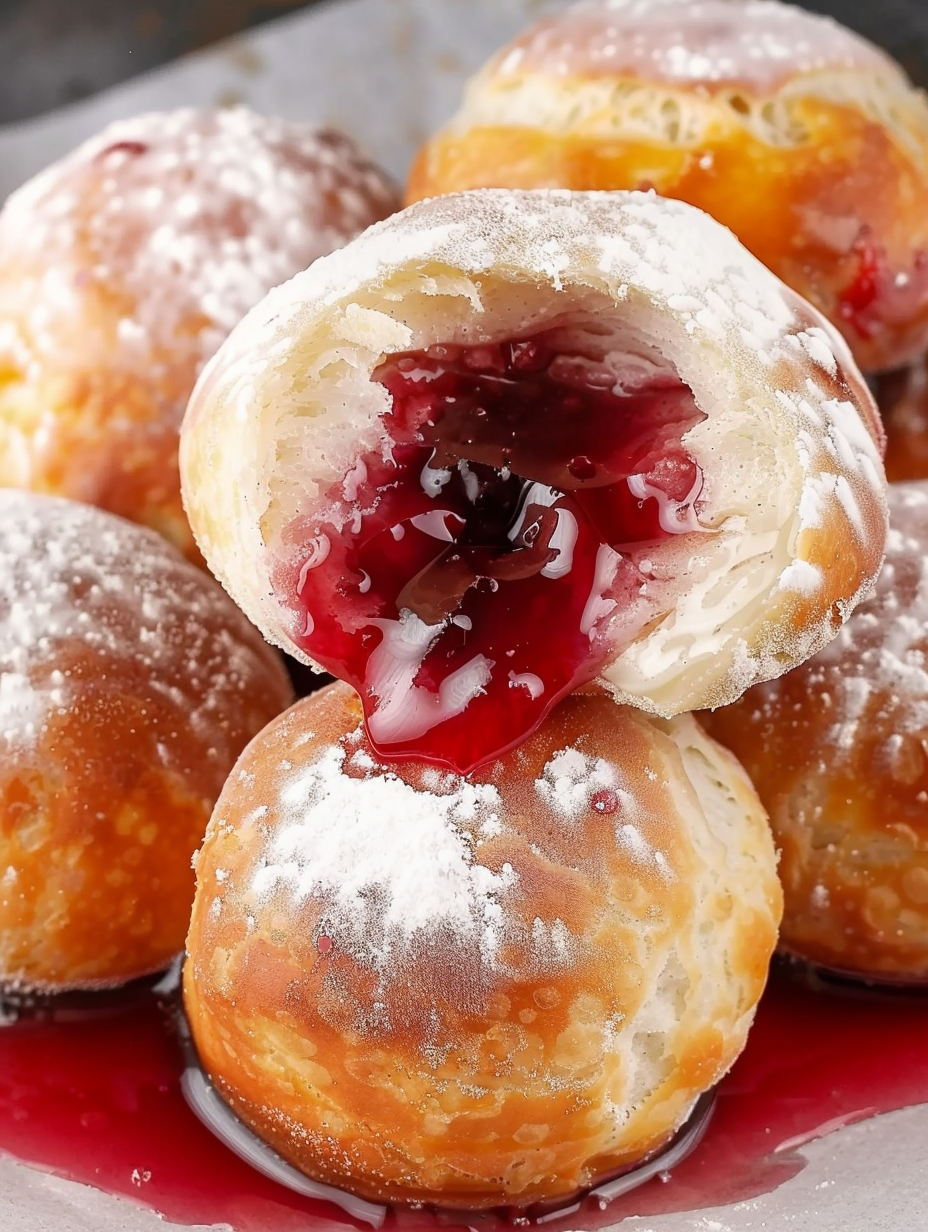
Bite-sized, deep-fried cherry pockets with a glossy sugar glaze — all the flavor of a classic cherry pie in a playful, quick-to-make dessert.
This recipe for cherry pie bombs has been a guilty-pleasure staple in my kitchen ever since I first tried them at a neighborhood potluck. They capture everything I love about cherry pie — the bright, jammy filling, the warm, tender dough, and that addictive sugar glaze — but in a size that is perfect for sharing and for sneaking a second piece. I discovered this method on a rainy Sunday while wishing for pie without the fuss of rolling crusts and wrestling with a pie plate. The result was instant joy: a crispy golden shell that gives way to a bubbling cherry center and a glossy sweet finish. My kids called them "little pies of happiness" and my neighbors asked for the recipe the next day.
These treats shine because of their contrasting textures and straightforward technique. The dough gets slightly puffed and golden when fried, creating a light, tender bite that keeps the filling contained until you break in. The cherry filling is warm and syrupy, and the sugar glaze adds a smooth sheen and a delicate crackle as it sets. They are wonderfully approachable to make, requiring only a can of flaky biscuit dough and a can of cherry pie filling — pantry-friendly ingredients that mean you can whip them up at a moment's notice for last-minute guests or an easy weekend dessert.
Why You'll Love This Recipe
- Ready in about 25 minutes from start to finish, making it perfect for a quick after-dinner treat or an impromptu gathering.
- Uses pantry staples: a can of flaky biscuits and a can of cherry pie filling get you most of the way there, so no specialty shopping required.
- Handheld, bite-sized pieces are ideal for parties, potlucks, or serving as a fun dessert at family meals.
- Glazed finish gives bakery-style shine and keeps the exterior slightly crisp while sealing in the warm filling.
- Flexible method: swap in pie dough or different pie fillings for endless flavor variations and seasonal options.
- Make-ahead friendly: you can freeze them before frying for easy, on-demand crisped treats cooked straight from the freezer.
I remember making a double batch for a summer block party and watching them disappear in ten minutes flat. People loved that they were familiar — like cherry pie — but novel in form. The glaze added that visual wow factor and kept hands sticky in a delightful, nostalgic way. Over time I learned small tricks, like flattening the biscuit just enough to hold a tablespoon of filling and frying at a steady 325 degrees to ensure a golden exterior with a fully warmed center.
Ingredients
- Flaky biscuit dough: Use a 16.3-ounce can of Grand's "Big" biscuits or a similar flaky canned biscuit. The pre-layered, flaky varieties separate easily for a lighter interior and are forgiving for shaping. If using fresh dough, keep it chilled and handle minimally.
- Cherry pie filling: One 21-ounce can of store-bought cherry pie filling provides the right balance of fruit and syrup. Look for a filling with whole or halved cherries for texture rather than a thin jam.
- Powdered sugar: Two cups of confectioners' sugar creates a glossy, smooth glaze that sets quickly. Sift if lumpy for the best finish.
- Milk: A quarter cup of whole milk balances the glaze, adding body and a slight richness. You can use 2% if preferred, but whole milk gives the best mouthfeel.
- Light corn syrup: One tablespoon adds sheen and prevents the glaze from becoming too brittle. It is optional but recommended for a consistent finish.
- Vegetable oil for frying: Use a neutral oil with a high smoke point such as canola, peanut, or sunflower oil. Fill a 2- to 3-quart heavy-bottomed saucepan so the oil sits deep enough to fully immerse the dough balls.
- Optional: A pinch of kosher salt in the glaze or a dusting of extra powdered sugar for presentation.
Instructions
Prepare the oil and workspace: Fill a 2- to 3-quart heavy-bottomed saucepan a little over halfway with vegetable oil so the dough balls will be fully submerged. Attach a candy or deep-fry thermometer and preheat the oil to 325 degrees Fahrenheit. Assemble a plate lined with paper towels and set out a wire rack on parchment to cool glazed bombs. Keep all tools within reach so you can work quickly once you start frying. Flatten the biscuit dough: Open the biscuit can and separate each biscuit by gently pulling apart the flaky layers at the center. Use your fingers or a rolling pin to press each biscuit half into a small circle roughly 3 inches across. Do not roll the dough paper-thin; keep it slightly thick so it puffs and holds the filling without tearing. Fill and seal: Place about 1 tablespoon of cherry pie filling in the center of each dough circle. Draw the edges up and pinch them together firmly so the filling is completely enclosed. To create a more uniform ball, tuck the pinched edge under and gently roll between your palms to form a smooth sphere. A tight seal prevents leakage during frying. Fry at steady temperature: Maintain the oil at 325 degrees Fahrenheit; temperature control is critical. Using a slotted spoon or spider, lower 2 to 3 bombs at a time into the oil so the pot is not overcrowded. Turn them frequently to brown evenly and fry for about 4 to 6 minutes until a deep golden color develops. Adjust heat as needed to keep oil steady; if it spikes, reduce heat so the exterior does not burn before the center heats. Drain and cool slightly: Lift the bombs out with a slotted spoon and transfer to the paper towel-lined plate to blot excess oil. Let them rest for a few minutes so they are warm but not piping hot before glazing. This helps the glaze adhere without melting off immediately. Make the glaze and coat: Whisk together 2 cups of powdered sugar, 1/4 cup milk, and 1 tablespoon light corn syrup until smooth and glossy. Toss each warm bomb in the glaze, lift and allow excess to drip back into the bowl, then place on a wire rack set over parchment to set. The glaze will firm slightly in about 10 minutes, leaving a shiny finish. Serve: Serve immediately or let glaze set before storing. These are best eaten the day they are made for the ideal contrast of warm filling and slightly crisp exterior.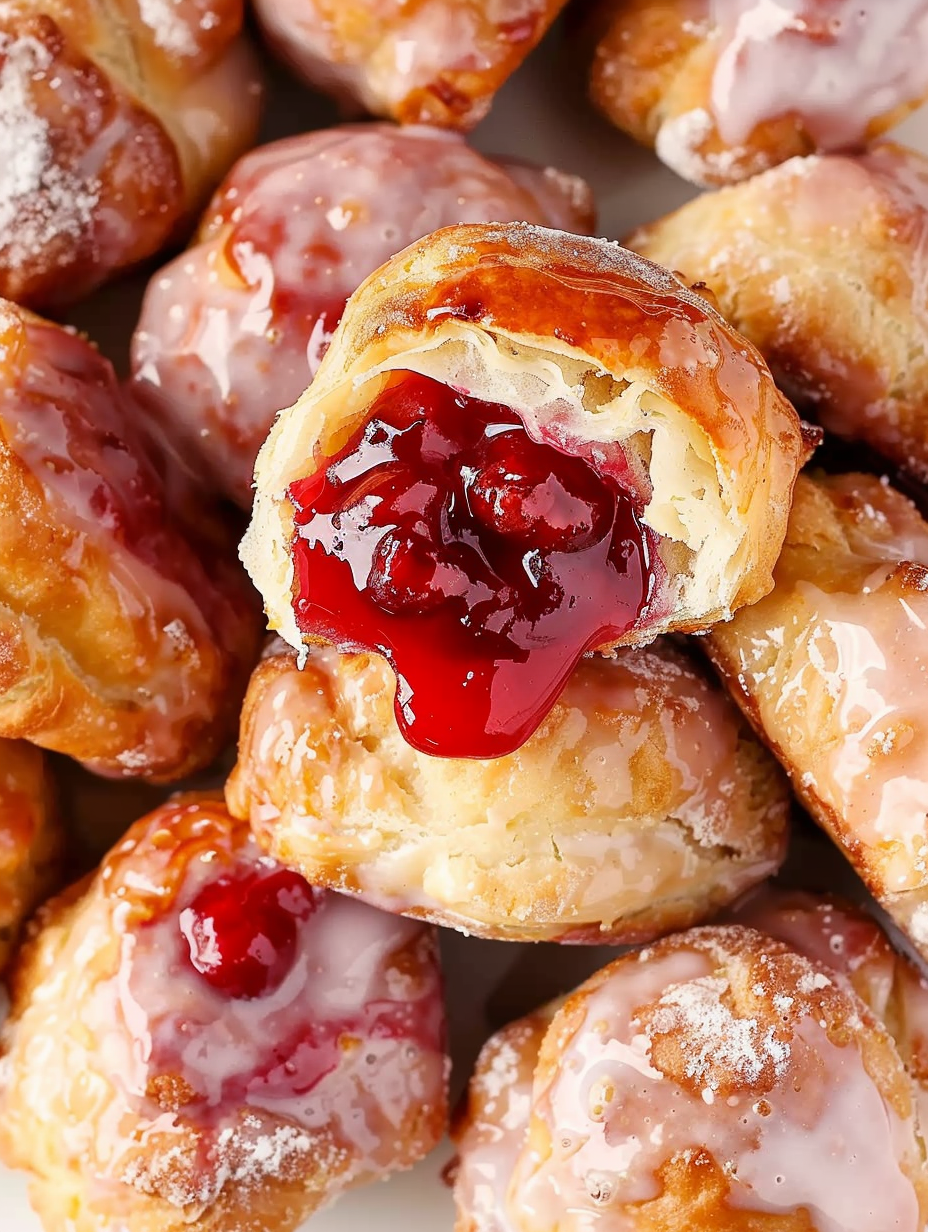
You Must Know
- These bite-sized treats are best enjoyed fresh the day they are made; they maintain the best texture for 48 hours when stored at room temperature in an airtight container.
- Freeze assembled but unfried bombs in a freezer bag for up to 3 months and fry them straight from frozen. They will take slightly longer to cook through when frozen.
- Keep oil temperature steady at 325 degrees Fahrenheit for biscuit dough; if swapping to pie dough, increase temperature to 350 degrees Fahrenheit to prevent sogginess.
- Seal dough tightly to prevent filling from leaking and remember to turn bombs often while frying since the sealed side can be heavier and brown unevenly.
I love how accessible this method is; the first time I froze a tray and then fried them for unexpected guests, everyone thought I had been baking all day. The glaze trick with corn syrup makes a big difference in appearance and texture, giving a professional gloss that always earns compliments. Small adjustments — like using a thermometer and not overcrowding the pot — transformed my results from uneven to reliably golden every batch.
Storage Tips
Store these in an airtight container at room temperature for up to 2 days to preserve the slightly crisp exterior. For longer storage, freeze the sealed dough balls (unfried) on a tray until solid, then transfer to a freezer bag for up to 3 months. When ready to enjoy, fry from frozen and allow additional cook time of about 1 to 2 minutes per batch. To reheat already fried bombs, warm them in a 300 degree Fahrenheit oven for 6 to 8 minutes to refresh exterior crispness. Avoid refrigeration as it can soften the glaze and make the dough less tender.
Ingredient Substitutions
Swap in canned apple or blueberry pie filling for a different flavor profile, keeping the same tablespoon measure per bomb. Use regular canned biscuits (one whole biscuit per bomb) if you do not have flaky layered biscuits; they will fry a bit faster so reduce fry time by about 1 minute and monitor color. If you prefer a lower-sugar glaze, reduce powdered sugar slightly and add a splash more milk; omit the corn syrup if necessary, though the finish will be less glossy. For dairy-free versions, substitute a plant-based milk like oat or almond in the glaze and check biscuit ingredients for milk solids.
Serving Suggestions
Serve warm with a scoop of vanilla ice cream, a dusting of extra powdered sugar, or a drizzle of warmed cherry compote for extra fruit intensity. For a brunch spread, pair with coffee or a sparkling fruit punch. Garnish with a few fresh mint leaves or a sprinkle of toasted almond slivers for contrast. Plate on a cooling rack to keep bottoms crisp and offer small tongs so guests can pick them without sticky fingers.
Cultural Background
These handheld pockets are a playful American adaptation of classic pie flavors transformed into a portable form. Fried pies have deep roots in regional American cooking, often found at county fairs and roadside stands where portability and quick service are prized. Using canned biscuit dough is a modern shortcut that reflects home-cooking ingenuity — taking familiar convenience items and elevating them into a nostalgic treat that evokes family gatherings and summer festivals.
Seasonal Adaptations
In summer, switch to fresh cherry compote or grilled peaches for seasonal brightness. During the holidays, use spiced apple filling with a pinch of cinnamon and nutmeg, and finish with a maple glaze. For a spring celebration, lemon curd makes a bright, tangy center; reduce frying time slightly for curd-filled bombs and consider a powdered sugar dusting instead of glaze to complement the citrus notes.
Meal Prep Tips
Make a large batch of sealed but unfried bombs and freeze them flat on a baking sheet. Once frozen solid, transfer to freezer bags for quick frying later. Label the bag with the date and filling type. Fry straight from frozen in batches and keep cooked bombs warm on a 200 degree Fahrenheit oven tray until serving. This method is ideal for entertaining or preparing desserts in advance without sacrificing that fresh-fried appeal.
These cherry-filled pockets are one of those recipes that make entertaining effortless and a little magical. They bring the nostalgia of pie into a playful form and reward attention to small techniques like temperature control and sealing. Try them once and you will find yourself adapting fillings and glazes again and again — that is the true joy of a simple, reliable treat.
Pro Tips
Maintain oil at a steady 325°F to ensure the dough cooks through without over-browning.
Seal each dough ball tightly and tuck the seam under to prevent filling from escaping while frying.
Freeze assembled but unfried bombs on a tray before bagging to fry straight from frozen when needed.
Do not overcrowd the pot; frying 2 to 3 at a time preserves oil temperature and ensures even browning.
This nourishing cherry pie bombs recipe is sure to be a staple in your kitchen. Enjoy every moist, high protein slice — it is perfect for breakfast or as a wholesome snack any time.
Tags
Cherry Pie Bombs
This Cherry Pie Bombs recipe makes perfectly juicy, tender, and flavorful steak every time! Serve with potatoes and a side salad for an unforgettable dinner in under 30 minutes.
Instructions
Prepare the oil and workspace
Fill a 2- to 3-quart heavy-bottomed saucepan a little over halfway with vegetable oil and attach a thermometer. Heat to 325°F and set up a paper towel-lined plate and wire rack for cooling.
Flatten the biscuit dough
Separate biscuit layers and flatten each half into a 3-inch circle using fingers or a rolling pin; keep the dough slightly thick to hold filling without tearing.
Fill and seal
Place about 1 tablespoon of cherry filling in the center of each dough circle, pinch edges tightly to seal, then tuck the seam under and roll into a smooth ball.
Fry the bombs
Carefully lower 2 to 3 bombs at a time into oil maintained at 325°F. Turn frequently and fry for about 4 to 6 minutes until deep golden brown, adjusting heat to keep temperature steady.
Drain and cool
Use a slotted spoon to transfer fried bombs to a paper towel-lined plate to blot excess oil. Allow to cool slightly so the glaze will adhere.
Glaze and serve
Whisk 2 cups powdered sugar, 1/4 cup milk, and 1 tablespoon corn syrup until smooth. Toss each warm bomb in glaze, allow excess to drip, and set on a wire rack to firm. Serve warm or at room temperature.
Last Step: Please leave a rating and comment letting us know how you liked this recipe! This helps our business to thrive and continue providing free, high-quality recipes for you.
Nutrition
Did You Make This?
Leave a comment & rating below or tag
@velvetyum on social media!
Categories:
You might also like...

Cheesy Zucchini Rollatini
Tender grilled zucchini rolled with a basil-kissed ricotta filling, nestled in marinara, and baked until the mozzarella bubbles and turns golden.

Crispy Zucchini and Squash
Golden, garlicky rounds with a deep-fried crunch made lighter in the air fryer. A fast, vitamin-packed side everyone devours.

Chicken Parmesan Meatballs
Tender chicken meatballs simmered in marinara, finished with melted mozzarella and basil for cozy, weeknight Italian comfort in every bite.
Did You Make This?
Leave a comment & rating below or tag @velvetyum on social media!
Rate This Recipe
Share This Recipe
Enjoyed this recipe? Share it with friends and family, and don't forget to leave a review!
Comments (1)
This recipe looks amazing! Can't wait to try it.
Comments are stored locally in your browser. Server comments are displayed alongside your local comments.

Hi, I'm Emma!
What's Popular

30-Minute Meals!
Join to receive our email series which contains a round-up of some of our quick and easy family favorite recipes.