
>>

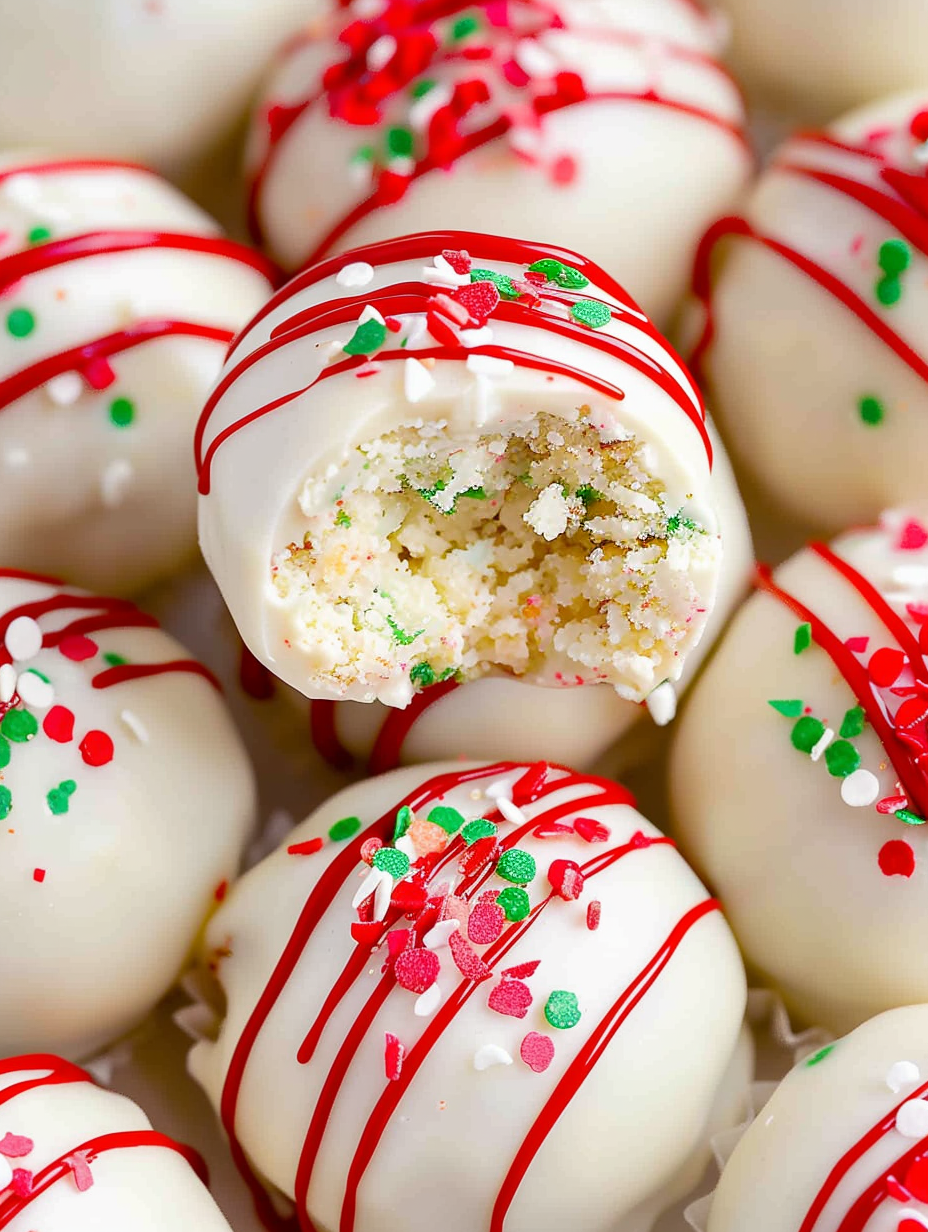
No bake Christmas truffles made with just five ingredients: festive tree snack cakes, cream cheese, vanilla almond bark and a pop of red drizzle. Perfect for gifting and cookie trays.
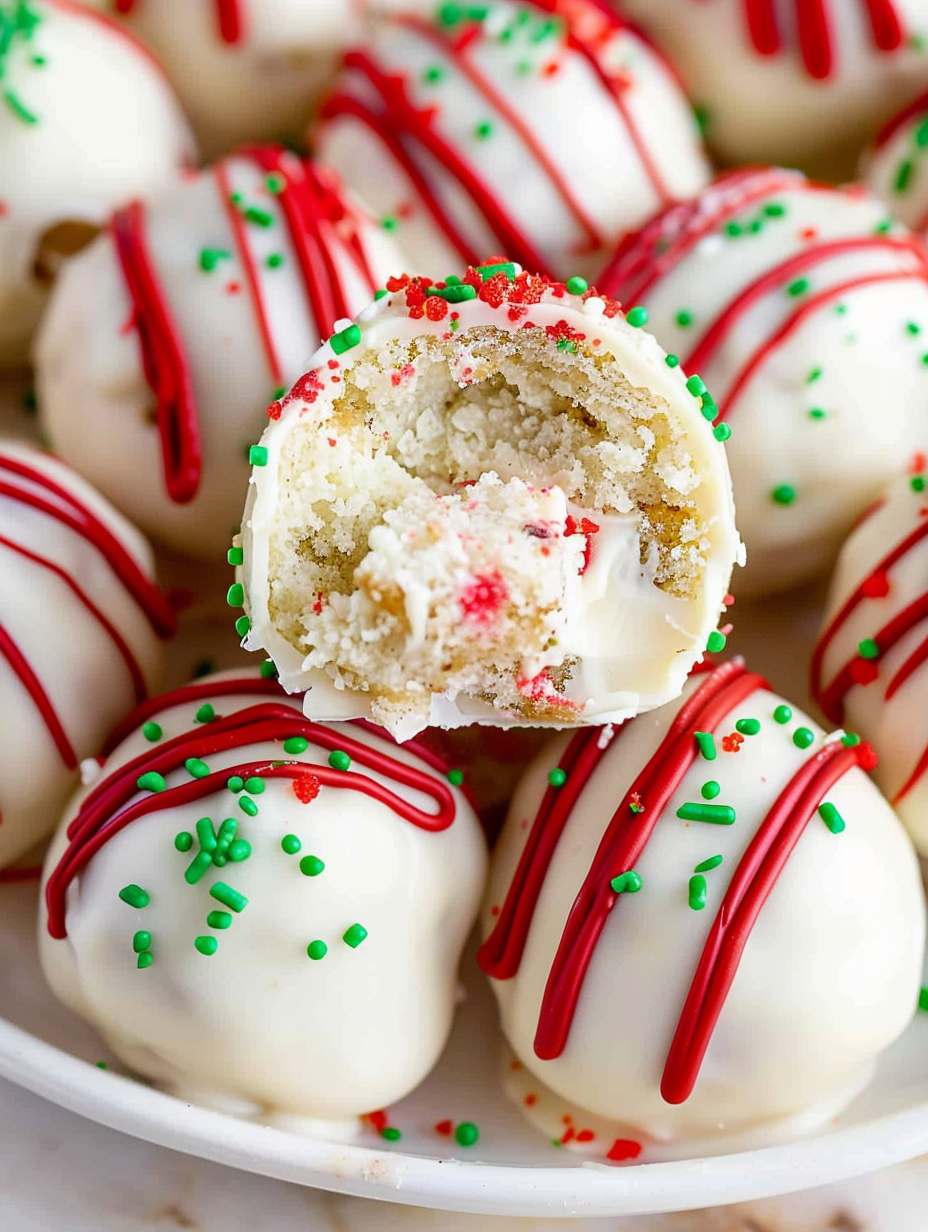
This recipe is all about easy holiday joy and a little nostalgic indulgence. I first made these Christmas tree cake truffles the season my neighbor gifted me a box of festive snack cakes and a tin of vintage cookie cutters. I wanted something playful and quick to add to a cookie tray, and transforming those soft snack cakes into bite sized coated treats turned out to be the most satisfying shortcut. The center is wonderfully creamy from brick style cream cheese, and when coated in sweet vanilla almond bark the truffles become a smooth, slightly crisp bite that keeps well for giving or party platters.
What I love most is how these come together with minimal active time and deliver maximum festive impact. They are no bake and rely on simple chemistry between moist cake crumbs and cream cheese to form a truffle base that holds its shape once chilled. The vanilla almond bark provides a clean canvas for green sugar sparkles and a ribbon of red candy melt drizzle that instantly reads as holiday. These have become my go to last minute edible gift because they store well and travel without fuss.
Personally, my family lights up the moment they see the tiny green trees on a platter. One year I wrapped small batches in parchment with twine and delivered them around the neighborhood. The feedback was immediate and warm, and a few folks asked for the recipe right away. There is a simple joy in transforming a premade snack into something that feels homemade and festive.
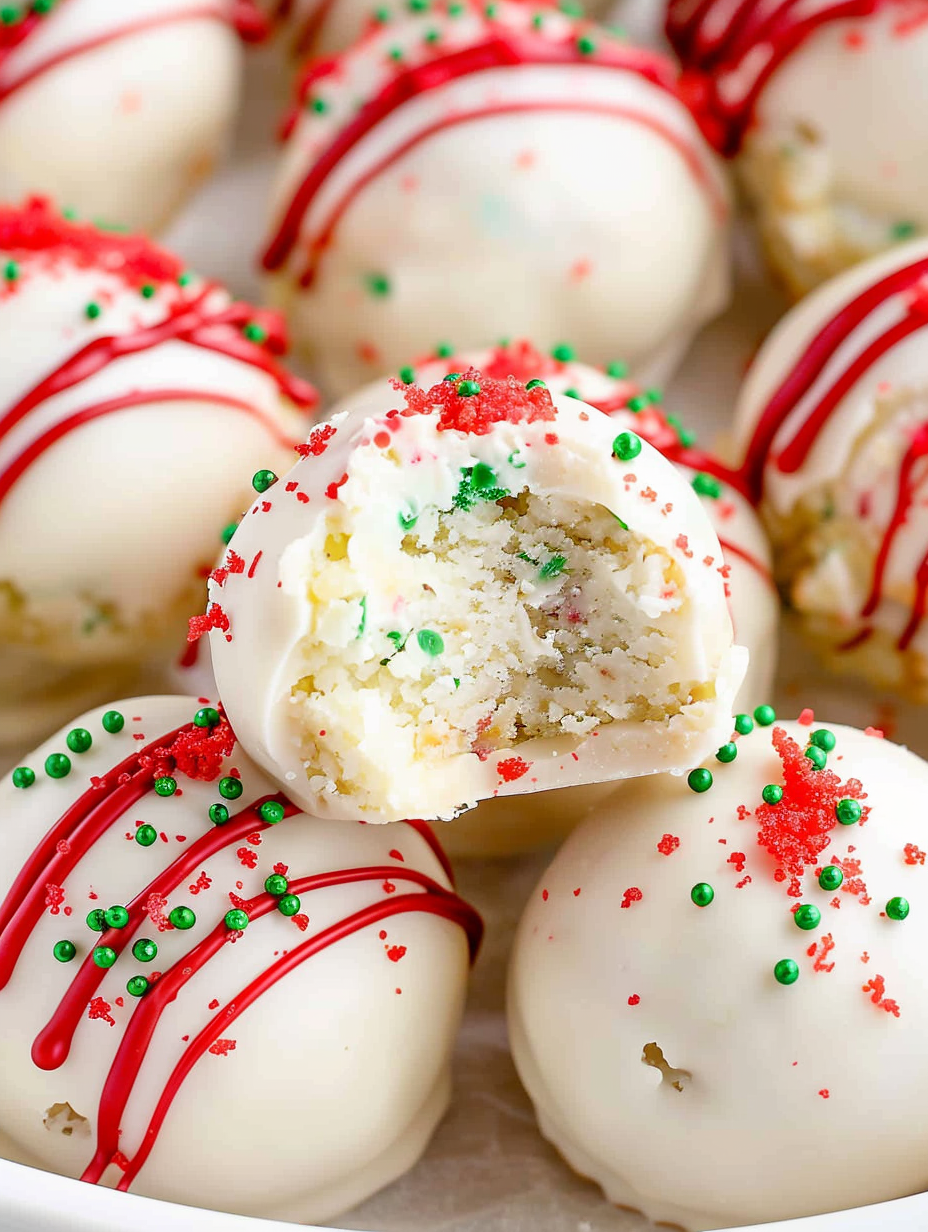
My favorite aspect is how forgiving this method is. Even if your first dip has small imperfections, the white vanilla coating covers a multitude of uneven edges and the red drizzle creates a polished look. Family members have called these little treats adorable and asked for them to appear every holiday table. They disappear fast at parties which is always a good sign, and they travel well to cookie exchanges.
Store the finished pieces in a single layer or with parchment between layers inside an airtight container. Refrigeration keeps the coating crisp and the center pleasantly cool; leave space between layers to prevent sticking. For longer storage freeze arranged truffles on a tray until solid, then transfer to a freezer safe container with parchment between layers. Label with the date and thaw in the refrigerator when ready to serve. For best texture allow chilled truffles to come to cool room temperature for ten to fifteen minutes before serving so the center softens slightly.
If almonds are a concern swap vanilla almond bark for a coating labeled nut free or use compound chocolate instead. For a chocolate forward version use chocolate snack cakes and chocolate coating; increase the red drizzle contrast by using white candy melts tinted with red. To make these dairy free use dairy free cream cheese and confirm the snack cakes are dairy free, though that may be challenging with branded products. For a lower sugar option try sugar free candy melts and reduced sugar sprinkles but expect a firmer mouthfeel from the center.
Arrange the truffles on a festive platter with contrasting cookies and small candies for a lively cookie tray. Garnish with sprigs of rosemary to mimic mini tree branches and add a citrus slice on the side for a pop of color. Pair these sweet bites with coffee, cocoa, or a lightly spiced mulled drink to balance their sweetness. They also work well boxed in small cellophane bags with ribbons as neighbor gifts.
Transforming cake into bite sized confection is a technique with roots in several baking traditions where leftovers are repurposed into truffles or cake pops. Using snack cakes as the base modernizes this idea with convenience foods common in American home baking. The concept echoes southern cake ball traditions and the European practice of forming confectionery centers before coating, but here the festive Christmas tree motif gives them a seasonal cultural identity familiar at North American holiday gatherings.
In winter mix warming spices like a pinch of cinnamon or nutmeg into the crumb base to deepen the seasonal profile. For Valentine's Day swap the green sugar for pink sanding sugar and use heart shaped sprinkles with pink candy drizzle. For a summer party use lemon snack cakes and a white chocolate coating with bright citrus zest sprinkled on top. The method remains the same, but small swaps tailor the treats to seasonal color palettes and flavors.
Make the crumb and cream cheese mixture up to two days ahead and keep chilled in an airtight container. Portion and freeze until solid, then dip in the coating hours before an event for maximum freshness. If you plan to gift multiples, arrange truffles in small batches to prevent condensation during transport by keeping them cool in insulated containers. Use a small cookie scoop to ensure consistent size which aids in even setting and presentation.
These little truffles are joyful to make and share. They combine a nostalgic snack cake base with simple finishing touches for a treat that looks like effort but comes together quickly. Give them as gifts or keep them around for holiday movie nights where they will always be welcomed.
Soften the cream cheese at room temperature for about thirty minutes for the smoothest mixture without overheating it.
Chill the formed balls until very firm before dipping to prevent the coating from cracking or melting the centers.
Work in small batches while dipping so the almond bark stays at a workable temperature and does not thicken.
Use a one tablespoon scoop for uniform sizing which makes setting and packaging easier.
Store in a single layer or with parchment between layers to prevent sticking and preserve decoration.
This nourishing christmas tree cake truffles recipe is sure to be a staple in your kitchen. Enjoy every moist, high protein slice — it is perfect for breakfast or as a wholesome snack any time.
This Christmas Tree Cake Truffles recipe makes perfectly juicy, tender, and flavorful steak every time! Serve with potatoes and a side salad for an unforgettable dinner in under 30 minutes.
Unwrap the Christmas tree snack cakes and break them into pieces in a large mixing bowl. Crumble them into fine crumbs by hand or with a fork until no large chunks remain, creating a uniform base for mixing.
Add the softened eight ounces of brick style cream cheese to the bowl and beat with an electric mixer until the mixture is smooth and fully combined, with a dough like texture that holds together when pressed.
Use a one tablespoon scoop to portion the mixture and roll each portion into a compact ball between your palms. Place each ball on a parchment lined baking sheet with space between them to chill evenly.
Freeze the balls for thirty to sixty minutes until firm. The chilled centers will resist warming when dipped and result in a cleaner, crisper coating.
Melt the vanilla almond bark according to package directions either in the microwave in short intervals or over a double boiler, keeping it smooth and warm but not hot to avoid melting the chilled centers.
Dip each truffle into the melted almond bark using a fork, let excess drip off, then return to the parchment. Immediately top with green sugar sprinkles before the coating sets to ensure good adhesion.
Melt the red candy melts according to package directions and drizzle over the coated truffles. Let the coating fully harden at room temperature or in the refrigerator prior to storing or serving.
Last Step: Please leave a rating and comment letting us know how you liked this recipe! This helps our business to thrive and continue providing free, high-quality recipes for you.
Leave a comment & rating below or tag
@velvetyum on social media!

Tender grilled zucchini rolled with a basil-kissed ricotta filling, nestled in marinara, and baked until the mozzarella bubbles and turns golden.

Golden, garlicky rounds with a deep-fried crunch made lighter in the air fryer. A fast, vitamin-packed side everyone devours.

Tender chicken meatballs simmered in marinara, finished with melted mozzarella and basil for cozy, weeknight Italian comfort in every bite.
Leave a comment & rating below or tag @velvetyum on social media!
Enjoyed this recipe? Share it with friends and family, and don't forget to leave a review!
This recipe looks amazing! Can't wait to try it.
Comments are stored locally in your browser. Server comments are displayed alongside your local comments.

Join to receive our email series which contains a round-up of some of our quick and easy family favorite recipes.
