
>>

A quick, satisfying turkey melt with layers of Swiss and provolone, crisp bacon, and ripe tomato on toasted sourdough—ready in under 15 minutes.
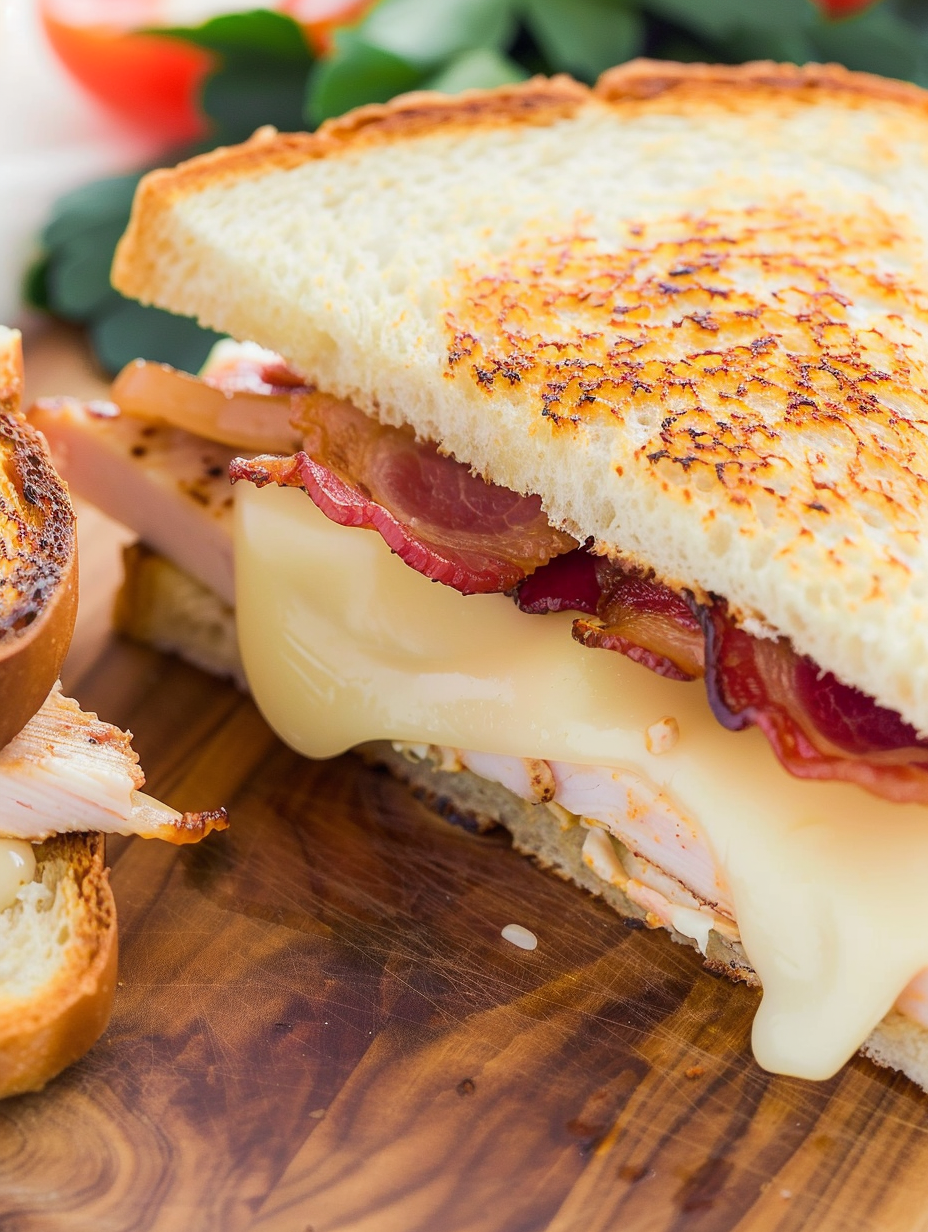
This Turkey Melt has been my go-to when I want something that feels indulgent but comes together in a flash. I first perfected this combination on a hectic weekday evening when the fridge held a half-pound of deli turkey and a couple of cheese slices; the result was a warm, cheesy sandwich that everyone in the house reached for. The contrast of buttery, toasted sourdough with gooey Swiss and provolone, a little tang from mayonnaise, and bright tomato keeps each bite interesting. It’s the kind of food that’s simple enough for a solo lunch yet satisfying enough to serve as a quick dinner.
I remember the first time I made a version of this for friends who stopped by unexpectedly. We had only ten minutes, and this sandwich saved the evening. The crisp bacon and the melted cheese drew compliments, and my friend said it tasted like a diner classic elevated. Because it uses pantry staples—bread, butter, cheese, deli turkey—it’s reliable and forgiving. Small adjustments, like swapping in thicker-cut sourdough or using a griddled tomato, can change the profile subtly, but the heart of the sandwich remains approachable and reliably tasty.
I’ve watched picky teens and guests who claim to dislike deli meat finish these sandwiches and ask for seconds. The combination of textures—crispy exterior, melty interior, and juicy tomato—creates a reliably crowd-pleasing experience. Over the years I’ve dialed in exact timings and butter amounts so the bread toasts evenly and the cheese melts through without the bread burning.

My favorite thing about this sandwich is how forgiving it is. Once you know the heat level and timing of your skillet, you can assemble multiple sandwiches and turn them quickly. Family members always fight over the last bite; it’s a simple pleasure that reminds me of diner meals and late-night kitchen chats. The combination of smoky bacon, creamy cheeses, and bright tomato offers a satisfying balance that never feels heavy when paired with a crisp side salad.
Keep leftover components separate. Store cooked bacon and turkey in airtight containers in the refrigerator for up to 3 days. Bread will stale in the fridge quickly, so keep it at room temperature wrapped for 1 to 2 days or freeze slices for up to 1 month. If you do assemble a sandwich in advance, wrap tightly in foil and refrigerate for up to 24 hours, but expect the bread to soften. To reheat, unwrap and re-toast in a skillet on low heat with a lid to melt the cheese evenly, monitoring to avoid burning.
Swap sourdough for rye, ciabatta, or brioche for a different texture; brioche will be richer while ciabatta offers more chew. Replace turkey with roasted chicken, ham, or sliced roast beef for new flavors. If you need a dairy-free or vegan option, use plant-based cheese slices and margarine, and opt for a tempeh bacon. For a lower-sodium sandwich, choose low-sodium turkey and reduce added salt in accompaniments. Note that melting behavior changes with different cheeses; mozzarella melts well but is milder in flavor.
Serve with classic sides like dill pickles, kettle chips, or a bright arugula salad dressed with lemon and olive oil to cut through the richness. For heartier meals, pair with roasted sweet potato wedges or a warm bowl of tomato soup—the acidity of the soup complements the melted cheeses beautifully. Garnish with cracked black pepper or a few basil leaves on the tomato for an aromatic lift. For brunch, add a fried egg inside the sandwich for extra richness.
The melt sandwich is an American staple with roots in diner culture and comfort food traditions. Melts gained popularity in mid-20th-century kitchens where cooks layered meats and cheeses on bread and heated them to gooey perfection. Variations like tuna melts and patty melts became regional favorites. This turkey version plays on that heritage, combining deli meats with melting cheeses to create a familiar, nostalgic flavor profile that resonates across generations and dining styles.
In summer, use a vine-ripened tomato and add fresh basil for brightness. In autumn, swap in roasted apple slices or cranberry chutney for a holiday twist that pairs exceptionally well with turkey. During winter, consider a smear of whole-grain mustard and add caramelized onions for depth. These seasonal swaps highlight different aspects of the sandwich—fruit adds sweetness, condiments add acidity, and cooked vegetables add savory complexity.
For make-ahead lunches, pre-cook bacon and portion turkey into containers. Pack cheese and bread separately, and slice tomatoes the morning you plan to eat. Use a thermal lunch container or insulated bag with an ice pack to keep components safe until reheating. When reheating at work, use an office toaster oven if available; otherwise, a quick stovetop reheat in a nonstick skillet with a lid will refresh texture without drying out the sandwich.
Enjoy building this sandwich and making it your own; it’s a small, reliable pleasure that adapts well to busy days and lazy evenings alike. Velvetyum.com encourages you to experiment with fillings and pairings, and to savor the simple comfort of a well-made melt.
Pat tomato slices dry with paper towels to prevent the sandwich from becoming soggy.
Butter the bread to the edges for even browning and a uniform crisp texture.
If cheese isn't melting quickly, lower the heat and cover the pan for 30 to 60 seconds to trap steam and finish melting.
This nourishing classic turkey melt recipe is sure to be a staple in your kitchen. Enjoy every moist, high protein slice — it is perfect for breakfast or as a wholesome snack any time.
This Classic Turkey Melt recipe makes perfectly juicy, tender, and flavorful steak every time! Serve with potatoes and a side salad for an unforgettable dinner in under 30 minutes.
Pat tomato slices dry, have cheeses and bacon ready, and soften butter to room temperature for easy spreading.
Butter one side of each sourdough slice and warm a heavy skillet over medium heat until a drop of water sizzles.
Place one slice butter-side down, spread mayonnaise, layer Swiss and provolone, add turkey, tomato, bacon, and top with second slice butter-side up.
Cook 3 to 5 minutes until deeply golden; lower heat if browning too quickly and cover briefly if cheese needs more melting.
Flip carefully, press slightly, and cook another 2 to 3 minutes until cheese is melted and the second side is toasted.
Remove from heat, rest 1 minute, slice diagonally, and serve warm with your choice of sides.
Last Step: Please leave a rating and comment letting us know how you liked this recipe! This helps our business to thrive and continue providing free, high-quality recipes for you.
Leave a comment & rating below or tag
@velvetyum on social media!

Tender grilled zucchini rolled with a basil-kissed ricotta filling, nestled in marinara, and baked until the mozzarella bubbles and turns golden.

Golden, garlicky rounds with a deep-fried crunch made lighter in the air fryer. A fast, vitamin-packed side everyone devours.

Tender chicken meatballs simmered in marinara, finished with melted mozzarella and basil for cozy, weeknight Italian comfort in every bite.
Leave a comment & rating below or tag @velvetyum on social media!
Enjoyed this recipe? Share it with friends and family, and don't forget to leave a review!
This recipe looks amazing! Can't wait to try it.
Comments are stored locally in your browser. Server comments are displayed alongside your local comments.

Join to receive our email series which contains a round-up of some of our quick and easy family favorite recipes.
