
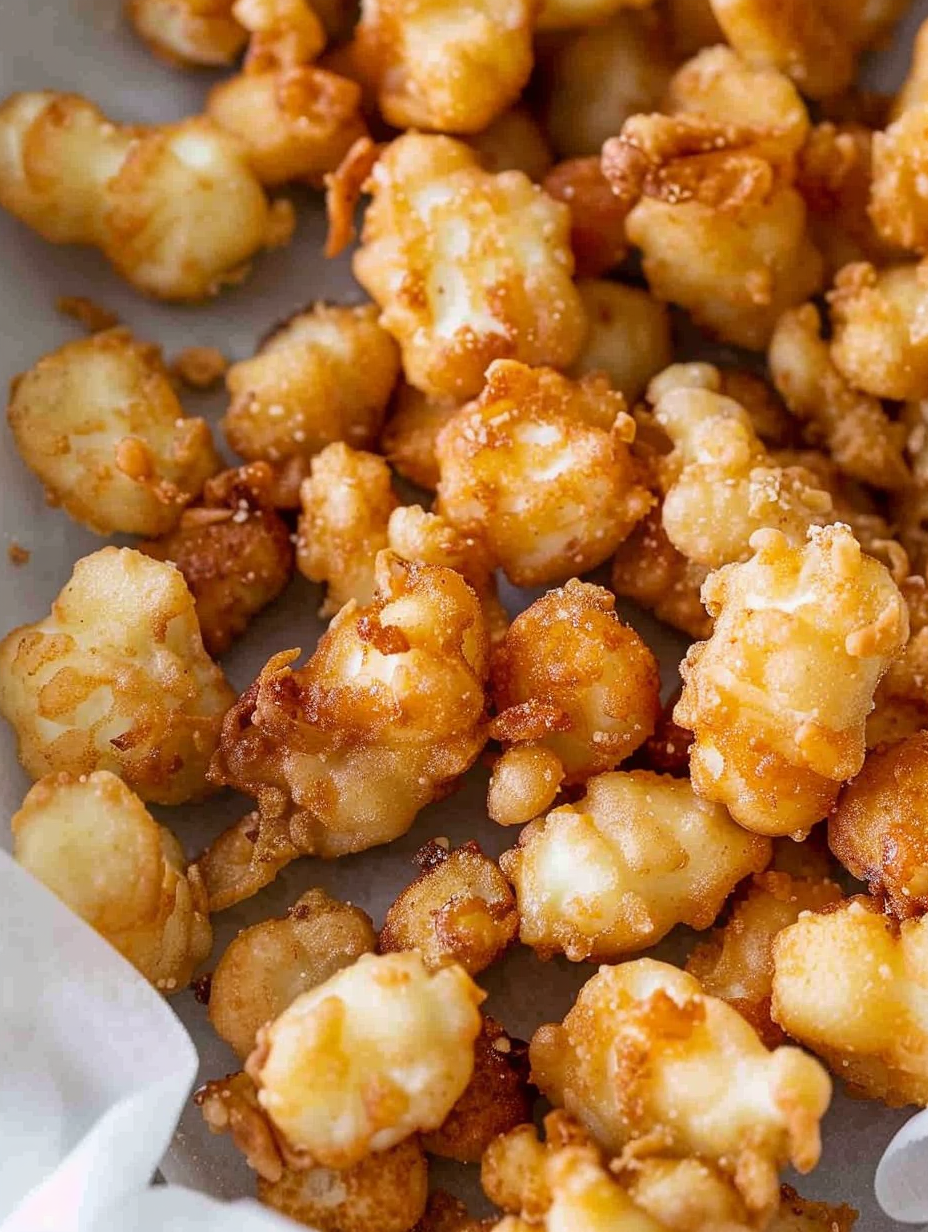
Crispy Fried Cheese Curds

Golden, gooey fried cheese curds that taste just like the state fair — crispy outside, melty inside, and ready in minutes for a crowd-pleasing appetizer.
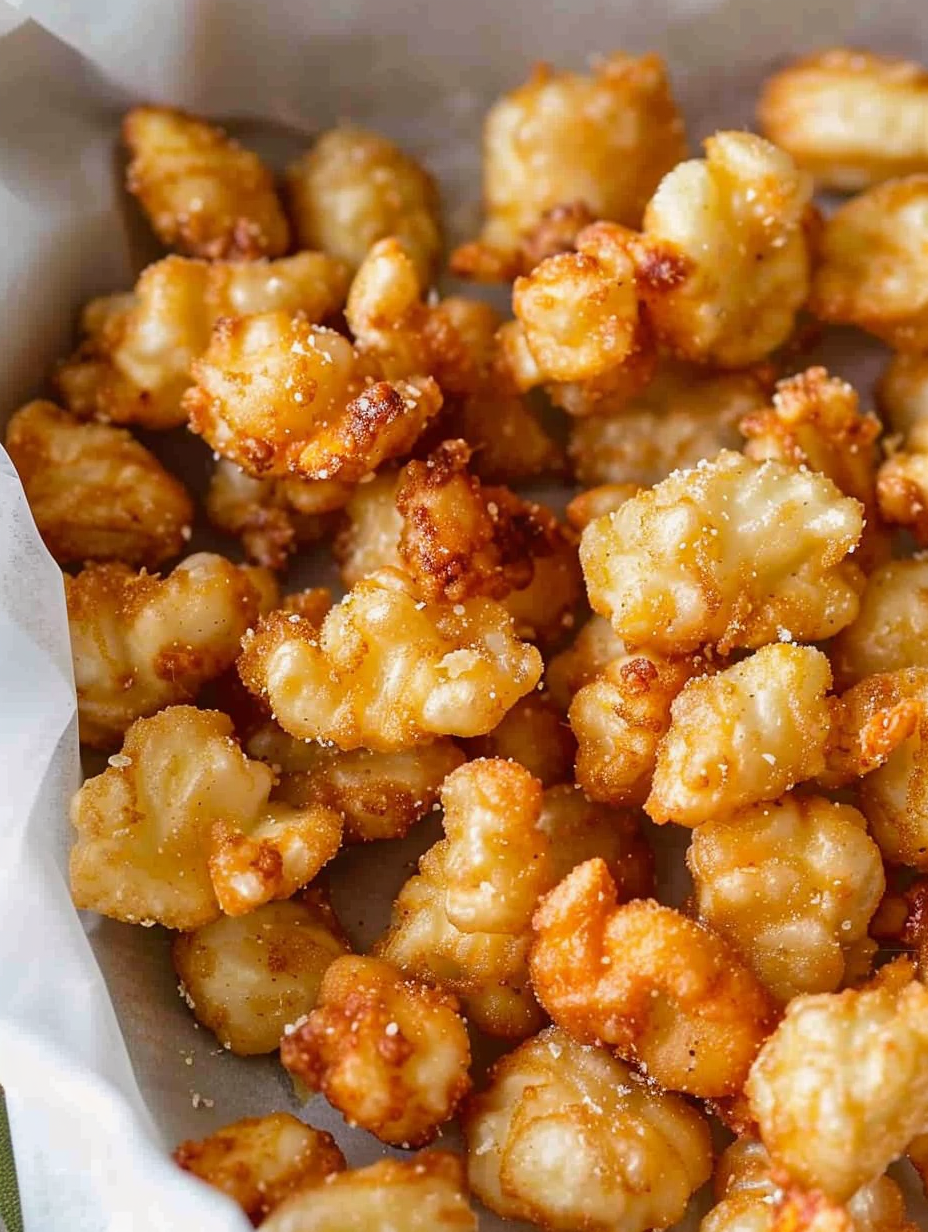
This batch of fried cheese curds has been my go-to at every game night and backyard picnic for years. I first learned to make them on an impromptu Friday night when I wanted that fair-food nostalgia without the long lines and overpriced baskets. The first time I cut into one and saw the warm, molten center stretch, I knew I had to perfect the method. These are crunchy, slightly airy on the outside and creamy inside, with that satisfying squeak of fresh curd if you can find it. They bring the same carefree excitement of a carnival plate right to my kitchen counter.
I discovered a few simple tricks along the way that make a huge difference: bring the curds closer to room temperature so they adhere better to flour, give them a short freeze after a dry coat so the batter clings, and maintain a steady oil temperature so the coating sets quickly without the interior losing its shape. The result is a timeless snack that disappears faster than you can say "pass the ranch." Whether served for a crowd or as a decadent weeknight treat, these bites are pure comfort and a true crowd-pleaser.
Why You'll Love This Recipe
- This recipe recreates that unmistakable state fair crunch while being easy enough for weeknights and scaled for entertaining.
- Ready in about 15 minutes of hands-on time and only a few minutes per batch to cook, making it fast to serve hot and fresh.
- Uses pantry staples like flour, baking powder, and club soda plus cheese curds — no specialty batter mixes required.
- Make-ahead friendly: the lightly floured curds can be frozen briefly to speed up frying and improve batter adhesion.
- Crowd-pleasing and adaptable for dietary swaps: use a gluten-free flour blend or flavored coating for variation.
- Perfect for dipping: pairs beautifully with ranch, spicy ketchup, or honey mustard for different flavor profiles.
In my experience, these bites turn any casual gathering into a celebration. Friends who claim they "aren't cheese people" always come back for seconds, and I've packed them into picnic boxes and tailgate trays with equal success. The technique is forgiving, so even novice cooks can achieve golden-brown results they can be proud of.
Ingredients
- Cheese curds (1 pound): Look for fresh white or yellow curds with a mild, milky flavor and a slight squeak. Local dairy stands often have the best texture; if unavailable, small cubed fresh mozzarella works in a pinch though the flavor will be different.
- All-purpose flour (1 cup): Provides a neutral base for the batter. I prefer King Arthur or a trusted brand for consistent results; reserve a little for dry-coating the curds before freezing.
- Baking powder (1 1/2 teaspoons): Adds lift and light crispness to the batter so the coating is airy and not greasy.
- Kosher salt (1/2 teaspoon): Enhances the curd flavor without overwhelming. Use coarse salt if that’s what you have and dissolve well in the batter.
- Club soda (1 cup): The carbonation lightens the batter and helps create a thin, crispy shell. Cold soda works best; do not overmix to keep bubbles intact.
- Vegetable oil: Neutral oil such as canola or sunflower for frying. Use enough to maintain a 3-inch deep fry bath in a heavy pot to ensure even cooking and correct browning.
Instructions
Bring curds to room temperature:Allow the cheese curds to sit out for about 15 to 20 minutes until they start to sweat lightly. Dry any moist surfaces with a paper towel. This reduces moisture on the surface so flour adheres better and prevents steaming during frying.Dry-coat and freeze:Place about two-thirds of the flour into a shallow bowl. Toss the curds gently so each piece is lightly coated. Spread the floured curds in a single layer on a baking sheet lined with parchment and freeze uncovered for 60 minutes. This step firms the curds and helps the wet batter cling during frying.Make the batter:Whisk the remaining flour together with the baking powder and kosher salt in a medium bowl. Gradually whisk in the club soda until the mixture is smooth and slightly bubbly. Keep the batter chilled until ready to use; a cold batter yields a crisper coating.Heat the oil:Pour vegetable oil into a heavy-bottomed pot to a depth of about 3 inches and heat to 360 degrees Fahrenheit. Use a candy or fry thermometer to monitor temperature. Maintain steady heat; if the oil gets too hot, the outside browns before the cheese warms; too cool and the coating absorbs oil.Fry the curds:Working in small batches, use a slotted spoon or skimmer to dip the frozen, floured curds into the batter, allowing excess to drip off. Carefully lower into the hot oil and fry for about 60 seconds, stirring gently after 30 seconds for even browning. Transfer to a paper towel-lined tray to drain. Serve immediately for the best melty center.Finish and serve:Season lightly with a pinch of flaky salt if desired and serve with dipping sauces. Fried curds are best warm out of the fryer when the contrast between the crisp exterior and warm interior is most pronounced.
You Must Know
- These are high in calcium and protein but are calorie-dense: roughly 211 calories per serving based on the nutrition breakdown. Enjoy in moderation as an occasional indulgence.
- Prep ahead: freeze the dry-coated curds for up to 2 hours before frying; do not freeze them for long term or the texture will suffer.
- Oil management: reserve a steady 360 degrees F for frying. Use a heavy pot and a reliable thermometer to avoid temperature swings.
- Leftovers: best reheated in a 375 degrees F oven for 6 to 8 minutes on a wire rack to regain some crispness; they will never be quite as perfect as freshly fried.
My favorite thing about this dish is how communal it becomes; people stand around the kitchen talking, passing sauces, and reaching for the next warm bite. I remember serving these at a neighborhood block party where even the most health-conscious guests abandoned their plates and lined up for more. It’s a simple pleasure with an immediate payoff.
Storage Tips
Fried curds are at their peak right after cooking. If you must store them, cool to room temperature then place in a single layer on a sheet pan and refrigerate for up to 24 hours. For longer storage, freeze the pre-fried, dry-coated curds for up to 1 month and fry straight from frozen for best texture. When reheating fried curds, avoid the microwave; use a 375 degrees F oven on a wire rack for 6 to 8 minutes to restore crispness. Use airtight containers for refrigeration and label with date to maintain food safety.
Ingredient Substitutions
If you can’t find cheese curds, small cubes of fresh mozzarella or a young cheddar with some moisture will work, though the texture and flavor will differ slightly. For a gluten-free option, substitute a 1-to-1 gluten-free all-purpose flour blend and verify that your baking powder is gluten-free. To lighten the crust, consider using a beer batter instead of club soda for a richer flavor, or swap vegetable oil for peanut oil for a higher smoke point and a slightly different flavor profile.
Serving Suggestions
Serve these bites hot with a trio of dipping sauces such as classic ranch, spicy ketchup (ketchup with a dash of hot sauce), and honey mustard. Garnish with chopped chives or parsley for color. They pair nicely with crisp, bright sides such as a simple slaw or pickled vegetables to cut the richness. For a game-night spread, include them alongside sliders, soft pretzels, and sliced sausages for a full state-fair inspired lineup.
Cultural Background
Fried cheese curds have strong Midwestern roots in the United States, particularly associated with state fairs and county festivals where deep-fried treats are a staple. Cheese curds themselves come from the early stage of cheesemaking; curds are the solid pieces that separate from the whey. In the Midwest, curds are celebrated for their fresh, squeaky texture and are often served simply. Frying elevates them into a carnival classic with universal appeal — combining rustic dairy traditions with indulgent frying techniques.
Seasonal Adaptations
For cooler months, serve the curds with a warming beer-cheddar fondue or a roasted tomato jam. In warmer weather, lighten the accompaniments with citrusy slaws, pickled red onions, or herbal chimichurri to balance the richness. Swap the batter to include a pinch of smoked paprika or cayenne in autumn for a smoky heat, or add lemon zest and fresh herbs in summer for brightness.
Meal Prep Tips
To streamline preparations for a party, dry-coat the curds and freeze them on a tray up to 2 hours before the event. Store the batter chilled and set up a frying station with the thermometer, skimmer, and a warm tray lined with paper towels. Fry in small batches to maintain oil temperature and transfer finished curds to a warming drawer or oven on low heat to keep them crisp until serving. This assembly-line approach keeps the process efficient and the food hot for guests.
These fried curds are a reminder that some of the most joyful recipes are the simplest. A little attention to temperature, a short freeze, and a hot oil bath yield bites that bring immediate smiles. Try them once and they will quickly become a requested favorite at your gatherings.
Pro Tips
Bring curds close to room temperature and pat dry so the flour adheres and prevents steam pockets.
Freeze the dry-coated curds for about 60 minutes; this helps the batter cling and keeps the interior from melting too quickly.
Maintain oil at 360 degrees F. Use a thermometer and fry in small batches to avoid temperature drops.
Use a slotted spoon or skimmer to remove excess batter before lowering curds into the oil to prevent large batter tails.
Serve immediately for the best contrast between a crisp exterior and a melty interior.
This nourishing crispy fried cheese curds recipe is sure to be a staple in your kitchen. Enjoy every moist, high protein slice — it is perfect for breakfast or as a wholesome snack any time.
Tags
Crispy Fried Cheese Curds
This Crispy Fried Cheese Curds recipe makes perfectly juicy, tender, and flavorful steak every time! Serve with potatoes and a side salad for an unforgettable dinner in under 30 minutes.
Ingredients
Main
Instructions
Bring curds to room temperature
Allow the cheese curds to sit at room temperature for 15 to 20 minutes until slightly sweating. Pat dry with paper towels to remove excess surface moisture so the flour adheres properly.
Dry-coat and freeze
Place about two-thirds of the flour in a shallow bowl. Toss curds gently until lightly coated. Arrange in a single layer on a parchment-lined baking sheet and freeze for 60 minutes to firm them up.
Prepare batter
Combine remaining flour, baking powder, and kosher salt in a bowl. Whisk in cold club soda until smooth and slightly bubbly. Keep the batter cold to maintain carbonation and crispness.
Heat oil
Pour vegetable oil into a heavy pot to a depth of about 3 inches and heat to 360 degrees F. Use a reliable thermometer and stabilize the temperature before frying.
Fry curds
Dip frozen, floured curds into the batter using a slotted spoon to let excess drip off. Fry in small batches for about 60 seconds, stirring gently after 30 seconds until golden brown. Drain on paper towels.
Serve hot
Season lightly with flaky salt if desired and serve immediately with dipping sauces. Fried curds are best enjoyed warm to preserve the contrast between the crunchy coating and melty center.
Last Step: Please leave a rating and comment letting us know how you liked this recipe! This helps our business to thrive and continue providing free, high-quality recipes for you.
Nutrition
Did You Make This?
Leave a comment & rating below or tag
@velvetyum on social media!
Categories:
You might also like...

Cheesy Zucchini Rollatini
Tender grilled zucchini rolled with a basil-kissed ricotta filling, nestled in marinara, and baked until the mozzarella bubbles and turns golden.

Crispy Zucchini and Squash
Golden, garlicky rounds with a deep-fried crunch made lighter in the air fryer. A fast, vitamin-packed side everyone devours.

Chicken Parmesan Meatballs
Tender chicken meatballs simmered in marinara, finished with melted mozzarella and basil for cozy, weeknight Italian comfort in every bite.
Did You Make This?
Leave a comment & rating below or tag @velvetyum on social media!
Rate This Recipe
Share This Recipe
Enjoyed this recipe? Share it with friends and family, and don't forget to leave a review!
Comments (1)
This recipe looks amazing! Can't wait to try it.
Comments are stored locally in your browser. Server comments are displayed alongside your local comments.

Hi, I'm Emma!
What's Popular

30-Minute Meals!
Join to receive our email series which contains a round-up of some of our quick and easy family favorite recipes.