
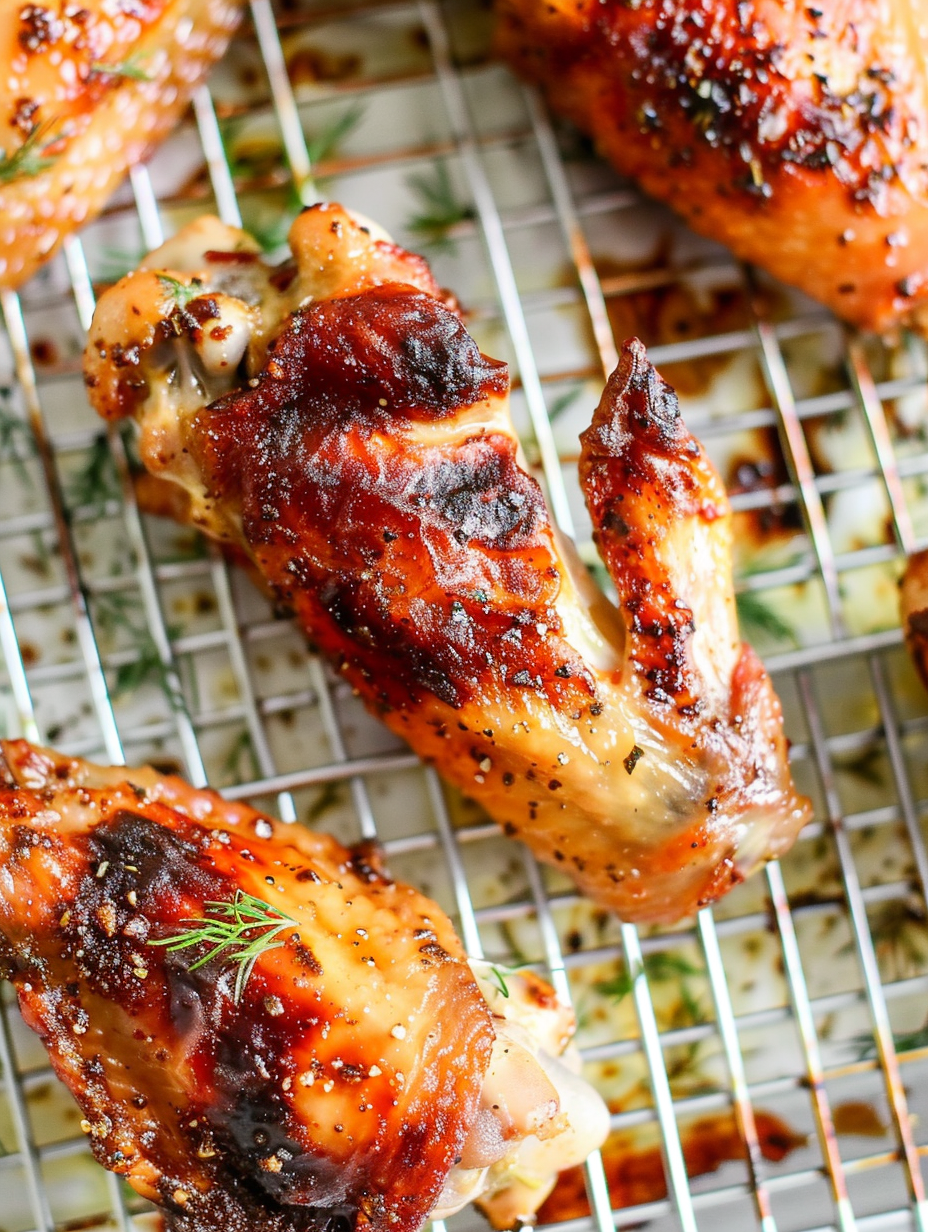
Dill Pickle Chicken Wings

Briny, tangy wings marinated in dill pickle juice, tossed in a crisping dry rub, and roasted until irresistibly crunchy — a bold appetizer that disappears fast.
Why You'll Love This Recipe
- Bold, briny flavor from soaking in dill pickle juice delivers a unique tang that complements the rich chicken; perfect for parties and weekend snacks.
- Quick active time: only about 10 minutes of hands-on prep, while a 2 to 4 hour soak does the marinating work for you — great for make-ahead convenience.
- Uses pantry staples like garlic powder, baking powder, and olive oil; no exotic ingredients required and pickles are inexpensive.
- Versatile finishing options: broil for char, air fry for extra crisp, or grill for smoky notes — cooks of any skill level can adapt easily.
- Crowd-pleasing appetizer that pairs well with cold beer or a crisp salad; the recipe scales simply when feeding a larger group.
- Gluten-free friendly when using gluten-free baking powder and condiments; naturally high in protein for a satisfying bite.
When I first served these, my neighbor — a notoriously picky eater — kept going back for thirds and declared them better than his favorite sports bar wings. My kids loved the crunchy bits and even asked for the leftover brine on the side for dipping carrot sticks. Over the years I've learned to trust the soak length and the final broil; those two steps make the dish reliably excellent every time.
Ingredients
- Chicken wings (2 lbs): Look for whole wings or separated flats and drumettes. Fresh or fully thawed frozen wings work; choose skin-on for best crisping. I prefer organic or pasture-raised wings when available for deeper flavor.
- Dill pickle juice (2 cups): Use juice from a jar of dill pickles or a commercial dill brine. Avoid sweet bread-and-butter pickles — the tang from a dill brine gives the right savory profile.
- Fresh chopped dill (1 teaspoon): Adds an herbaceous lift to the brine. If unavailable, use dried dill but reduce the quantity by half because dried herbs are more concentrated.
- Olive oil (1 tablespoon): A light coating helps the dry mix adhere and encourages even browning under high heat.
- Garlic powder (2 teaspoons): Provides savory depth without adding moisture. For a fresher garlic note, add 1/2 teaspoon granulated garlic or a pinch of garlic salt (reduce regular salt if using).
- Baking powder, aluminum-free (1 tablespoon): This is the secret to extra-crisp skin. Choose aluminum-free baking powder — do not use baking soda — as the wrong leavening agent alters flavor and color.
- Salt and freshly cracked black pepper (1/2 teaspoon each): Season simply; the brine imparts plenty of salt so use modest amounts and adjust after cooking if needed.
- Fresh or dried dill for garnish: Adds an aromatic finish and reinforces the pickle flavor when serving.
Instructions
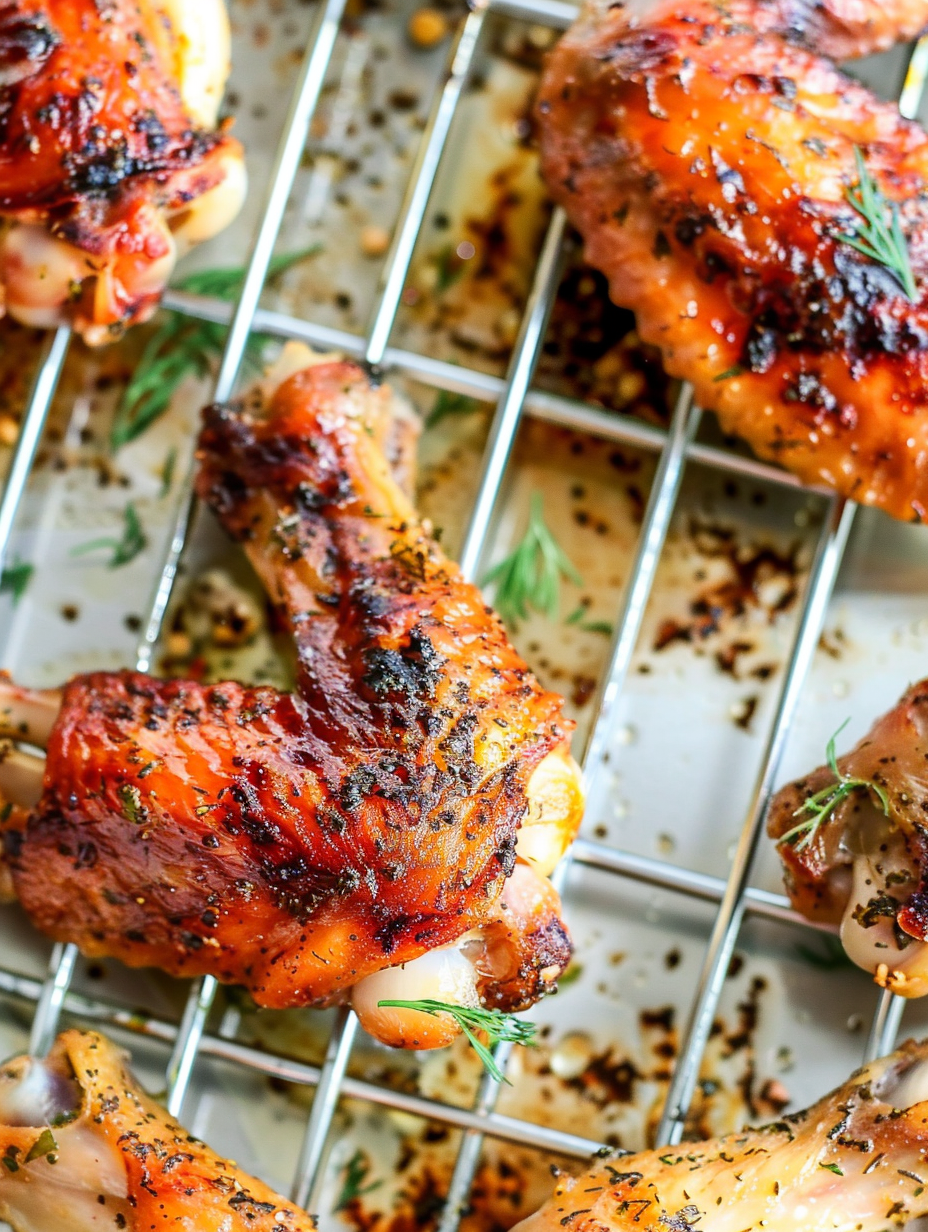
Brine the wings: Add 2 pounds of wings, 2 cups of dill pickle juice, and 1 teaspoon of freshly chopped dill to a large mixing bowl. Toss to coat, cover tightly, and refrigerate for 2 to 4 hours. This short brine brightens flavor and helps keep the meat juicy; avoid overnight soaks to prevent overly soft texture. Preheat and prepare: Set the oven to 425°F and arrange a wire rack on a rimmed sheet pan. Remove wings from the brine, drain and discard the liquid, then pat the wings thoroughly dry with paper towels. Dry skin is essential for crisping — moisture is the enemy of crunch. Season and toss: In a large bowl combine the dried wings with 1 tablespoon olive oil, 2 teaspoons garlic powder, 1 tablespoon aluminum-free baking powder, 1/2 teaspoon salt, and 1/2 teaspoon freshly cracked black pepper. Toss until evenly coated; the baking powder creates tiny bubbles in the skin during cooking that produce noticeable crispness. Arrange and roast: Arrange the wings in a single layer on the wire rack so air circulates underneath. Bake for 30 minutes at 425°F, flipping once halfway through with tongs. Look for bubbling skin and golden edges as visual cues that the skin is crisping properly. Broil for finish: Switch the oven to broil on high and broil for about 5 minutes, watching carefully so the wings char and crisp without burning. Remove when you see deep golden-brown color and charred tips for a restaurant-style finish. Check the internal temperature with a meat thermometer — it should read 165°F to ensure doneness. Serve: Transfer the wings to a platter and garnish with fresh dill. Serve immediately with dill pickle ranch, blue cheese dressing, or your favorite dipping sauce.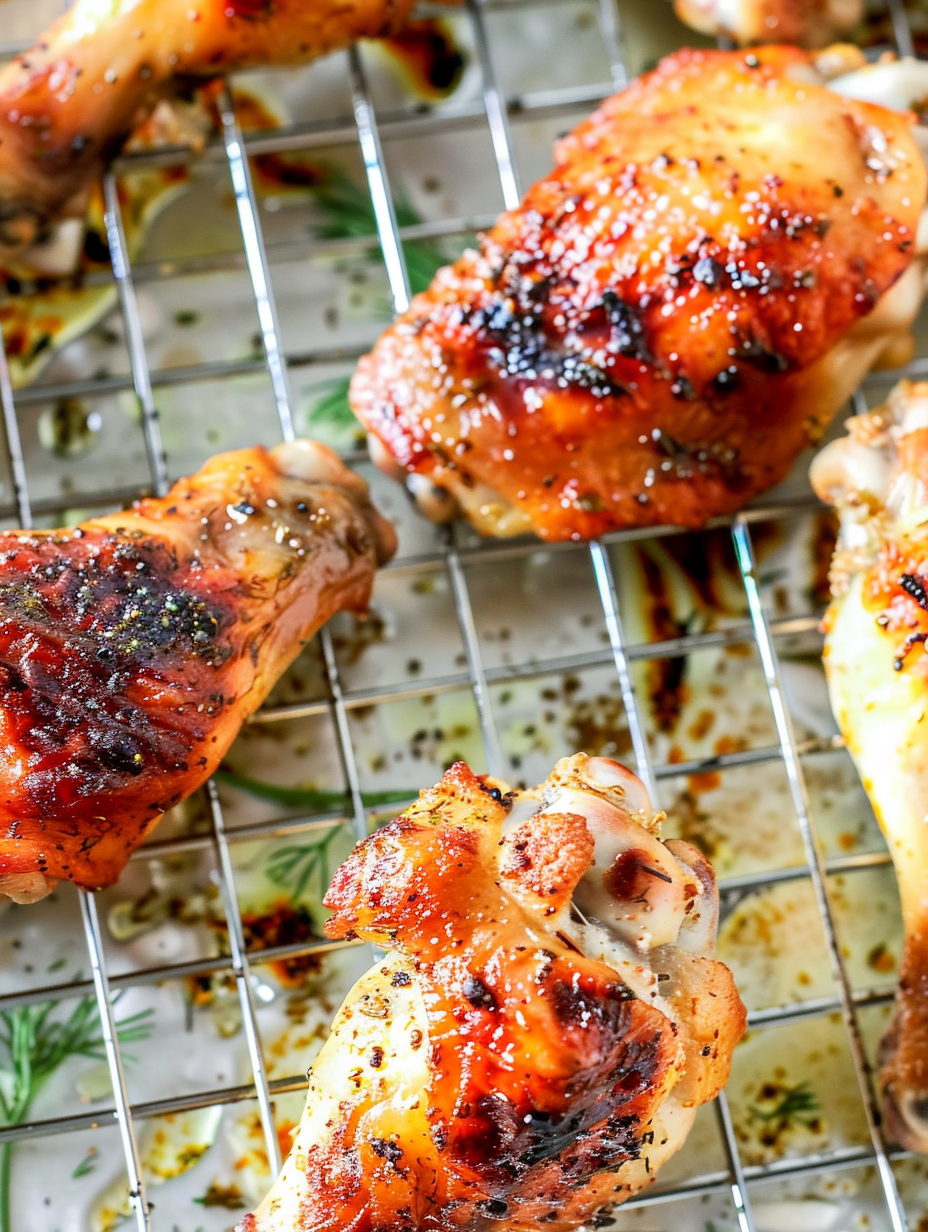
You Must Know
- These wings freeze well uncooked after the brine step for up to 3 months; thaw in the refrigerator before proceeding with the dry toss and bake.
- High sodium note: commercial pickle juice adds substantial salt. If you use salted wings or extra-salty pickles, reduce the added salt to prevent oversalting.
- Storage: refrigerate leftovers in an airtight container for up to 3 days; reheat on a rack at 400°F to refresh crispness.
- Nutrition highlight: one serving is rich and calorie-dense (about 880 kcal), so these are best enjoyed as an indulgent appetizer rather than a light main course.
My favorite part is the contrast between the bright, vinegary bite and the rich, crispy skin. At family BBQs these wings always vanish first; one neighbor told me they remind him of gourmet pub wings, and I love that — it means a simple technique and great ingredients can really elevate something familiar.
Storage Tips
Store cooled leftovers in an airtight container in the refrigerator for up to 3 days. For best texture, reheat on a wire rack set over a sheet pan at 400°F for 8 to 12 minutes until warmed through and the skin crisps again. Avoid microwaving, which will make the skin soggy. If freezing, flash-freeze the brined-and-dried wings in a single layer, then transfer to a freezer bag; cook from frozen by adding a few extra minutes to the bake time.
Ingredient Substitutions
If you don’t have dill pickle juice, mix 1 cup water with 1/3 cup distilled white vinegar and 2 tablespoons pickle brine seasoning (or 1 tablespoon kosher salt plus 1 teaspoon dill weed) as a quick substitute. For a spicier version, use spicy dill pickles or add 1/2 teaspoon cayenne to the dry mix. Swap the olive oil for avocado oil for a higher smoke point if you worry about browning under the broiler.
Serving Suggestions
Serve these wings with crisp celery sticks, sliced pickles, and a cold beer. For a party platter, add carrot sticks and a bowl of dill pickle ranch. They pair nicely with potato wedges, a crisp green salad, or corn on the cob in summer. Garnish with additional fresh dill and a squeeze of lemon if you want an extra bright finish.
Cultural Background
Pickle-brined proteins have roots in many traditions where vinegar and fermentation were used for preservation and flavor. The modern pickled wing trend grew out of American bar cuisine, where pickled accents and brined meats add acidity to cut through richness. This version is a simple, home-friendly take on that trend, emphasizing crisp textures and bold, tangy flavor.
Seasonal Adaptations
In winter, swap fresh dill for 1/2 teaspoon dried dill and add a pinch of smoked paprika for warmth. In summer, serve alongside a cucumber-dill salad and grilled corn. For the holidays, make a platter with multiple brine flavors — dill, spicy jalapeño, and garlic-herb — for variety and visual impact.
Meal Prep Tips
Prepare the brine and place wings in it the night before your event to save time. On the day of serving, drain, pat dry, toss with the dry mix, and bake. Alternatively, brine and freeze raw wings in single layers for quick future meals. Pack leftovers in individual portions for easy reheating at lunch or after-school snacks.
These wings are a simple way to add a gourmet twist to an ordinary gathering. With little hands-on time and big payoff, they’re a keeper — make a double batch next time so you won’t be tempted to hide the leftovers from guests.
Pro Tips
Pat wings very dry before tossing with the dry mix — any surface moisture prevents crisping.
Use a wire rack over the sheet pan so air circulates and skin crisps on all sides.
Watch closely during broiling; broilers vary and wings can go from perfect to burned in a minute.
Check internal temperature (165°F) with an instant-read thermometer for safe doneness.
This nourishing dill pickle chicken wings recipe is sure to be a staple in your kitchen. Enjoy every moist, high protein slice — it is perfect for breakfast or as a wholesome snack any time.
FAQs about Recipes
How long should I brine the wings?
Yes. Marinate the wings in the pickle juice for 2 to 4 hours. Longer than 4 hours can start to change the texture since the acid can tenderize too much.
Can I use baking soda instead of baking powder?
Use aluminum-free baking powder. Baking soda will create off flavors and prevent proper browning.
Tags
Dill Pickle Chicken Wings
This Dill Pickle Chicken Wings recipe makes perfectly juicy, tender, and flavorful steak every time! Serve with potatoes and a side salad for an unforgettable dinner in under 30 minutes.
Ingredients
Wings
Instructions
Brine the wings
Combine wings, 2 cups dill pickle juice, and 1 teaspoon fresh chopped dill in a large bowl. Toss to coat, cover, and refrigerate for 2 to 4 hours to impart tang and help retain moisture.
Preheat oven and dry
Preheat oven to 425°F. Drain and discard the pickle juice, then pat the wings thoroughly dry with paper towels to ensure the skin crisps during cooking.
Season with dry mix
In a large bowl, toss dried wings with 1 tablespoon olive oil, 2 teaspoons garlic powder, 1 tablespoon aluminum-free baking powder, 1/2 teaspoon salt, and 1/2 teaspoon black pepper until evenly coated.
Arrange and bake
Place wings in a single layer on a wire rack set over a sheet pan. Bake at 425°F for 30 minutes, flipping once halfway, until skin shows bubbling and golden areas.
Broil to finish
Turn the broiler to high and broil for about 5 minutes, watching closely until charred and crispy. Confirm internal temperature is 165°F before serving.
Serve and garnish
Transfer wings to a platter, garnish with fresh dill, and serve with dill pickle ranch or your preferred dip while hot.
Last Step: Please leave a rating and comment letting us know how you liked this recipe! This helps our business to thrive and continue providing free, high-quality recipes for you.
Nutrition
Did You Make This?
Leave a comment & rating below or tag
@velvetyum on social media!
Categories:
You might also like...

Cheesy Zucchini Rollatini
Tender grilled zucchini rolled with a basil-kissed ricotta filling, nestled in marinara, and baked until the mozzarella bubbles and turns golden.

Crispy Zucchini and Squash
Golden, garlicky rounds with a deep-fried crunch made lighter in the air fryer. A fast, vitamin-packed side everyone devours.

Chicken Parmesan Meatballs
Tender chicken meatballs simmered in marinara, finished with melted mozzarella and basil for cozy, weeknight Italian comfort in every bite.
Did You Make This?
Leave a comment & rating below or tag @velvetyum on social media!
Rate This Recipe
Share This Recipe
Enjoyed this recipe? Share it with friends and family, and don't forget to leave a review!
Comments (1)
This recipe looks amazing! Can't wait to try it.
Comments are stored locally in your browser. Server comments are displayed alongside your local comments.

Hi, I'm Emma!
What's Popular

30-Minute Meals!
Join to receive our email series which contains a round-up of some of our quick and easy family favorite recipes.