
>>

All the bold flavors of an Italian sub rolled into irresistible bite-sized pinwheels—perfect for parties, snack platters, and make-ahead appetizers.
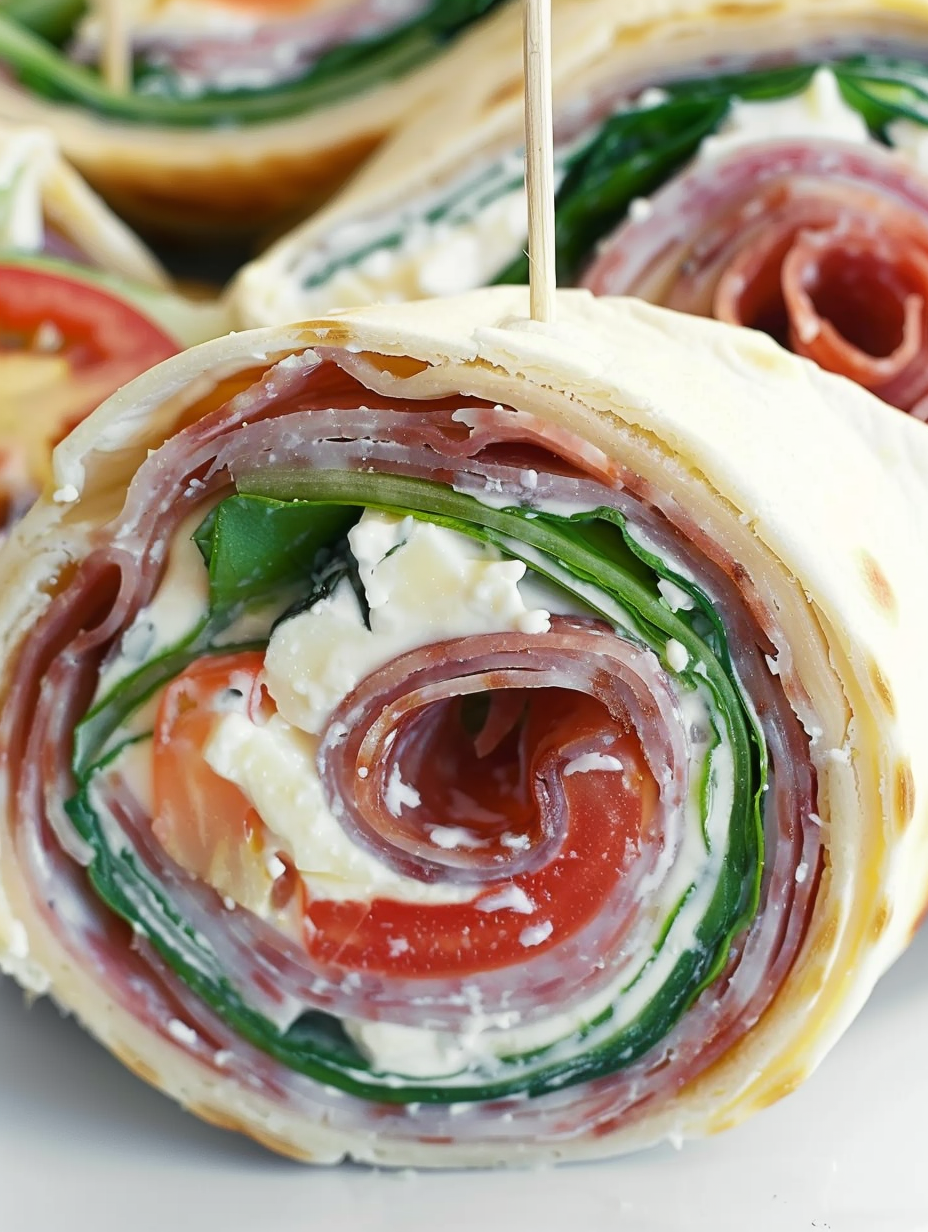
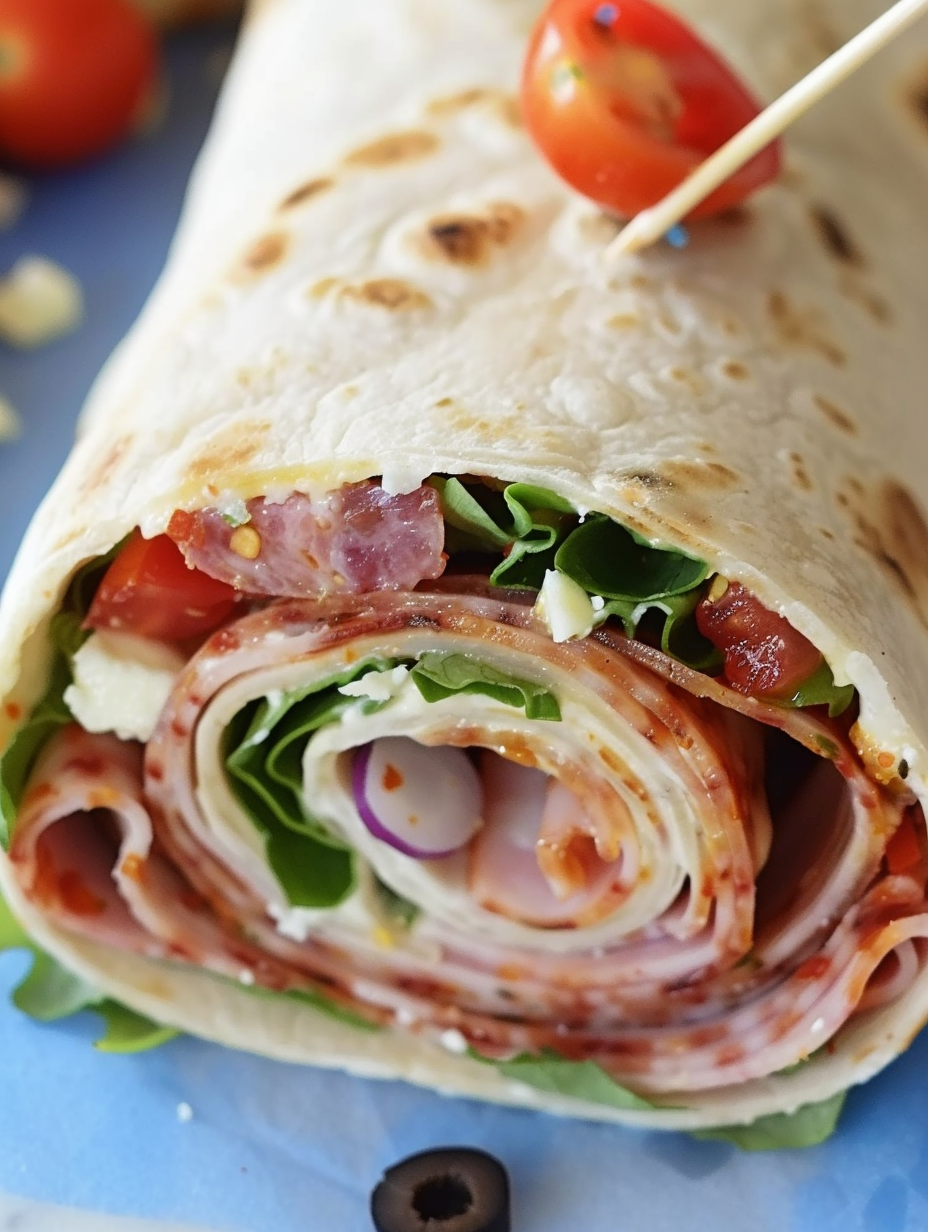
This appetizer brings the classic deli spirit of an Italian sub into a playful, party-friendly form. I first made these pinwheels on a hot July afternoon for a neighborhood potluck. I wanted something that captured the tang of banana peppers, the salt and spice of Genoa salami and pepperoni, and the creaminess of a seasoned cheese spread—without the fuss of slicing a sandwich tray. They disappeared in under 30 minutes, and every time I bring them now someone asks for the recipe. The textures are what make these special: a soft tortilla, a lush, herby cream cheese layer, thin layers of deli meat, and the pop of tomato and mixed greens. Each bite is both familiar and refreshingly compact.
What convinced me to keep this combination was how effortlessly these hold up when prepared ahead. The tortilla stays pliable when wrapped tight, while the cream cheese mix acts as a glue that keeps tomatoes from making the bread soggy if you remove some seeds and juice first. These have become my go-to for weekday entertaining because they travel well, appeal to most palates, and require only a handful of ingredients you likely already have. They scale smoothly: eight tortillas make about fifty pinwheels, and the technique is forgiving enough for beginner cooks.
Personally, the first time I made these I learned that removing excess tomato juice is the secret to avoiding a soggy roll-up. My kids loved identifying the layers when I sliced the rolls, and neighbors asked for seconds and the recipe. Over time I've refined the spread and portioning so every pinwheel stays neat and flavorful—the sort of little culinary problem solving that makes cooking at home satisfying.
My favorite part of this dish is how customizable it is—I've served it at holiday gatherings, summer picnics, and casual game nights. Friends often tell me they love the cream cheese base because it tastes indulgent without being heavy; replacing the dressing mix with fresh herbs works too if you prefer a fresher flavor. These pinwheels are a reliable crowd-pleaser that spark conversation and compliment a variety of beverages and sides.

Store pinwheels in an airtight container in the refrigerator for up to 48 hours. Place a layer of parchment or wax paper between layers to prevent sticking and keep edges intact. For travel, arrange them in a shallow, leakproof container with paper towels beneath to absorb any residual moisture. If preparing the spread and chopping vegetables ahead of time, keep components stored separately in sealed containers for up to two days and assemble within 24 hours for peak freshness. Avoid freezing sliced pinwheels—texture degrades—but uncut, tightly wrapped rolls can be frozen for up to one month and thawed in the fridge overnight before slicing.
Swap Provolone for mozzarella or Swiss for a milder or nuttier profile; use thin-sliced sharp provolone for more pronounced flavor. Replace Genoa salami and pepperoni with ham, capicola, or turkey pepperoni to reduce spice or pork content. For a lighter spread, try 8 ounces of neufchatel or half cream cheese and half ricotta—blend until smooth. If you need gluten-free, choose certified gluten-free tortillas; they can be slightly more fragile so warm briefly to increase pliability. To make vegetarian, omit meats and add roasted red peppers and marinated artichokes with extra olives for umami depth.
Arrange pinwheels on a large platter with small bowls of extra banana peppers, sliced olives, and a drizzle of balsamic glaze on the side. Pair with crisp vegetables like cucumber rounds, carrot sticks, and an antipasto salad. These are excellent with sparkling water, dry white wine, or a medium-bodied red such as Sangiovese. For casual events, include toothpick flags or small decorative picks to make grabbing easy. Garnish the platter with fresh basil leaves for color and a hint of freshness.
The flavor profile draws from classic Italian-American deli traditions—cured salamis, pepperoni, provolone, and olives are staples of Italian-American sandwiches. Pinwheels themselves are an Americanized hors d'oeuvre technique: flatten and roll flatbreads or tortillas with layered fillings, then slice into spirals for bite-sized servings. This format reflects the mid-20th century trend in party foods where presentation and convenience mattered; it modernizes the beloved sandwich into shareable forms that fit contemporary gatherings and grazing tables.
In summer, use ripe, in-season tomatoes and swap mixed greens for peppery arugula for freshness. During cooler months, swap fresh tomatoes for roasted cherry tomatoes or sun-dried tomatoes packed in oil for concentrated flavor. For holiday parties, incorporate a smear of fig jam under the cheese for a sweet-salty twist that pairs wonderfully with prosciutto. These small seasonal swaps keep the base technique the same while offering different tasting experiences throughout the year.
Make the cream cheese spread up to two days ahead—keep it chilled and bring to room temperature for 15 minutes before assembling. Chop the peppers, onions, and olives the day before and store in separate airtight containers. Layer meats and cheese on parchment in stacks inside the fridge so assembly is a quick assembly-line process. If you prep for a large crowd, assign one person to spread, one to layer meats, and another to roll and slice; the process becomes efficient and keeps pinwheels consistent in size.
These pinwheels are a simple, reliable answer when you want Italian deli flavors without the fuss of a sandwich platter. Share them warm with friends or pack them for a picnic—the recipe's flexibility makes it one of my most-used appetizer formulas. Make it yours by tweaking the fillings, and enjoy the proud moment when plates come back clean.
Soften cream cheese at room temperature for 20 to 30 minutes for easy mixing and smooth spreading.
Pat tomato slices dry and remove seeds to prevent excess moisture that leads to soggy pinwheels.
Chill rolled tortillas for at least 15 minutes before slicing to help maintain a clean spiral.
This nourishing italian sub pinwheel sandwiches recipe is sure to be a staple in your kitchen. Enjoy every moist, high protein slice — it is perfect for breakfast or as a wholesome snack any time.
Remove excess tomato seeds and juice to prevent soggy rolls; chill rolls before slicing to maintain shape.
Yes—assemble and wrap tightly, then freeze uncut rolls for up to 1 month. Thaw overnight in the fridge and slice before serving.
Recipe data validation failed
Please check the recipe data format. See console for details.

Tender grilled zucchini rolled with a basil-kissed ricotta filling, nestled in marinara, and baked until the mozzarella bubbles and turns golden.

Golden, garlicky rounds with a deep-fried crunch made lighter in the air fryer. A fast, vitamin-packed side everyone devours.

Tender chicken meatballs simmered in marinara, finished with melted mozzarella and basil for cozy, weeknight Italian comfort in every bite.
Leave a comment & rating below or tag @velvetyum on social media!
Enjoyed this recipe? Share it with friends and family, and don't forget to leave a review!
This recipe looks amazing! Can't wait to try it.
Comments are stored locally in your browser. Server comments are displayed alongside your local comments.

Join to receive our email series which contains a round-up of some of our quick and easy family favorite recipes.
