
>>

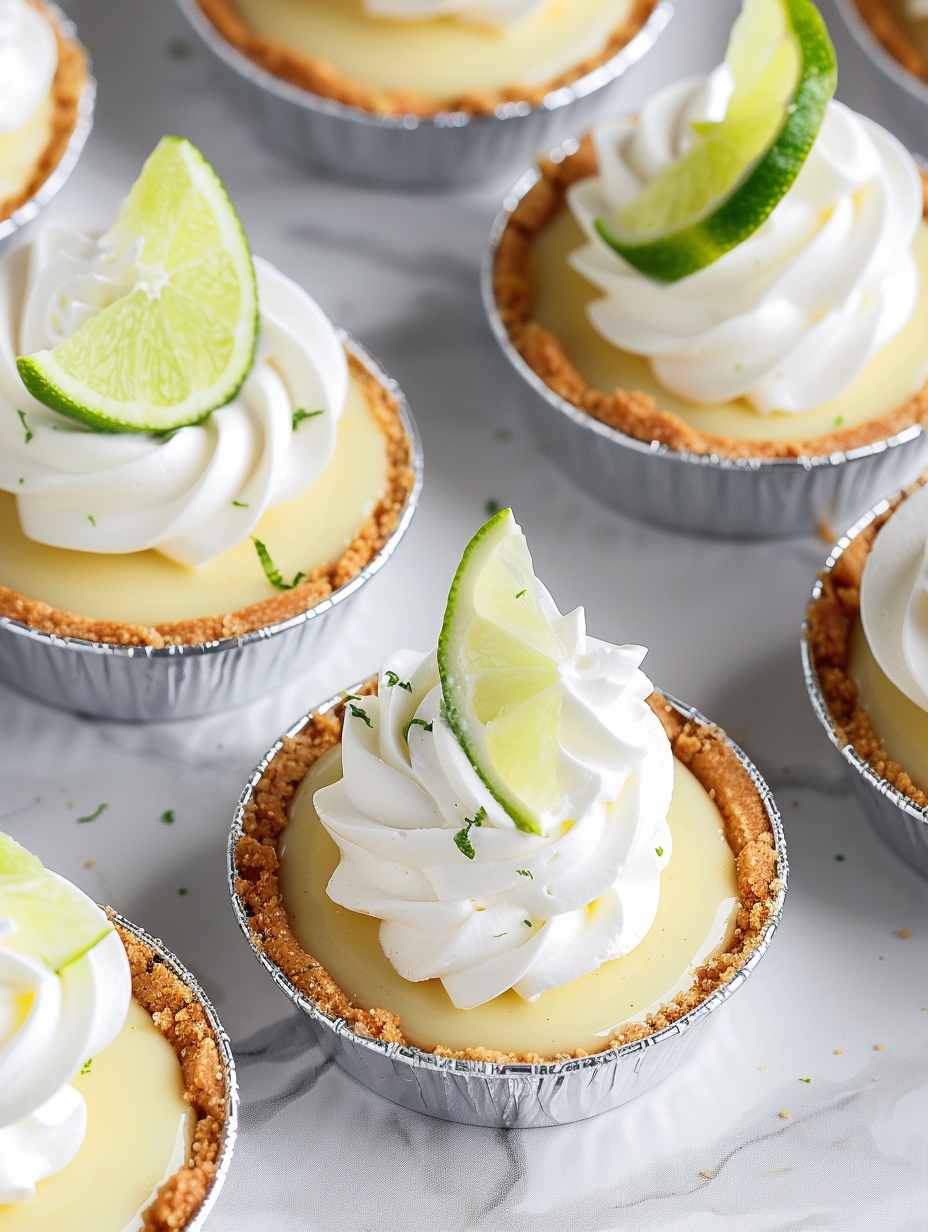
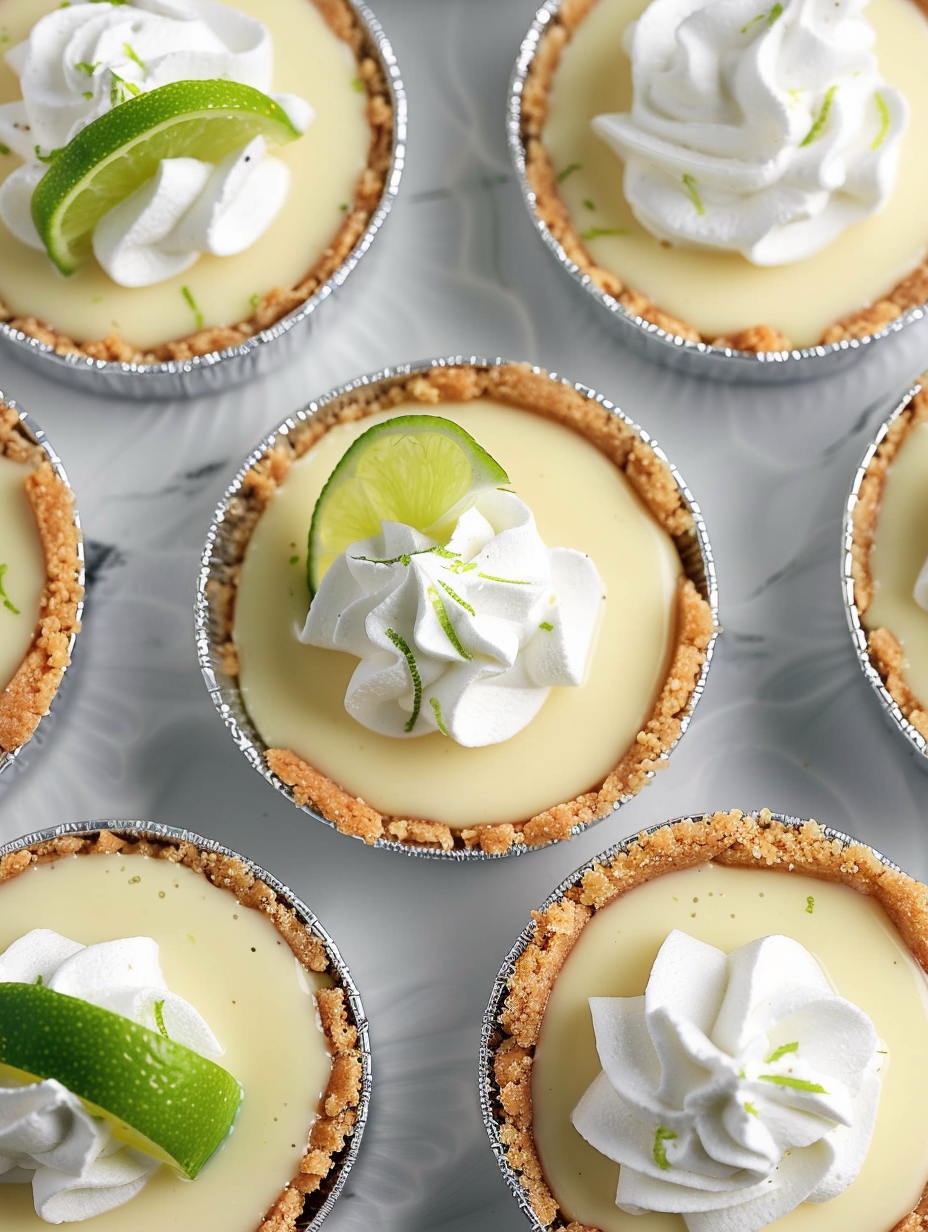
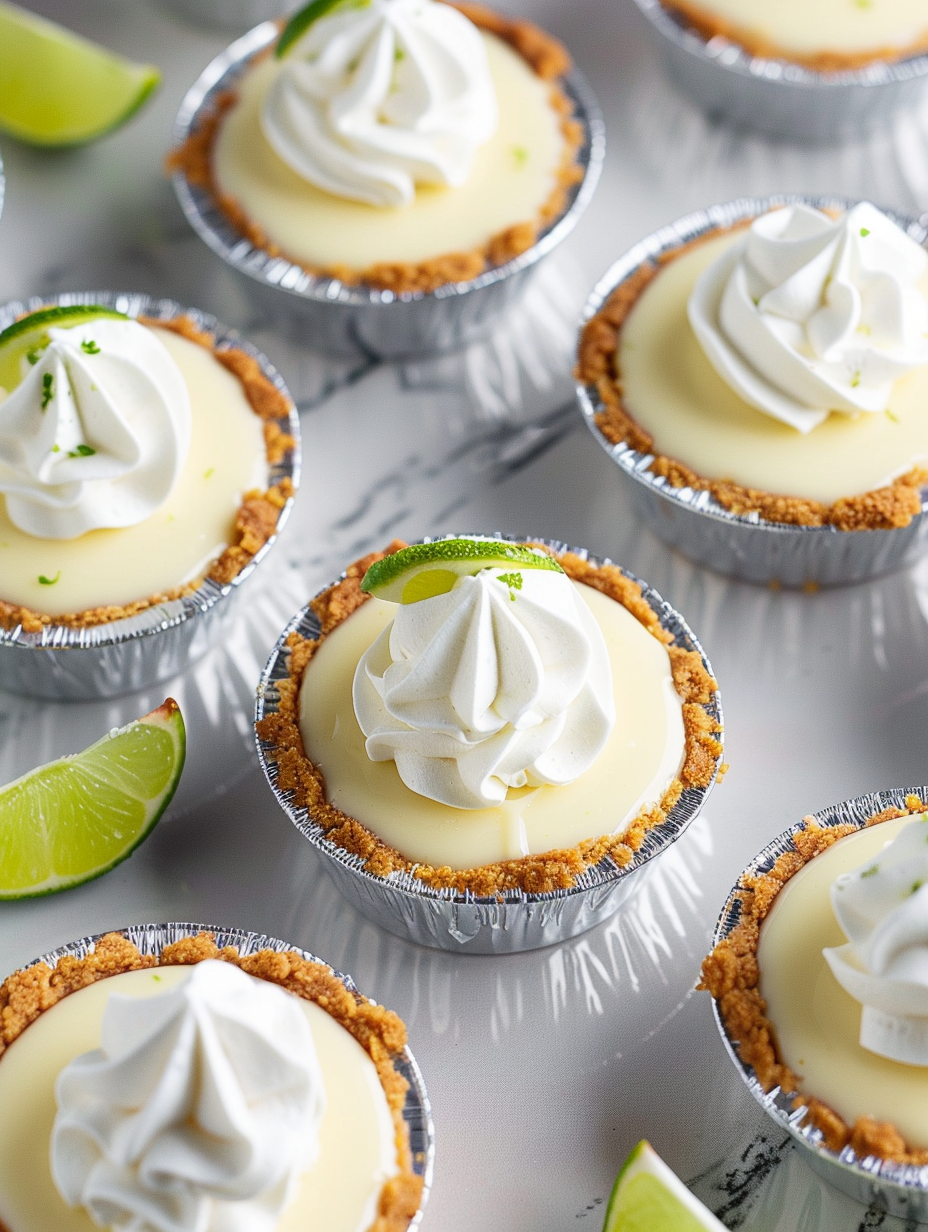
Tiny, tangy, and perfectly sweet—these Mini Key Lime Pies use store-bought graham cracker crusts and a silky lime filling for a breezy, crowd-pleasing dessert.
This recipe for Mini Key Lime Pies has been a summer favorite in my kitchen ever since I first tried a mini version at a neighborhood potluck. I wanted the same tart, silky filling of a classic Key lime pie but in a small, handheld format that guests could enjoy without needing a fork. I discovered this approach the first summer I hosted a backyard barbecue: I swapped a full pie for individual mini crusts, and they disappeared so quickly I began keeping frozen store-bought mini crusts on hand for last-minute gatherings.
What makes these little pies special is the balance of sharp citrus against the sweet, creamy condensed milk base—the texture is velvety with a slight jiggle straight out of the oven that sets into a smooth custard after chilling. The graham cracker shell gives a toasty, buttery crunch that pairs beautifully with the bright lime flavor. Whether you make them for a holiday, a summer picnic, or simply to satisfy a citrus craving, these minis are as charming as they are simple to prepare.
From my experience, these mini pies are consistently the first dessert to go at gatherings. Friends comment on the bright lime punch and the velvety mouthfeel; my kids adore the whipped cream topping. The convenience of Keebler mini foil crusts means I can match dessert scale to guest list—big party, lots of minis; small dinner, a dozen for dessert plates.
What I love most about this recipe is how reliably it brings bright summer memories to the table. My family always requests these minis at summer dinners, especially when we’re short on oven space but need a dessert that feels celebratory. The contrast between the crunchy crust and the cool, tangy filling never gets old.
Keep assembled pies refrigerated in a single layer inside an airtight container. If stacking is necessary, place parchment between layers to protect the whipped cream. Chilled minis will keep for about 3 to 4 days; beyond that the crust becomes noticeably softer. For longer storage, freeze unadorned pies on a baking sheet until solid, then transfer to a zip-top freezer bag for up to 3 months. Thaw in the refrigerator overnight and top with freshly whipped cream before serving to retain the best texture.
If you can’t find Key lime juice, substitute high-quality bottled lime juice or a 50/50 mix of fresh lime and bottled lime juice for consistency. For a lighter version, use half-and-half in place of heavy cream in the whipped topping (it won’t whip as stiffly, so opt for soft peaks). To make gluten-free minis, swap the graham crusts for gluten-free cookie crusts—note that flavor and texture will vary, with gluten-free shells sometimes being crumblier.
Serve chilled on a dessert platter with a dusting of powdered sugar or a thin lime wheel for color. These mini pies pair beautifully with a cup of strong coffee or iced tea; for a grown-up pairing, try a fizzy Prosecco or light rum punch. Garnish ideas include toasted coconut flakes, finely zested lime twist, or a small mint sprig. They’re ideal for bridal showers, potlucks, or plated desserts at dinner parties when you want to offer variety without slicing a large pie.
Key lime pie is a classic American dessert with roots in Florida, where Key limes were historically abundant. The traditional filling uses condensed milk and citrus—an elegant solution from the era before widespread refrigeration, when canned dairy provided a reliable source of sweetness and body. Miniaturizing the pie is an American party-friendly adaptation: individual portions make serving easy and reflect modern entertaining preferences for small-bite desserts and visually appealing platters.
In summer, amplify the citrus by adding a small spoonful of fresh lime zest to the filling for extra aroma. For winter, offer a garnish of candied ginger or a sprinkle of crushed graham crumbs toasted with a pinch of cinnamon to bring warmer notes. During holidays, top with a tiny sugared cranberry or edible flower to make the minis feel festive. The recipe adapts well—just avoid heavy-handed flavor changes that would overwhelm the lime’s brightness.
For efficient meal prep, bake and chill the filling in the crusts a day ahead and store in the refrigerator. Prepare the whipped cream the morning you plan to serve and keep it chilled until use—this preserves its volume. Transport chilled minis in a shallow cooler with ice packs for outdoor events; keep them covered and avoid stacking. For large events, bake several trays and chill them on baking sheets before loading into containers for quick plating.
These Mini Key Lime Pies are a small, joyful treat that make any gathering feel a little more special. They’re approachable for bakers of all skill levels, yet impressive in presentation and taste—give them a try and make them your own with seasonal garnishes and little personal touches.
Slowly add the lime juice to the condensed milk and eggs on low speed to prevent curdling and keep the filling silky.
Chill your mixing bowl and beaters for the whipped cream to achieve faster, more stable peaks.
Avoid browning the filling; it should remain pale with a slight jiggle when removed from the oven.
This nourishing mini key lime pies recipe is sure to be a staple in your kitchen. Enjoy every moist, high protein slice — it is perfect for breakfast or as a wholesome snack any time.
Yes—if you can't find Key lime juice, use high-quality bottled lime juice or freshly squeezed limes; bottled Nellie & Joe's offers consistent flavor.
Freeze unadorned pies on a baking sheet, then transfer to a freezer-safe bag for up to 3 months. Thaw in the fridge and add whipped cream before serving.
This Mini Key Lime Pies recipe makes perfectly juicy, tender, and flavorful steak every time! Serve with potatoes and a side salad for an unforgettable dinner in under 30 minutes.
Preheat the oven to 350 degrees F and position the rack in the center for even baking.
Gently whisk 2 large eggs with 21 ounces of sweetened condensed milk until smooth using a hand mixer on low to avoid excess air.
With the mixer running on low, slowly pour in 8 ounces of Key lime juice until fully incorporated and the filling is pale and glossy.
Place 12 mini graham crusts on a baking sheet and pour the filling into each, leaving a small gap at the rim to prevent overflow.
Bake at 350 degrees F for 8 to 10 minutes; remove when centers are still slightly wobbly and surfaces remain pale—do not brown.
Cool completely on a rack, then refrigerate for 2 to 3 hours or overnight until the filling is firm and cold.
Chill bowl and beaters, then whip 1 cup heavy cream with 3–4 tablespoons powdered sugar and 1 teaspoon vanilla to desired peaks.
Pipe or dollop whipped cream onto each chilled mini pie and garnish with a thin lime slice before serving.
Last Step: Please leave a rating and comment letting us know how you liked this recipe! This helps our business to thrive and continue providing free, high-quality recipes for you.
Leave a comment & rating below or tag
@velvetyum on social media!

Tender grilled zucchini rolled with a basil-kissed ricotta filling, nestled in marinara, and baked until the mozzarella bubbles and turns golden.

Golden, garlicky rounds with a deep-fried crunch made lighter in the air fryer. A fast, vitamin-packed side everyone devours.

Tender chicken meatballs simmered in marinara, finished with melted mozzarella and basil for cozy, weeknight Italian comfort in every bite.
Leave a comment & rating below or tag @velvetyum on social media!
Enjoyed this recipe? Share it with friends and family, and don't forget to leave a review!
This recipe looks amazing! Can't wait to try it.
Comments are stored locally in your browser. Server comments are displayed alongside your local comments.

Join to receive our email series which contains a round-up of some of our quick and easy family favorite recipes.
