
No-Bake Brownie Truffles

Thick, moist, fudge-like brownie truffles made with minimal ingredients and no baking. Creamy, chocolatey, and perfect for gifting or last-minute dessert cravings.
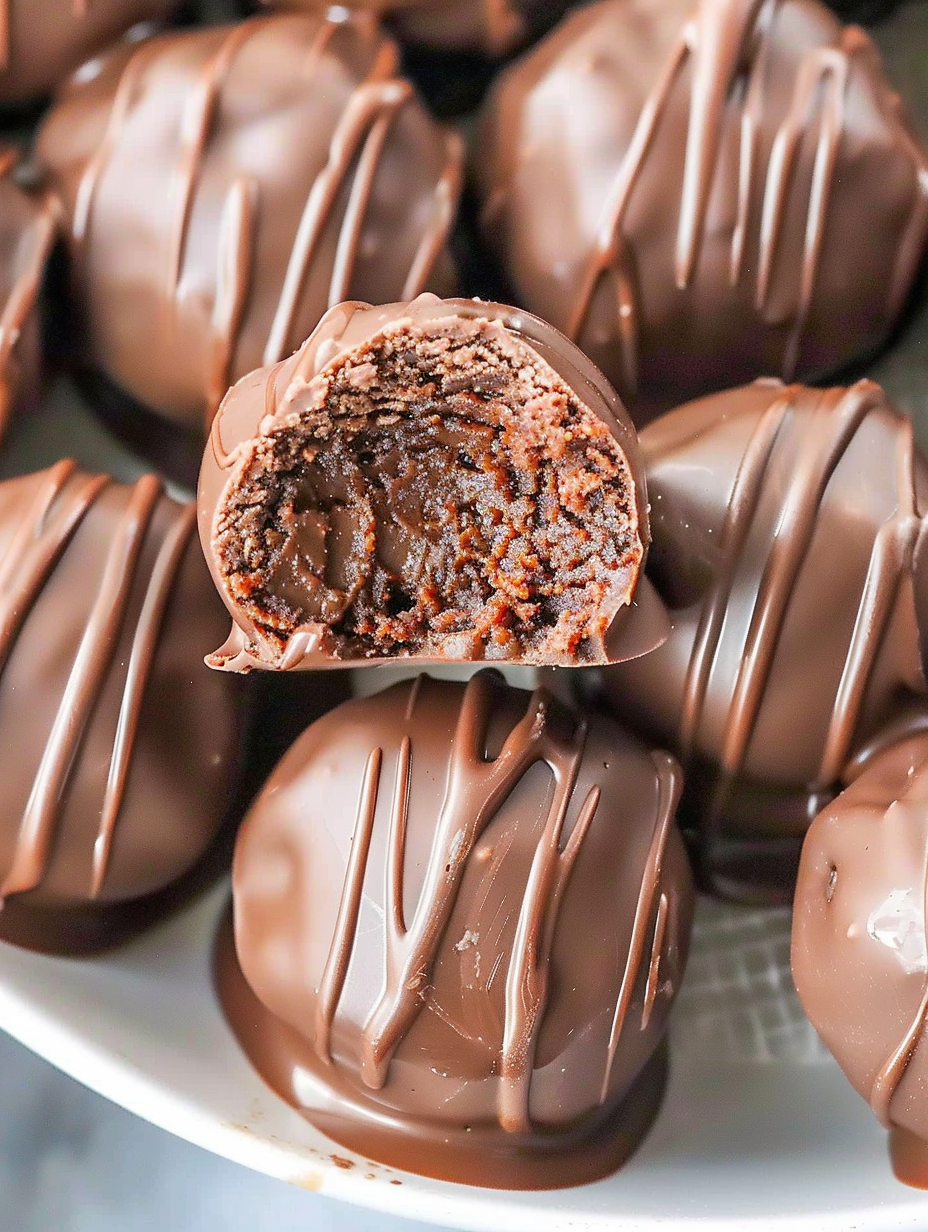
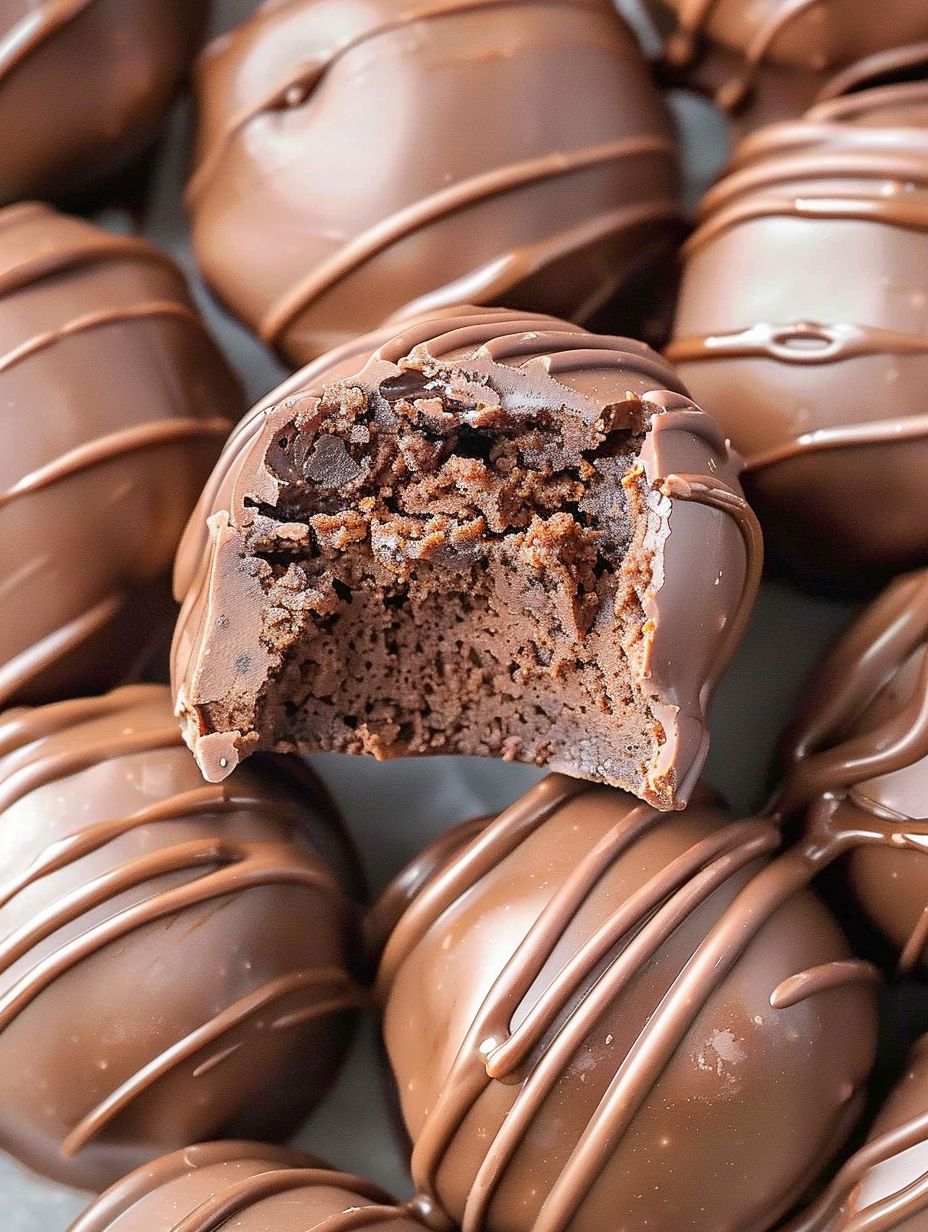
This recipe for brownie truffles has been my go-to when I want indulgence without an oven. I first discovered the idea one rainy afternoon while cleaning out the pantry and realizing I had a box of brownie mix and a block of cream cheese. The combination produced a dense, fudgy filling with a true brownie batter flavor, but in bite-sized form. They are thick and moist, melting on the tongue with a rich chocolate finish, and the cream cheese brings a subtle tang that keeps each bite from feeling too sweet.
I love making these for simple gatherings because they require very little hands-on time and no baking. The texture is soft and slightly chewy in the center, with a crisp chocolate shell if you allow the coating to set firmly. This batch became a holiday staple after I wrapped a dozen in parchment and tied them with baker's twine. Friends kept asking for the recipe, so I refined my method for a smooth coating and tidy drizzle. They travel well and the flavor is familiar enough to please a crowd yet special enough to feel homemade.
Why You'll Love This Recipe
- Ready with just a few pantry items and no baking required, these bites take minimal active time and are ideal for quick hosting.
- The texture is intensely fudgy, thanks to the cream cheese which creates a velvet filling that mimics homemade batter.
- Coating in melted wafers produces a glossy finish that sets quickly in the refrigerator, making assembly easy.
- Make-ahead friendly: they firm up in the fridge and are perfect for gifting or prepping the day before an event.
- Customizable: use flavored wafers, add nuts, or change the drizzle to white chocolate for contrast.
- Minimal equipment and beginner friendly, a great recipe to involve kids for scooping and dipping.
Personally, these truffles became my answer to last-minute company. I once made a double batch when neighbors popped by, and the simple presentation made them look upscale despite the tiny ingredient list. Every time I serve them, the chocolate shell crackles pleasantly when bitten and the inside remains dense and luxurious, which always prompts requests for the recipe.
Ingredients
- Fudge brownie mix, 18.3 ounces: Use a quality brand you enjoy eating straight from the box. Heat treat the dry mix first if your brand contains raw flour, following package safety tips. It provides the concentrated cocoa and texture.
- Cream cheese, 8 ounces: One standard block, softened to room temperature. Full fat yields the creamiest texture and best mouthfeel; avoid low fat if you want the fudgy consistency.
- Vanilla extract, 1 teaspoon: Adds a rounded background flavor and lifts the chocolate notes. Use pure vanilla if available for deeper aroma.
- Chocolate melting wafers, 1.5 cups plus 1/4 cup reserved: Choose high quality wafers or candy melts. Reserve some for a decorative drizzle. These melt smoothly and set with a firm shell.
- Vegetable shortening, 1 tablespoon: A small amount keeps the coating silky and glossy and prevents seizing. Crisco or another neutral shortening works well.
Instructions
Prepare the workspace: Line a large cookie sheet with parchment paper and have a medium mixing bowl ready. Chilling space in the refrigerator should be cleared to accommodate the sheet. Clean, dry hands and a 1.5 inch scoop will speed assembly. Make the filling: In the mixing bowl, combine the heat treated brownie mix, softened cream cheese, and vanilla. Use a hand mixer on low speed or a sturdy spatula. Mix until the texture becomes uniform and dough-like with no streaks of cream cheese. The mixture should hold its shape when scooped and be slightly tacky. Scoop and shape: Using a 1.5 inch cookie scoop or two spoons, portion the mixture and roll between your palms into smooth balls about 1 to 1.5 inches across. If the mixture sticks, lightly dust your palms with cocoa powder or chill the mixture briefly. Place each ball on the parchment and refrigerate for one hour to firm up so they are easy to dip. Melt the coating: Five to ten minutes before the chill ends, prepare a double boiler. Place 1.25 cups of the melting wafers in a heatproof bowl above a pot of barely simmering water. Stir frequently until melted. Add 1 tablespoon shortening and stir until silky and smooth. Remove from heat and keep warm over the pot with the heat off. Dip the truffles: Use two forks or dipping tools to lower a chilled ball into the melted chocolate, turning gently to coat completely. Lift and tap the fork against the bowl to remove excess coating. Return each coated truffle to parchment. Work quickly but carefully to prevent the filling from softening too much. Chill and drizzle: Refrigerate the coated truffles for 30 minutes until set. Melt the reserved 1/4 cup wafers with a tiny amount of shortening to thin, transfer to a small piping bag or zip-top bag with a tiny corner snipped, and drizzle decorative lines over each truffle. Chill an additional 30 minutes until fully firm.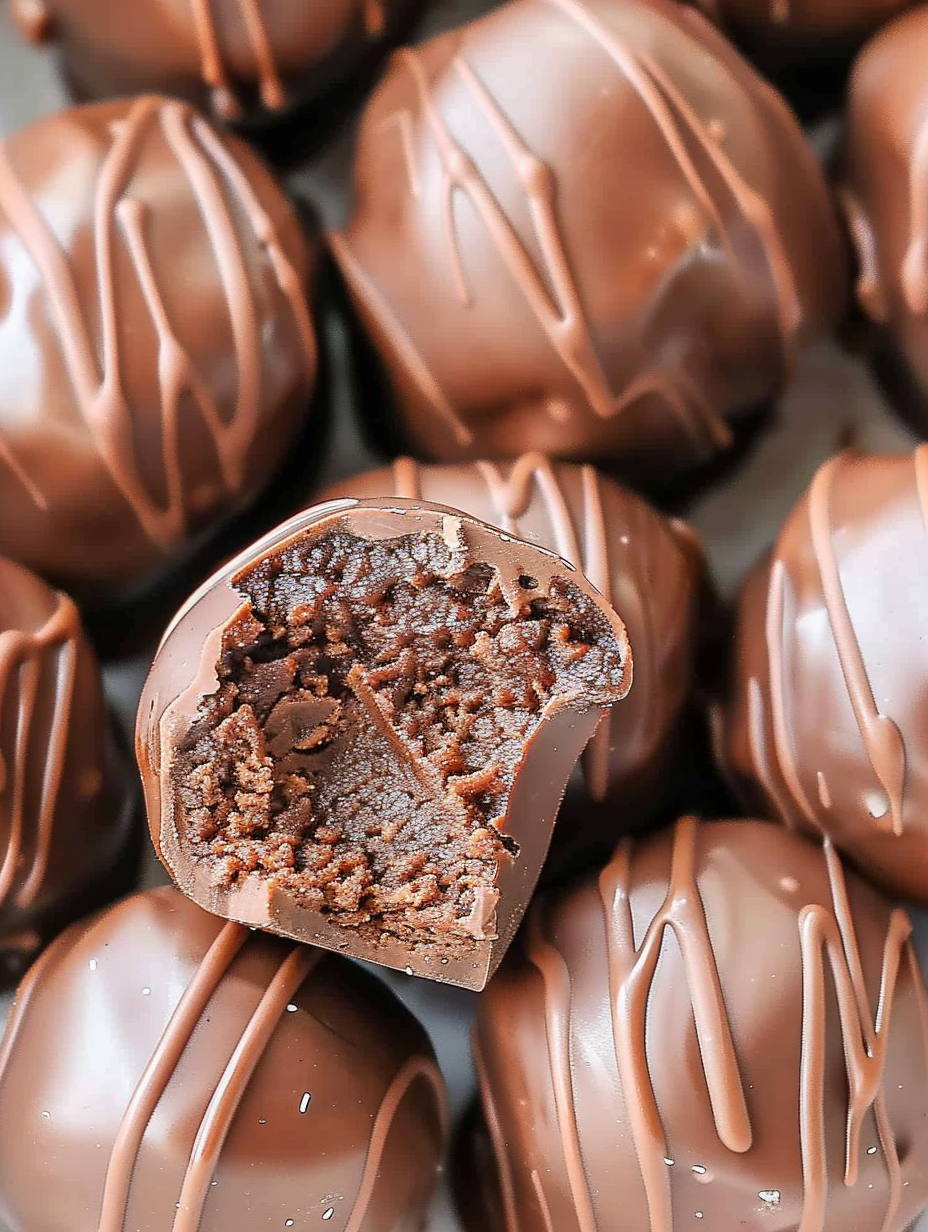
You Must Know
- The truffles will keep in the refrigerator for up to two weeks when stored in an airtight container layered with parchment.
- They freeze well for up to three months; thaw overnight in the refrigerator to avoid condensation on the coating.
- Because these are made with boxed mix, note that some mixes contain raw flour; heat treat the mix by spreading on a baking sheet and baking briefly at 350 degrees Fahrenheit for five minutes.
- The texture is dense and rich, so a small portion per person is satisfying. They are high in calories due to chocolate and cream cheese, making them a special treat.
My favorite part is how quickly a simple pantry remix becomes an elegant dessert. The first time I made these for a potluck, people assumed I had baked and dipped dozens of truffles; they were surprised that a single bowl and a little chilling produced such a polished result. The cream cheese addition makes the center feel like a cross between fudge and mousse which is addictive.
Storage Tips
Store the truffles in a single layer or with parchment between layers inside an airtight container in the refrigerator. At room temperature they may soften within an hour depending on your home temperature. For longer storage, freeze in a shallow container with parchment between layers. To serve from frozen, move them to the refrigerator overnight, then sit at room temperature for 15 minutes before serving for best flavor and texture. Avoid excess humidity to keep the coating glossy and prevent bloom.
Ingredient Substitutions
Swap the melting wafers for chopped couverture chocolate for a richer flavor, though you may need to add more shortening or a teaspoon of oil to obtain the same coating fluidity. For a dairy-free option, use dairy-free cream cheese and vegan wafers, keeping in mind the texture will be slightly different and sometimes looser. Gluten free brownie mix can replace the boxed mix to make them gluten free. Flavor additions like a tablespoon of espresso powder in the filling or a teaspoon of orange extract can elevate the profile.
Serving Suggestions
Plate these on a slate board with a sprinkle of flaky sea salt or finely chopped toasted pecans for contrast. They pair beautifully with strong coffee, espresso, or a glass of milk. For gifting, place small paper cups in a box and tie with ribbon. For a dessert platter, add assorted berries and plain cookies to offset the richness. Serving chilled gives the firmest bite while slightly warmed truffles are silkier inside.
Cultural Background
The concept of transforming cake or brownie crumbs into truffles is a modern adaptation inspired by classic European chocolate truffles. Instead of ganache, boxed mix or crumbs combine with moistening agents to create a convenient filling. These Americanized, no-bake versions emphasize ease and accessibility, using pantry staples to recreate the indulgent texture of traditional truffles without a pastry kitchen. The method reflects a trend toward simplified, giftable confections.
Seasonal Adaptations
For holidays, fold in a teaspoon of peppermint extract and top with crushed candy cane. In summer, swap the drizzle to white chocolate and scatter toasted coconut. Autumn calls for a pinch of ground cinnamon and a drizzle of salted caramel. Because the base is forgiving, spices and flavored extracts can transform the truffle for seasonal occasions while keeping the same assembly technique.
Meal Prep Tips
To prepare in advance, complete the dough and roll balls, then freeze them on a tray until firm. Once frozen, transfer to a freezer bag. When ready, dip straight from frozen, adding a minute or two longer in the refrigerator to set. Use a kitchen scale to portion uniformly if you want perfect presentation. When dipping many truffles, keep the melted chocolate gently warmed over barely simmering water to maintain fluidity.
These brownie truffles are proof that a few thoughtful steps and simple ingredients can deliver a dessert that looks and tastes like a labor of love. Make them your own with a drizzle, a sprinkle, or a flavored wafer, and enjoy sharing them with friends and family.
Pro Tips
Soften cream cheese to room temperature for a smooth, lump-free filling.
Chill the shaped balls before dipping so they do not collapse in the coating.
Use a small amount of vegetable shortening in melted wafers to achieve a glossy, stable shell.
If the coating thickens, warm gently over the double boiler; avoid water contact with the chocolate.
This nourishing no-bake brownie truffles recipe is sure to be a staple in your kitchen. Enjoy every moist, high protein slice — it is perfect for breakfast or as a wholesome snack any time.
FAQs about Recipes
Do I need to heat treat boxed brownie mix?
Yes. Heat treat the dry brownie mix by spreading it on a baking sheet and baking at 350 degrees Fahrenheit for five minutes to make raw flour safe to eat.
How long do the truffles keep?
Store in the refrigerator for up to two weeks in an airtight container, or freeze for up to three months.
Tags
No-Bake Brownie Truffles
This No-Bake Brownie Truffles recipe makes perfectly juicy, tender, and flavorful steak every time! Serve with potatoes and a side salad for an unforgettable dinner in under 30 minutes.
Instructions
Prepare the sheet
Line a large cookie sheet with parchment paper and clear refrigerator space. Have your scoop, bowls, and tools ready for a smooth workflow.
Combine filling ingredients
In a medium bowl, mix the heat treated brownie mix, softened cream cheese, and vanilla extract until the mixture forms a uniform, dough-like consistency with no streaks.
Shape the balls
Use a 1.5 inch scoop to portion and roll into smooth balls with your palms. Place on the parchment and chill in the refrigerator for one hour to firm.
Melt coating
Set up a double boiler and melt 1.25 cups of wafers, stirring frequently. Add one tablespoon shortening and stir until smooth and glossy. Remove from heat but keep warm.
Dip truffles
Using two forks or dipping tools, fully coat each chilled ball in the melted wafers. Tap off excess and return to parchment. Work quickly to keep centers firm.
Chill and decorate
Refrigerate coated truffles for 30 minutes. Melt reserved wafers with a little shortening and drizzle decorative lines over each truffle. Chill an additional 30 minutes before serving.
Last Step: Please leave a rating and comment letting us know how you liked this recipe! This helps our business to thrive and continue providing free, high-quality recipes for you.
Nutrition
Did You Make This?
Leave a comment & rating below or tag
@velvetyum on social media!
Categories:
You might also like...

Cheesy Zucchini Rollatini
Tender grilled zucchini rolled with a basil-kissed ricotta filling, nestled in marinara, and baked until the mozzarella bubbles and turns golden.

Crispy Zucchini and Squash
Golden, garlicky rounds with a deep-fried crunch made lighter in the air fryer. A fast, vitamin-packed side everyone devours.

Chicken Parmesan Meatballs
Tender chicken meatballs simmered in marinara, finished with melted mozzarella and basil for cozy, weeknight Italian comfort in every bite.
Did You Make This?
Leave a comment & rating below or tag @velvetyum on social media!
Rate This Recipe
Share This Recipe
Enjoyed this recipe? Share it with friends and family, and don't forget to leave a review!
Comments (1)
This recipe looks amazing! Can't wait to try it.
Comments are stored locally in your browser. Server comments are displayed alongside your local comments.

Hi, I'm Emma!
What's Popular

30-Minute Meals!
Join to receive our email series which contains a round-up of some of our quick and easy family favorite recipes.