
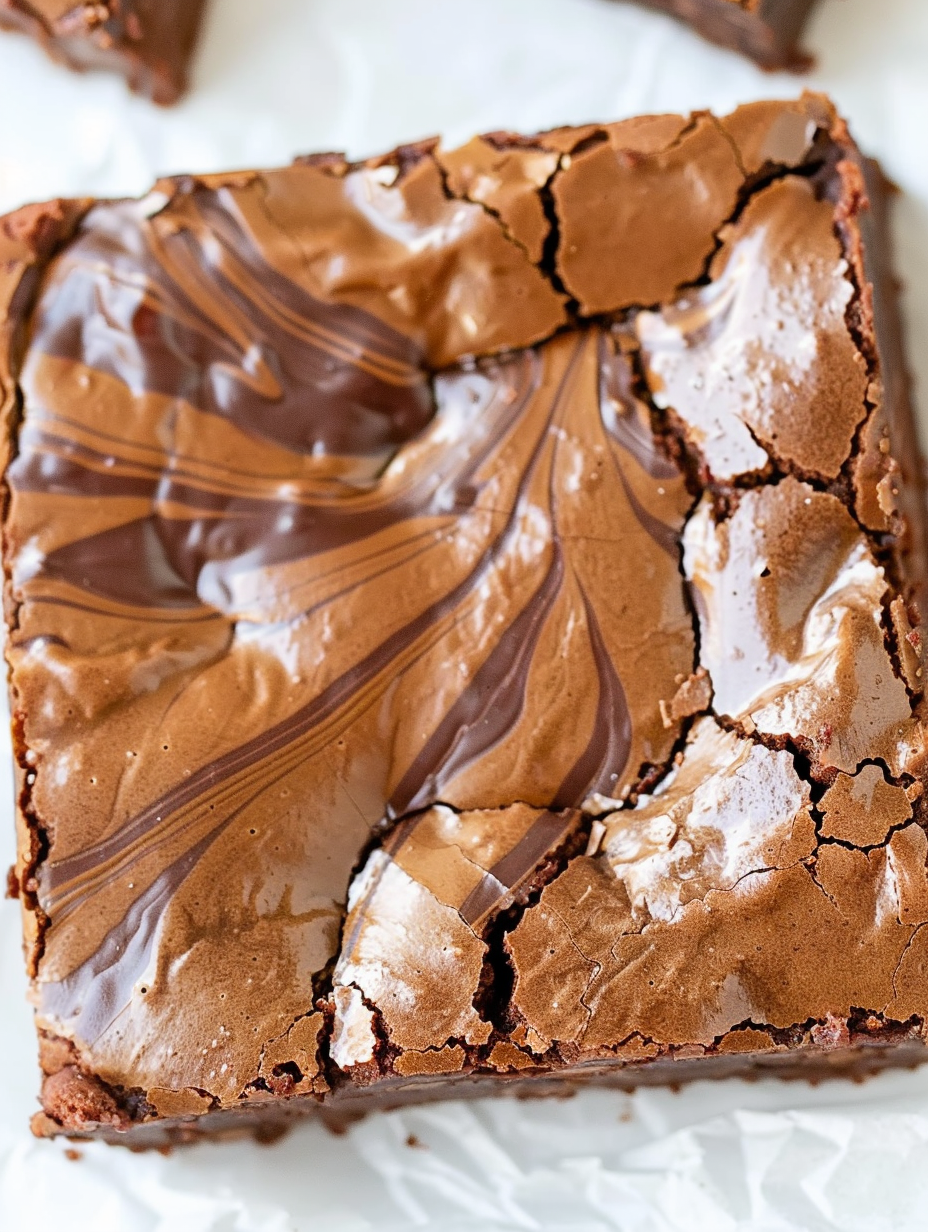
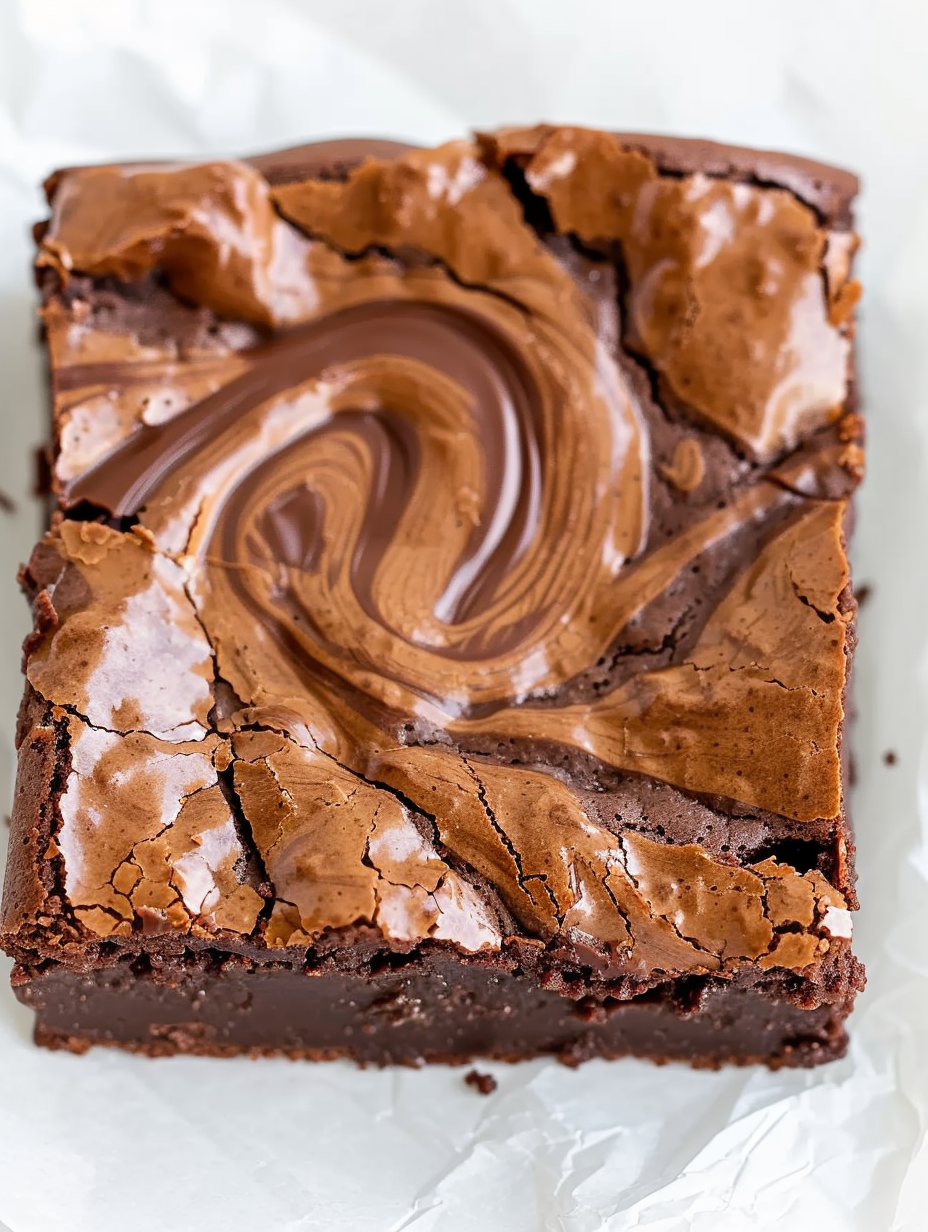
Nutella Brownies

Incredibly moist and fudgy Nutella brownies made in one bowl, swirled with extra Nutella for a glossy, chocolate-hazelnut finish. Ready in under an hour and perfect for sharing.
Why You'll Love This Recipe
- One-bowl preparation and simple steps make these brownies fast to pull together, ready in about 50 minutes from start to finish.
- Uses pantry staples plus a jar of Nutella for a distinctive chocolate-hazelnut flavor that guests always ask about.
- Fudgy, not cakey: the texture stays moist thanks to melted chocolate, butter, and an extra egg yolk for richness.
- Make-ahead friendly: bake a day in advance and the texture remains plush; they travel well for gatherings and potlucks.
- Flexible pan sizes: an 8x8 inch pan yields thicker bars, while a 9x9 inch pan creates slightly thinner but equally fudgy squares.
- Swirled topping adds visual appeal and an extra pocket of Nutella in every bite without extra work.
I first learned this version while experimenting with jars of chocolate hazelnut spread and found that warming the Nutella before stirring made a dramatic difference in ease and swirl definition. My family calls these the 'instant favorite' brownies because they disappear faster than I can make a second batch. Little moments like warm squares straight from the pan with a cold glass of milk are why I keep this recipe bookmarked.
Ingredients
- Unsalted butter: 1/2 cup. Use good-quality European-style butter if you want a slightly creamier mouthfeel; it gives richness and helps the texture stay moist.
- Dark chocolate: 3 ounces finely chopped or 1/2 cup chocolate chips. I use 50 percent cacao for balanced bitterness; 60 to 70 percent works if you prefer deeper chocolate notes.
- Granulated sugar: 2/3 cup. This amount keeps the brownies sweet but not cloying, letting the chocolate and hazelnut flavor come through.
- Vanilla extract: 2 teaspoons. Pure vanilla smooths the chocolate flavor and complements the Nutella.
- Large eggs: 2 whole eggs (2 large eggs plus 1 extra yolk). Room temperature eggs incorporate better and yield a silkier batter.
- Nutella: 1 1/4 cups total. Use 3/4 cup in the batter and reserve 1/2 cup to drop and swirl on top. A standard 13-ounce jar covers both quantities easily.
- All-purpose flour: 1 cup. Spoon and level for accuracy to keep the brownies fudgy rather than cakey.
- Salt: 1/4 teaspoon. A small amount of salt brightens the chocolate flavor and balances sweetness.
Instructions
Preheat and prepare the pan: Preheat the oven to 350F. Line an 8x8 inch pan with parchment paper or aluminum foil with an overhang to lift the brownies out later. A 9x9 inch pan can be used but expect thinner bars and slightly reduced bake time. Melt chocolate and butter: In a large microwave-safe bowl, combine the butter and chopped dark chocolate. Microwave in 45-second intervals on medium power, stirring between intervals, until smooth. Alternatively, use a double boiler over gently simmering water. Remove from heat and let cool briefly so the mixture is warm but not hot. Incorporate sugar and Nutella: Whisk the granulated sugar into the melted chocolate mixture until glossy. For easier mixing, warm the Nutella in the microwave for 30 to 60 seconds until pourable, then whisk 3/4 cup into the chocolate and butter until fully combined and smooth. Add eggs and flavoring: In a small bowl whisk the two whole eggs and the extra yolk together with the vanilla. Whisk the eggs into the chocolate mixture quickly but steadily; the residual heat will gently combine them and create a shiny batter. If the bowl is too hot, let the chocolate cool another minute to avoid scrambling. Fold in dry ingredients: Using a rubber spatula, fold in the flour and salt until just combined. Do not overmix. The batter should be thick and glossy. You will see streaks of Nutella and chocolate, which contribute to a fudgy finished texture. Transfer and swirl: Pour the batter into the prepared pan and smooth the top. Drop spoonfuls of the reserved 1/2 cup Nutella evenly across the surface, about 1 to 2 teaspoons per spoonful. Use a wooden skewer or toothpick to gently swirl the Nutella into the batter in a decorative pattern. Aim for contrast but avoid over-swiring, which will flatten the texture. Bake and cool: Bake in the middle of the preheated oven for 30 to 35 minutes for an 8x8 inch pan. If using a 9x9 inch pan, start checking at 22 minutes and expect 22 to 27 minutes total. The center should still look slightly soft and glossy; a toothpick inserted in the center will come out with moist crumbs rather than clean. Cool completely in the pan before lifting out on the parchment and slicing. Wipe your knife between cuts for clean edges.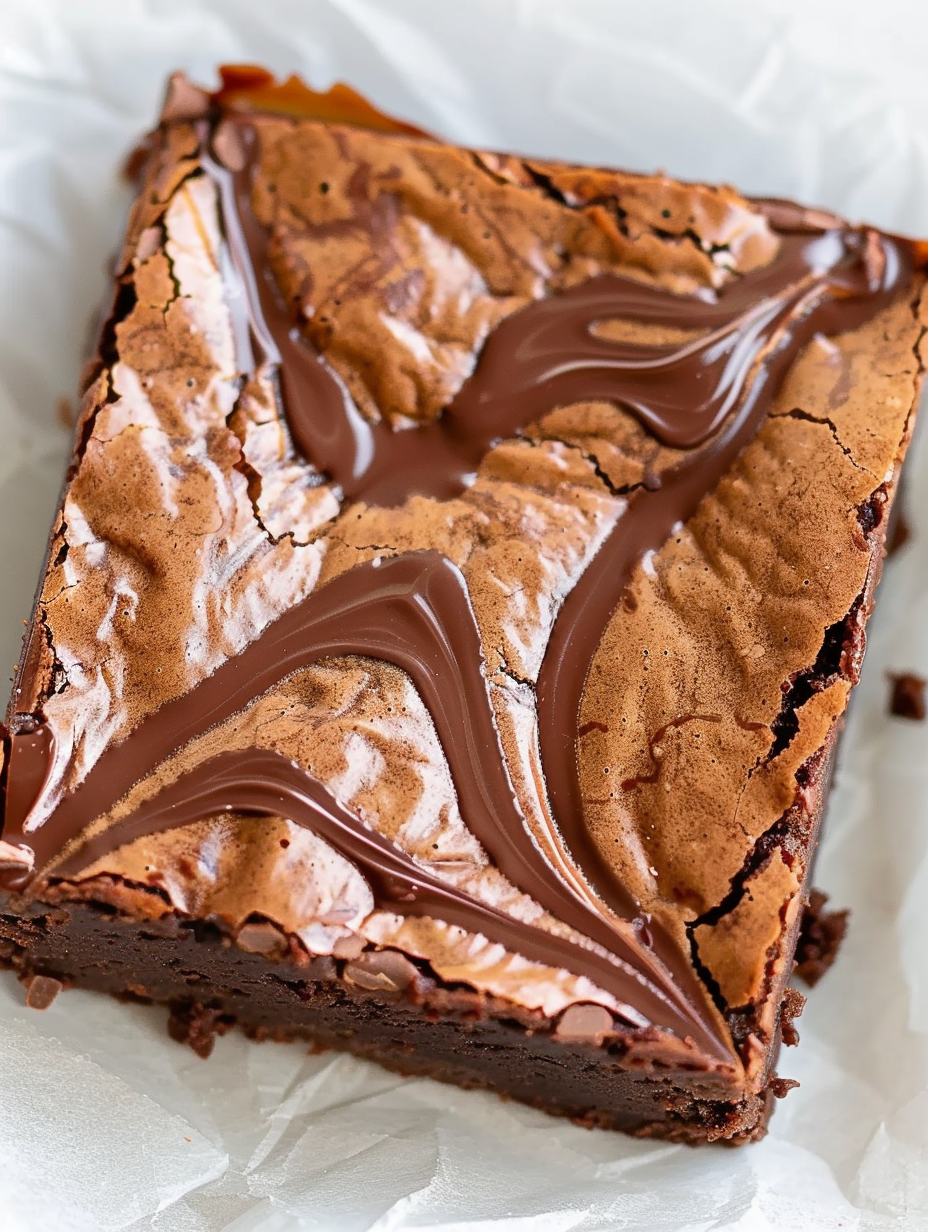
You Must Know
- These bars are fudgiest when slightly underbaked; pull them when the center is still glossy and soft to the touch.
- Store at room temperature in an airtight container for up to four days. For longer storage, freeze well-wrapped for up to three months.
- Warming the Nutella before mixing makes both incorporation and the swirl step much easier and yields cleaner swirls.
- Using dark chocolate between 50 and 70 percent cacao balances sweetness and richness; very dark chocolate will read more bitter.
My favorite part is how a simple jar of Nutella transforms the entire pan with minimal effort. At home, these brownies have become the unofficial dessert for weekend visitors because they travel well and pair beautifully with coffee or a scoop of vanilla ice cream. I've learned that quick warming tricks and accurate measuring are the two biggest hacks for consistent results.
Storage Tips
Store fully cooled bars at room temperature in an airtight container for up to four days. If your kitchen is warm, refrigerate to prevent the Nutella swirls from becoming too soft; bring back to room temperature before serving for the best texture. For longer storage, wrap individual squares tightly in plastic wrap and place in a freezer-safe bag for up to three months. Thaw overnight in the refrigerator or at room temperature for a few hours, then let sit at room temperature before serving to revive the fudgy crumb.
Ingredient Substitutions
If you do not have Nutella, use another commercial chocolate-hazelnut spread to maintain texture and stability. Homemade spreads can separate and produce inconsistent swirls, so stick with store-bought if possible. For dairy-free versions, choose a dairy-free chocolate and a lactose-free hazelnut spread labeled vegan; expect a slightly different mouthfeel. To reduce sugar, substitute half the granulated sugar with coconut sugar, noting that color and flavor will deepen. For gluten-free, use a 1-to-1 gluten-free flour blend and proceed the same way; the texture will remain fudgy though slightly more tender.
Serving Suggestions
Serve warm squares with a scoop of plain vanilla ice cream or a dollop of lightly whipped cream to contrast the dense chocolate. A sprinkle of flaky sea salt right before serving elevates the chocolate and hazelnut notes. For a brunch twist, pair slices with espresso or a milky latte. Garnish with toasted hazelnut halves or cocoa nibs for texture. These bars also make an attractive dessert on a platter with fresh berries to cut through the richness.
Cultural Background
Nutella itself is an Italian-inspired chocolate-hazelnut spread that became popular worldwide in the mid 20th century. The concept of combining chocolate with hazelnut pastes or spreads has roots in European confections and pralines. These brownies represent a modern, simple fusion: an American-style dense chocolate bar enriched by the signature flavor of a globally recognized spread. Over time, cooks have adopted Nutella as an easy flavor shortcut in many bakes, from cookies to tarts, because it brings both sweetness and a nutty profile in one jar.
Seasonal Adaptations
In cooler months, serve warm squares with a sprinkle of ground cinnamon or a chile-spiced sugar to add warmth and complexity. For spring and summer, top chilled squares with fresh raspberries for a bright contrast. During the holidays, fold in 1/3 cup chopped toasted hazelnuts into the batter for crunch and a festive finish. For a lighter seasonal version, reduce the Nutella swirl slightly and pair the bars with a citrusy sauce or compote to balance the richness.
Meal Prep Tips
These brownies are ideal for make-ahead snacks. Bake and cool fully, then cut and store squares layered between parchment in an airtight container. For grab-and-go treats, portion squares into small containers or wrap individually. If freezing, thaw wrapped squares in the refrigerator overnight and bring to room temperature before serving. When preparing for large events, double the recipe and bake in two pans so you have a steady supply without overbaking any single batch.
These brownies are a simple way to bring warm, comforting flavor to any table. The combination of melted chocolate, butter, and Nutella delivers a reliably decadent result that is both elegant and everyday friendly. I hope you keep a jar of Nutella on hand after making these — you will find many excuses to bake them again.
Pro Tips
Warm the Nutella for 30 to 60 seconds to make it easier to mix and swirl.
Do not overmix after adding flour; fold until just combined to keep the texture fudgy.
Remove from the oven when the center is slightly glossy; the bars continue to set as they cool.
Use a sharp knife and wipe it between cuts for clean slices.
This nourishing nutella brownies recipe is sure to be a staple in your kitchen. Enjoy every moist, high protein slice — it is perfect for breakfast or as a wholesome snack any time.
FAQs about Recipes
How long should I bake these?
Yes. For an 8x8 inch pan bake 30 to 35 minutes. For a 9x9 inch pan check at 22 minutes and bake 22 to 27 minutes until the center is set but still glossy.
How should I store leftovers?
Store cooled squares in an airtight container at room temperature for up to four days, or freeze wrapped for up to three months.
Tags
Nutella Brownies
This Nutella Brownies recipe makes perfectly juicy, tender, and flavorful steak every time! Serve with potatoes and a side salad for an unforgettable dinner in under 30 minutes.
Ingredients
Brownies
Instructions
Preheat and prepare pan
Preheat oven to 350F. Line an 8x8 inch pan with parchment paper or aluminum foil with an overhang for easy removal.
Melt chocolate and butter
In a microwave-safe bowl melt butter and chopped dark chocolate in 45-second intervals, stirring between until smooth. Alternatively use a double boiler. Let cool briefly so the mixture is warm, not hot.
Whisk in sugar and Nutella
Stir granulated sugar into the melted chocolate. Warm Nutella for 30 to 60 seconds until pourable and whisk 3/4 cup into the chocolate mixture until smooth.
Add eggs and vanilla
Whisk the two whole eggs and extra yolk in a small bowl, then whisk into the chocolate mixture with the vanilla extract until glossy and combined.
Fold in flour and salt
Fold in 1 cup all-purpose flour and 1/4 teaspoon salt with a rubber spatula until just combined. Do not overmix to keep the batter fudgy.
Transfer and swirl Nutella
Pour batter into prepared pan and smooth. Drop spoonfuls of the reserved 1/2 cup Nutella across the surface and use a skewer to gently swirl for a marbled effect.
Bake and cool
Bake 30 to 35 minutes for an 8x8 inch pan, or 22 to 27 minutes for a 9x9 inch pan. Center should be slightly glossy. Cool completely in pan before lifting out and slicing.
Last Step: Please leave a rating and comment letting us know how you liked this recipe! This helps our business to thrive and continue providing free, high-quality recipes for you.
Nutrition
Did You Make This?
Leave a comment & rating below or tag
@velvetyum on social media!
Categories:
You might also like...

Cheesy Zucchini Rollatini
Tender grilled zucchini rolled with a basil-kissed ricotta filling, nestled in marinara, and baked until the mozzarella bubbles and turns golden.

Crispy Zucchini and Squash
Golden, garlicky rounds with a deep-fried crunch made lighter in the air fryer. A fast, vitamin-packed side everyone devours.

Chicken Parmesan Meatballs
Tender chicken meatballs simmered in marinara, finished with melted mozzarella and basil for cozy, weeknight Italian comfort in every bite.
Did You Make This?
Leave a comment & rating below or tag @velvetyum on social media!
Rate This Recipe
Share This Recipe
Enjoyed this recipe? Share it with friends and family, and don't forget to leave a review!
Comments (1)
This recipe looks amazing! Can't wait to try it.
Comments are stored locally in your browser. Server comments are displayed alongside your local comments.

Hi, I'm Emma!
What's Popular

30-Minute Meals!
Join to receive our email series which contains a round-up of some of our quick and easy family favorite recipes.