
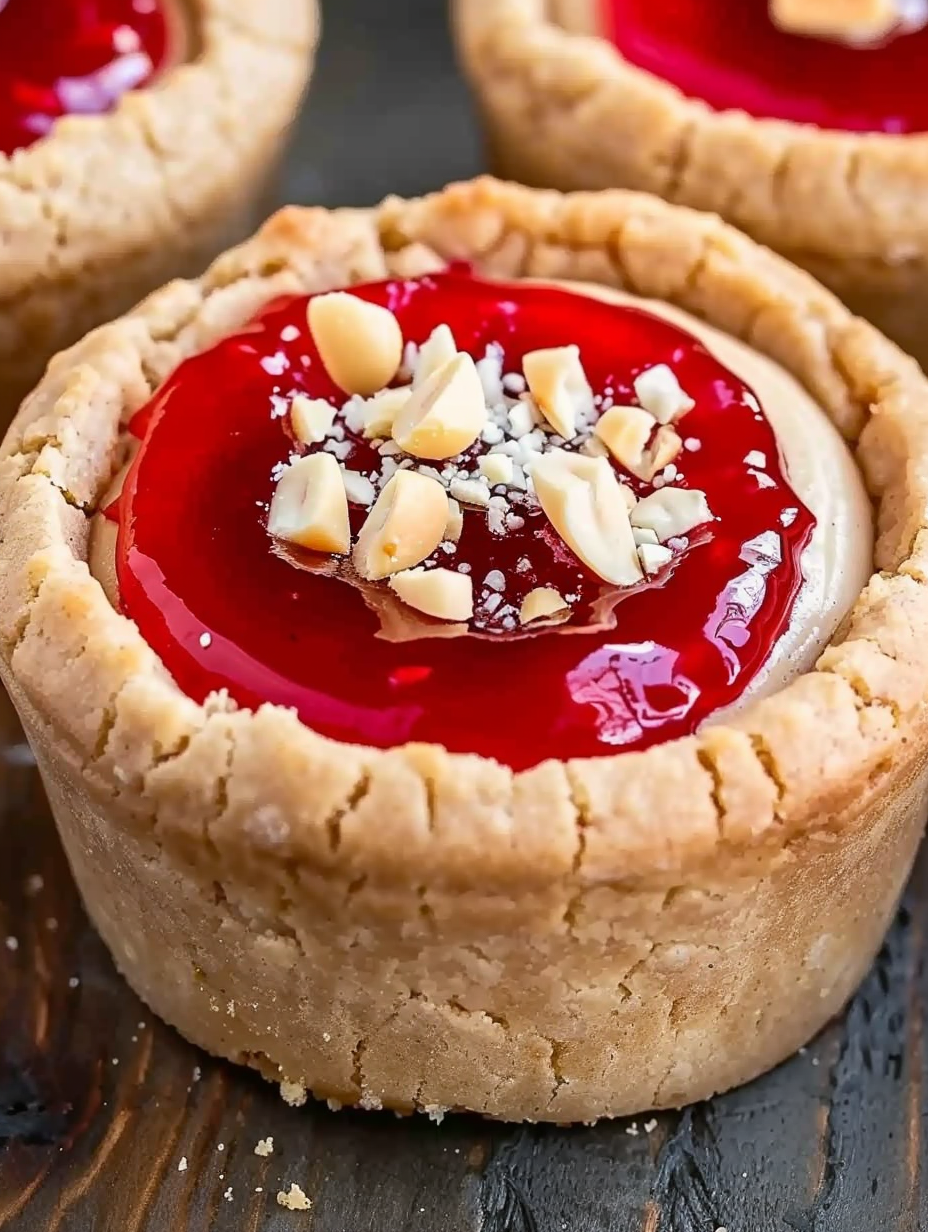
Peanut Butter & Jelly Cookie Cups

A lunchbox classic reimagined as buttery cookie cups filled with raspberry jam and fluffy peanut butter mousse. Perfect for parties and easy to make ahead.

This recipe takes a nostalgic sandwich and turns it into a playful handheld dessert you will make again and again. I first riffed on peanut butter and jelly cookie cups one rainy afternoon when my son asked for something special for his school lunch. I wanted the familiar flavors he loves but presented in a way that felt celebratory. The result was a crisp edged cookie shell with a tender center that holds a spoonful of jam and a cloud of peanut butter mousse. It quickly became our favorite weekend baking project.
What makes these cookie cups special is the balance between textures and temperatures. The cookie cups bake to a light golden brown and then are pressed to form a little well that holds jam without running. The mousse is airy but dense enough to sit neatly on top while melting gently in your mouth. Every bite offers the sweet tang of jam and the comforting richness of peanut butter. I often serve these cold from the fridge so the mousse keeps its shape, but they are also lovely at room temperature when the jam loosens and becomes slightly glossy.
Why You'll Love This Recipe
- These cookie cups are ready to assemble in about 30 minutes of active work and then chill for easy making ahead.
- The dough uses pantry staples and a single bowl plus an electric mixer for approachable cleanup.
- Each cup is perfectly portioned so they are ideal for packed lunches and party platters.
- The jam can be swapped to accommodate seasonal fruit or dietary needs and freezes well for up to four weeks.
- The mousse is light and stable because cold whipped cream is folded into cream cheese and peanut butter for structure and flavor.
- Crunch from chopped peanuts is optional but adds a pleasing contrast in texture and visual appeal.
I watched my family taste these for the first time and my father declared them genius which made me laugh. My kids love picking their favorite jam and testing different textures of peanut butter. Over time I learned a few tricks that ensure the cookie shells do not collapse and that the mousse pipes cleanly without weeping. Those small discoveries turned this from a fun idea into a reliable treat we reach for when we want something both playful and sophisticated.
Ingredients
- All purpose flour 1 1 4 cups. Use unbleached flour for a tender crumb and measure by spooning into the cup then leveling. Provides structure for the cookie cups.
- Baking soda 1 4 teaspoon. A small amount helps the cookies spread just enough and brown evenly.
- Salt 1 2 teaspoon. Balance for sweetness; use fine sea salt or table salt measured equally.
- Unsalted butter 1 4 cup room temperature. Softer butter helps the dough cream smoothly with peanut butter.
- Smooth peanut butter 1 4 cup. Use regular smooth commercial peanut butter rather than natural that separates for consistent texture.
- Granulated sugar 1 4 cup and additional 1 4 cup for the mousse. White sugar for crisp edges in the cookie and to sweeten the filling.
- Light brown sugar 1 2 cup packed. Adds moisture and caramel notes for deeper flavor.
- Large egg 1 room temperature. Helps bind and adds tenderness to the shells.
- Vanilla extract 1 teaspoon. Use pure vanilla for the best aromatic lift.
- Heavy whipping cream 1 2 cup cold. For whipping to stiff peaks and folding into the mousse.
- Cream cheese 3 ounces softened. Adds tang and structure to the mousse so it holds its shape.
- Raspberry jam 1 cup seedless. Can be swapped for any favorite jam or fruit preserve.
- Chopped peanuts optional. For garnish and crunch that complements the mousse.
Instructions
Prepare pans and dry ingredientsPreheat the oven to 350 degrees Fahrenheit and spray a standard 12 cup muffin tin with cooking spray. In a bowl whisk together 1 1 4 cups all purpose flour, 1 4 teaspoon baking soda and 1 2 teaspoon salt until evenly distributed. Having the dry mix ready keeps the dough process quick and prevents over mixing.Make cookie baseIn a large bowl beat 1 4 cup unsalted butter and 1 4 cup smooth peanut butter on medium speed until smooth. Add 1 4 cup granulated sugar and 1 2 cup light brown sugar and beat on medium high for about two to three minutes until the mixture becomes pale and fluffy. Reduce speed and add 1 large egg and 1 teaspoon vanilla extract then beat until combined. Scrape the bowl and avoid over beating after the egg is added.Combine doughReduce the mixer to low and fold in the flour mixture until just combined. The dough should be soft but hold its shape when scooped. If it feels too sticky refrigerate for ten minutes to make scooping easier. Overworking will lead to tougher shells.Scoop and shapeUse a large cookie scoop about three tablespoons to portion dough into each muffin well. Press each mound down slightly to flatten the top. This helps the dough spread evenly in the oven and form a shallow cup when pressed after baking. Leave a little space between dough and cup rim for rising.Bake and form wellsBake for ten to twelve minutes or until the edges are lightly browned and the centers are mostly set. Remove from the oven and while the cookies are hot press the center with the bottom of a small jar or a measuring cup to create a well. Cool in the pan for ten minutes so the shells set then transfer to a wire rack to cool completely.Whip the mousseChill a bowl and whisk then whip 1 2 cup cold heavy whipping cream to stiff peaks. In a separate bowl beat 3 ounces softened cream cheese with 1 4 cup granulated sugar until smooth. Add 1 2 cup smooth peanut butter and mix until silky. Fold the whipped cream into the peanut butter mixture in two to three additions to keep the mousse airy and stable.Assemble and setWarm 1 cup raspberry jam in a microwave safe bowl in twenty second intervals until pourable. Spoon about 1 to 1 1 2 teaspoons jam into each cookie cup and chill the tray for twenty minutes. Pipe or spoon the peanut butter mousse on top then refrigerate until fully set about two hours. Finish with extra jam and chopped peanuts if desired and serve cold.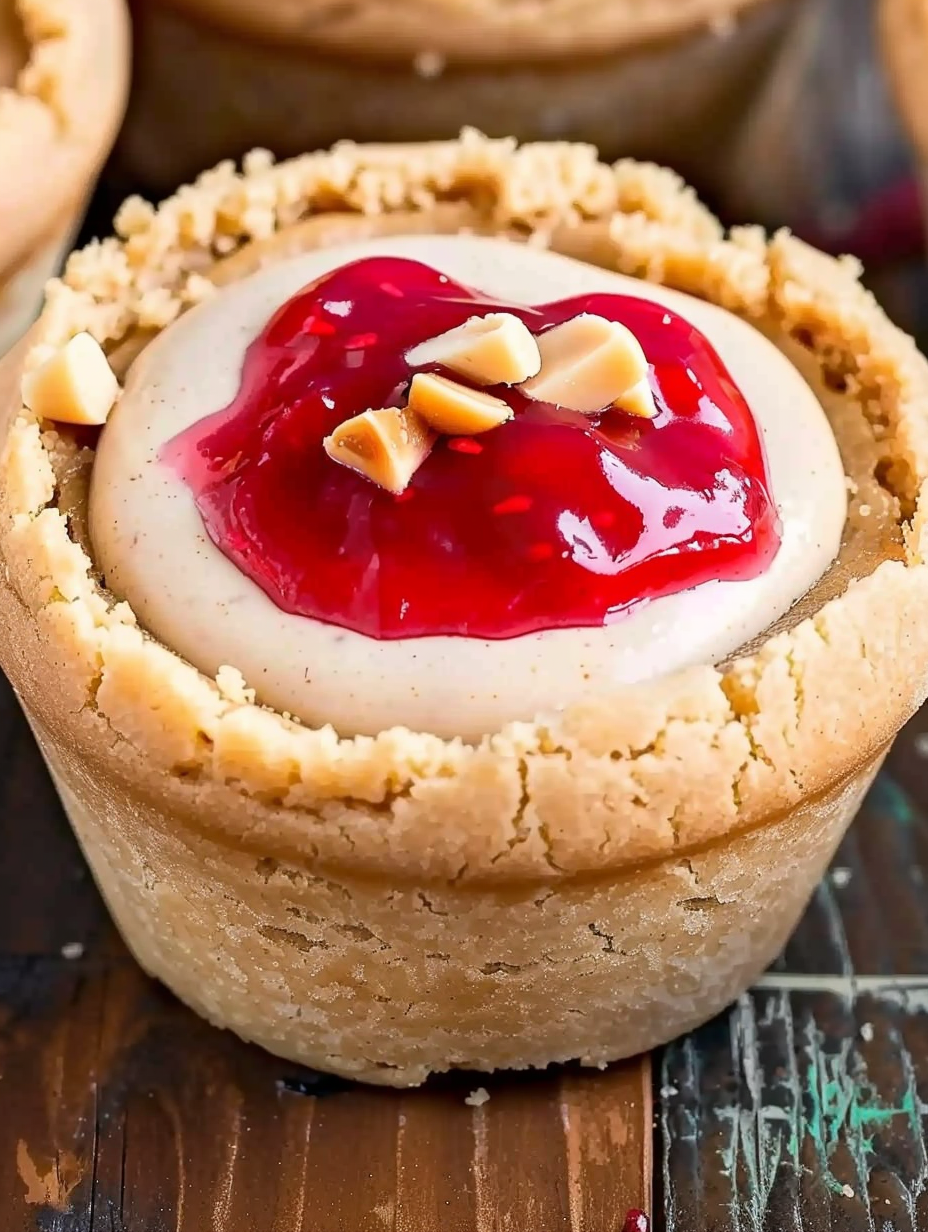
You Must Know
- These cookie cups keep well refrigerated for two to three days and freeze for up to four weeks in a sealed container.
- The mousse holds better if the cream and bowls are cold before whipping which prevents it from breaking or weeping.
- Use regular commercial smooth peanut butter rather than natural style as the stabilizers help the mousse and dough keep consistent texture.
- For even baking line the top of the oven rack in the middle and rotate the pan once if your oven has hot spots.
My favorite part is seeing the little wells fill with jam then transform into tiny domes of mousse. One time I brought a tray to a neighborhood potluck and watched every guest scan the platter and choose their favorite jam. It became a conversation starter and a fun way to taste seasonal preserves. The simple combination and reliable technique make this a dessert I reach for whenever I want something nostalgic yet refined.
Storage Tips
Store the assembled cookie cups in an airtight container in the refrigerator. Place layers separated with parchment to prevent sticking. They will keep their best texture for two to three days. For longer storage freeze unassembled cookie shells in a single layer on a sheet pan then transfer to a sealed bag for up to four weeks. Thaw shells at room temperature and assemble with chilled mousse and jam just before serving. To re chill after assembly place the tray in the coldest part of the fridge and allow at least two hours for the mousse to firm.
Ingredient Substitutions
You can swap the raspberry jam for apricot or strawberry preserves with similar sweetness. For a lower dairy version replace the cream cheese with a nondairy spread and use coconut whipping cream in place of heavy cream for a dairy free option though texture will be slightly different. To make the cookie cups nut free replace peanut butter with sunflower butter and top with seed crunch instead of peanuts. If you need gluten free use a one to one gluten free baking flour blend and allow a minute more baking time while monitoring browning.
Serving Suggestions
Present these on a dessert platter with mint leaves for color and a small bowl of extra jam for dipping. They are perfect for birthday parties and school events. Pair with cold milk or a light coffee for adult gatherings. For a brunch spread include fresh berries and shortbread so guests can contrast textures. Garnish the mousse with finely grated dark chocolate for an elegant finish that complements the peanut butter.
Cultural Background
The combination of peanut butter and jam is a classic American comfort pairing with roots in simple home cooking. It became popular in the 20th century as commercial peanut butter and fruit preserves were widely distributed and affordable. Turning the sandwich into a filled cookie cup is a modern twist that plays with nostalgia while showcasing contemporary pastry techniques such as folding whipped cream into a stabilized mousse. These cups are an example of how familiar flavors can be elevated with new textures.
Seasonal Adaptations
In summer use fresh berry jam or quick macerated berries instead of cooked jam for a fresher flavor. In winter try warmed pear butter with a cinnamon pinch for an autumnal variation. Holiday versions can include a smear of cranberry orange jam and a sprinkle of toasted pecans. For spring use lighter mousses with a touch of citrus zest folded in to brighten the peanut butter.
Meal Prep Tips
Make the cookie shells up to three days ahead and store in a sealed container at room temperature. Prepare the mousse and keep it chilled in the refrigerator for up to twenty four hours before assembly. Warm the jam briefly to make it easy to spoon then assemble the cups the day of serving so the shells remain crisp. Use a piping bag fitted with a medium round tip to portion the mousse quickly and evenly for consistent presentation.
These cookie cups are a joyful slice of childhood that adults will appreciate for their refined textures. Try different jams and garnishes to make the idea your own and enjoy sharing them with family and friends.
Pro Tips
Chill the bowl and whisk before whipping cream to help it reach stiff peaks faster.
Press the wells while the shells are hot for a clean, even cup shape.
Use regular smooth commercial peanut butter rather than natural for consistent texture in dough and mousse.
Warm jam briefly to make it easy to spoon into wells without overfilling.
This nourishing peanut butter & jelly cookie cups recipe is sure to be a staple in your kitchen. Enjoy every moist, high protein slice — it is perfect for breakfast or as a wholesome snack any time.
FAQs about Recipes
How long do these cookie cups last?
They keep best refrigerated for two to three days and can be frozen unassembled for up to four weeks.
How do I keep the mousse from weeping?
Chill the bowl and whisk before whipping cream and fold gently to maintain air for a stable mousse.
Tags
Peanut Butter & Jelly Cookie Cups
This Peanut Butter & Jelly Cookie Cups recipe makes perfectly juicy, tender, and flavorful steak every time! Serve with potatoes and a side salad for an unforgettable dinner in under 30 minutes.
Ingredients
Peanut Butter Cookie Cups
Peanut Butter Mousse Filling
Other
Instructions
Prepare pans and dry ingredients
Preheat oven to 350 degrees Fahrenheit and spray a standard muffin tin with cooking spray. Whisk flour baking soda and salt together and set aside to streamline the mixing process.
Make cookie base
Beat butter and peanut butter until smooth then add sugars and beat until pale and fluffy about two to three minutes. Reduce speed and add egg and vanilla then mix until combined.
Combine dough
Fold in the flour mixture on low speed until just combined. Chill for ten minutes if dough is too soft to scoop and avoid over mixing to keep shells tender.
Scoop and shape
Use a large three tablespoon scoop to portion dough into muffin wells and press down slightly so the top is flattened to encourage even spread.
Bake and form wells
Bake ten to twelve minutes until lightly browned then press the center with a small jar while hot to create a well. Cool in pan for ten minutes then transfer to a wire rack.
Whip the mousse
Whip cold heavy cream to stiff peaks. Beat cream cheese with sugar then add peanut butter and mix until smooth. Fold whipped cream into peanut butter mix in additions to retain air.
Assemble and chill
Warm jam until pourable then spoon into each cup. Chill twenty minutes then pipe mousse on top and refrigerate until set about two hours. Garnish and serve chilled.
Last Step: Please leave a rating and comment letting us know how you liked this recipe! This helps our business to thrive and continue providing free, high-quality recipes for you.
Nutrition
Did You Make This?
Leave a comment & rating below or tag
@velvetyum on social media!
Categories:
You might also like...

Cheesy Zucchini Rollatini
Tender grilled zucchini rolled with a basil-kissed ricotta filling, nestled in marinara, and baked until the mozzarella bubbles and turns golden.

Crispy Zucchini and Squash
Golden, garlicky rounds with a deep-fried crunch made lighter in the air fryer. A fast, vitamin-packed side everyone devours.

Chicken Parmesan Meatballs
Tender chicken meatballs simmered in marinara, finished with melted mozzarella and basil for cozy, weeknight Italian comfort in every bite.
Did You Make This?
Leave a comment & rating below or tag @velvetyum on social media!
Rate This Recipe
Share This Recipe
Enjoyed this recipe? Share it with friends and family, and don't forget to leave a review!
Comments (1)
This recipe looks amazing! Can't wait to try it.
Comments are stored locally in your browser. Server comments are displayed alongside your local comments.

Hi, I'm Emma!
What's Popular

30-Minute Meals!
Join to receive our email series which contains a round-up of some of our quick and easy family favorite recipes.