
>>

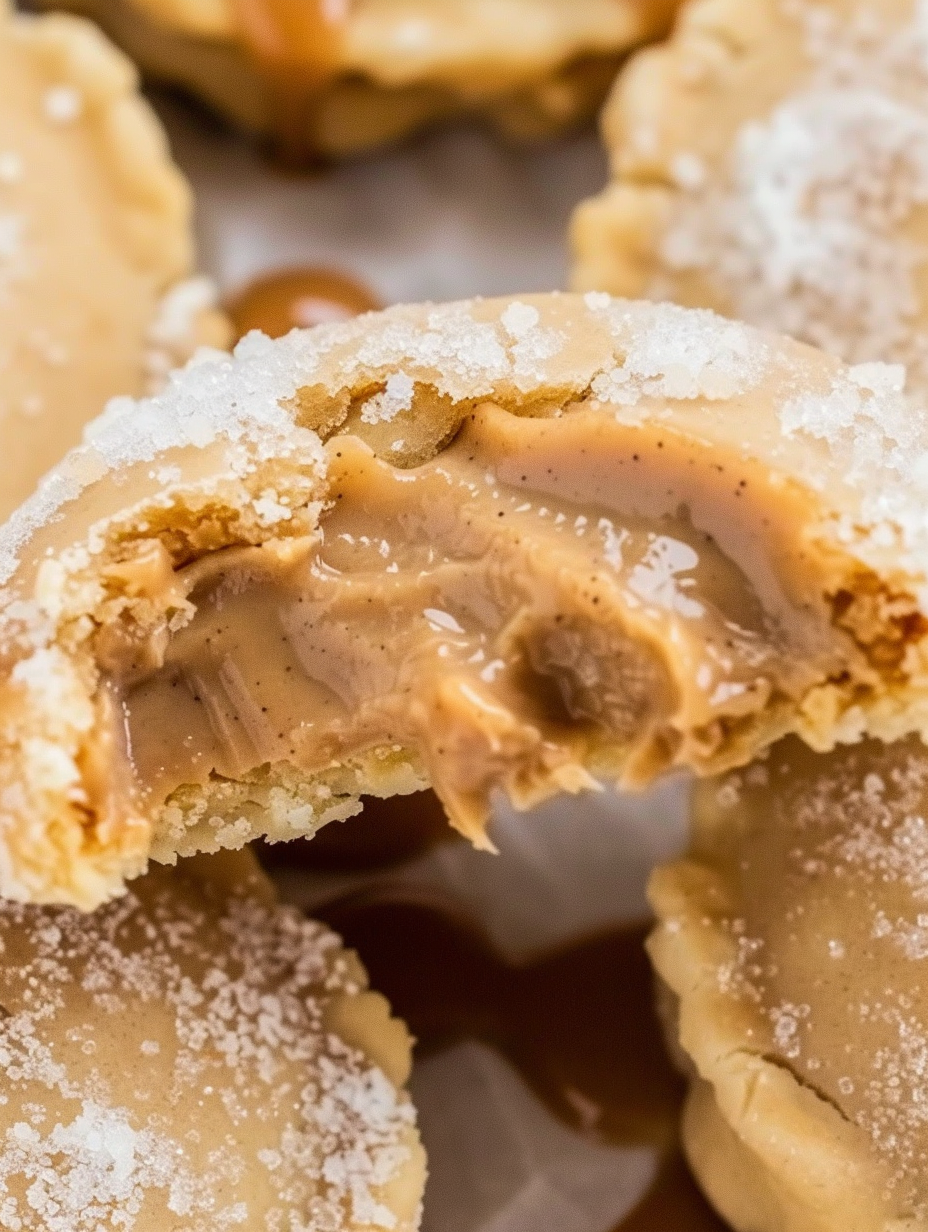
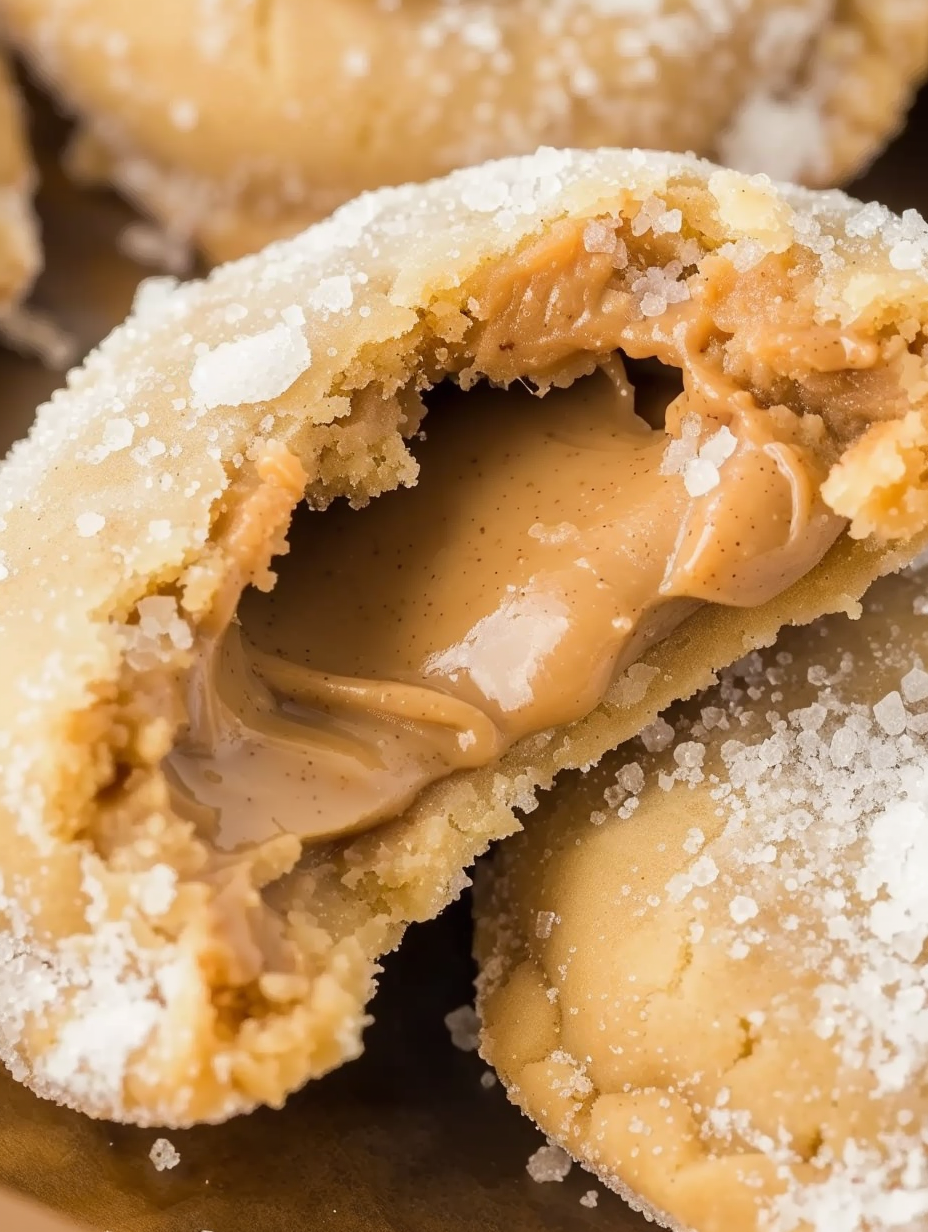
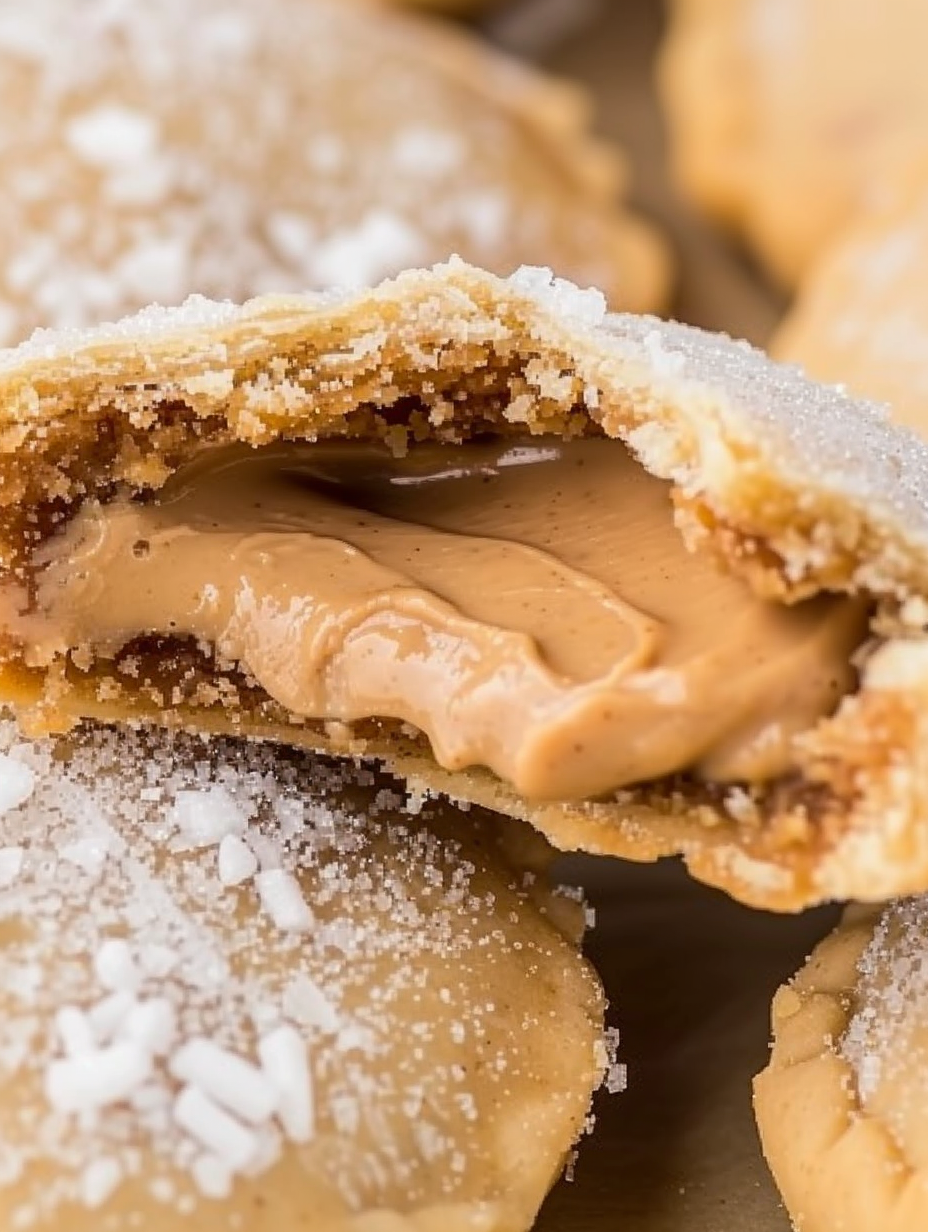
Warm, flaky pastry envelopes a molten peanut buttery center—simple to make, impossibly satisfying to eat. These cookies turn store-bought pie crust and pantry peanut butter into a gooey, nostalgic treat.
This recipe began as a late-night experiment the first winter I rented an apartment with a tiny oven and a very big craving for warm peanut butter. I remember unrolling a box of premade pie crust, scooping generous tablespoons of JIF creamy peanut butter, and thinking it would be nice if a cookie could taste like a warm peanut butter sandwich crossed with a hand pie. The first tray came out with edges barely golden and centers that were molten and impossibly soft. We ate them one after another until the plate was empty. From that night on these became my go-to for last-minute guests, impromptu school bake sales, and any time someone needed a quick hug in cookie form.
What makes these especially beloved is the contrast: a delicate, crisped pastry shell that snaps gently, giving way to a hot, velvety peanut butter core that flows like lava while still warm. The entire process uses just three pantry-friendly ingredients and familiar tools, so you can have warm, bakery-style treats in under 30 minutes. They bring out that toasted peanut aroma, just-sweet-enough sugar crystals on the outside, and the comforting, nutty creaminess at the center that keeps everyone coming back for one more.
In my household these became the dessert that everyone expects for weekend movie nights. My sister once wrapped a cooled cookie in wax paper and placed it in my lunchbox—when I opened it at noon the peanut center had firmed into a creamy dollop that was still unforgettable. They are proof that a few high-quality ingredients cooked simply can create a memorable moment.
My favorite thing about these is how forgiving they are: even if the seal isn’t perfect, the sugar coating hides imperfections and the center still delights. Once, at a backyard picnic, a gust of wind toppled the cookie platter and everyone simply laughed, picked them up, and kept eating. They’re communal, nostalgic, and unfussy—exactly what I want from a quick dessert.
Store cooled cookies at room temperature in a single layer or separated by parchment to avoid sticking. Use an airtight container; they keep for up to 24 hours with the best texture. For longer storage, place cooled cookies in a freezer-safe bag and freeze up to three months. To reheat a frozen or refrigerated cookie, microwave for 8–12 seconds until warm but not piping—this revives the molten center. If reheating multiple cookies, do so one at a time to avoid overheating and dry pastry.
If you prefer a different nut flavor, swap the creamy peanut butter for almond or cashew butter—note that natural nut butters with separated oil may produce a slightly looser center, so stir well. For a gluten-free option use a store-bought gluten-free pie crust if available; baking time may vary slightly. To reduce sweetness, lower the exterior sugar toss to 1/4 cup total; inside the filling the 1/8 teaspoon sugar dot can be omitted but helps prevent sealing issues.
Serve warm with a small scoop of vanilla ice cream or a dollop of whipped cream for a wonderful contrast of temperature and texture. Sprinkle flaky sea salt on top before serving to heighten the peanut flavors and balance sweetness. These are excellent alongside coffee or a glass of milk—perfect for breakfast-for-dessert or a nostalgic afternoon snack. For parties, present on a slate board with small tongs so guests can take one or two without touching all the cookies.
Hand pies and filled pastries have a long tradition across many cuisines; these cookies are a playful American twist that leans on the love of peanut butter in U.S. kitchens. The idea of a molten center echoes popular molten chocolate cakes but uses the everyday comfort of peanut butter instead. Using premade pie crust is a modern convenience that mirrors home bakers’ desire to keep technique simple while delivering nostalgic flavors.
In winter, add a pinch of cinnamon or cardamom to the peanut butter for a warming spice note. For summer gatherings fold a teaspoon of lemon zest into the sugar coating for a surprising bright finish. Around holidays incorporate a flavored peanut butter—maple or honey-roasted—or press a few mini chocolate chips into the center before sealing for a festive variation.
Assemble cookies ahead and refrigerate on a tray covered tightly for up to 24 hours, then bake when ready—this is ideal for busy nights or entertaining. For bulk baking, freeze formed unbaked cookies on a tray until solid, then transfer to a bag and bake directly from frozen, adding a couple of minutes to the bake time. Use parchment or silicone mattes to prevent sticking and to speed up clean up.
These cookies are about comfort and speed—simple ingredients made into something homey and a little bit magical. They invite sharing, conversation, and the small joy of a warm, gooey center. Make them often, experiment with flavors, and most of all, enjoy the cozy crumbs.
Ensure the pie crust is at room temperature to prevent cracking when rolling and sealing.
Keep the sugar spot confined to the peanut butter center to avoid sealing failures during baking.
If the edges won’t seal, press firmly and chill the assembled cookie for 5 minutes before tossing with sugar and baking.
Use a 3-inch cutter for consistent sizing and predictable baking results.
Bake until edges are just golden—overbaking yields a dry center.
This nourishing peanut butter lava cookies recipe is sure to be a staple in your kitchen. Enjoy every moist, high protein slice — it is perfect for breakfast or as a wholesome snack any time.
Yes. Assemble the cookies on a tray, freeze until solid, then transfer to a freezer bag. Bake from frozen adding 1–2 minutes to the bake time.
Let the cookies rest on the baking sheet for 2 minutes, then transfer to a rack. The center will be molten while warm and will firm as it cools in about 5–10 minutes.
This Peanut Butter Lava Cookies recipe makes perfectly juicy, tender, and flavorful steak every time! Serve with potatoes and a side salad for an unforgettable dinner in under 30 minutes.
Preheat oven to 400°F. Line baking sheets with parchment paper and set aside. Remove pie crusts from refrigerator and let come to room temperature per package directions to make rolling and sealing easier.
Unroll one pie crust on parchment and roll slightly to thin to about 1/16 to 1/8 inch. Use a 3-inch cutter to cut circles, keeping scraps for rerolling. Repeat with second crust as you bake batches.
Place 1 tablespoon of creamy peanut butter in the center of each round. Sprinkle roughly 1/8 teaspoon granulated sugar on the peanut butter only to help prevent sticking when sealing.
Place a second round over each filled base, press edges firmly to remove air and create a tight seal. Crimp with a fork or your fingers to ensure the peanut butter does not leak during baking.
Gently toss each sealed cookie in granulated sugar and place on prepared baking sheet. Bake at 400°F for 12 minutes until edges just begin to brown. Do not overbake to preserve molten center.
Remove from oven and rest on the baking sheet for 2 minutes before serving. Centers will be very hot—allow a brief cool down so the lava sets slightly. Store cooled cookies at room temperature for up to 24 hours.
Last Step: Please leave a rating and comment letting us know how you liked this recipe! This helps our business to thrive and continue providing free, high-quality recipes for you.
Leave a comment & rating below or tag
@velvetyum on social media!

Tender grilled zucchini rolled with a basil-kissed ricotta filling, nestled in marinara, and baked until the mozzarella bubbles and turns golden.

Golden, garlicky rounds with a deep-fried crunch made lighter in the air fryer. A fast, vitamin-packed side everyone devours.

Tender chicken meatballs simmered in marinara, finished with melted mozzarella and basil for cozy, weeknight Italian comfort in every bite.
Leave a comment & rating below or tag @velvetyum on social media!
Enjoyed this recipe? Share it with friends and family, and don't forget to leave a review!
This recipe looks amazing! Can't wait to try it.
Comments are stored locally in your browser. Server comments are displayed alongside your local comments.

Join to receive our email series which contains a round-up of some of our quick and easy family favorite recipes.
